Skyline Trail Loop
Where: Mount Rainier National Park
Distance: 4.4 to 5.9 miles
Type: Loop
Elevation gain: 1700 feet
Difficulty: Moderate to Hard (for distance and elevation gain)
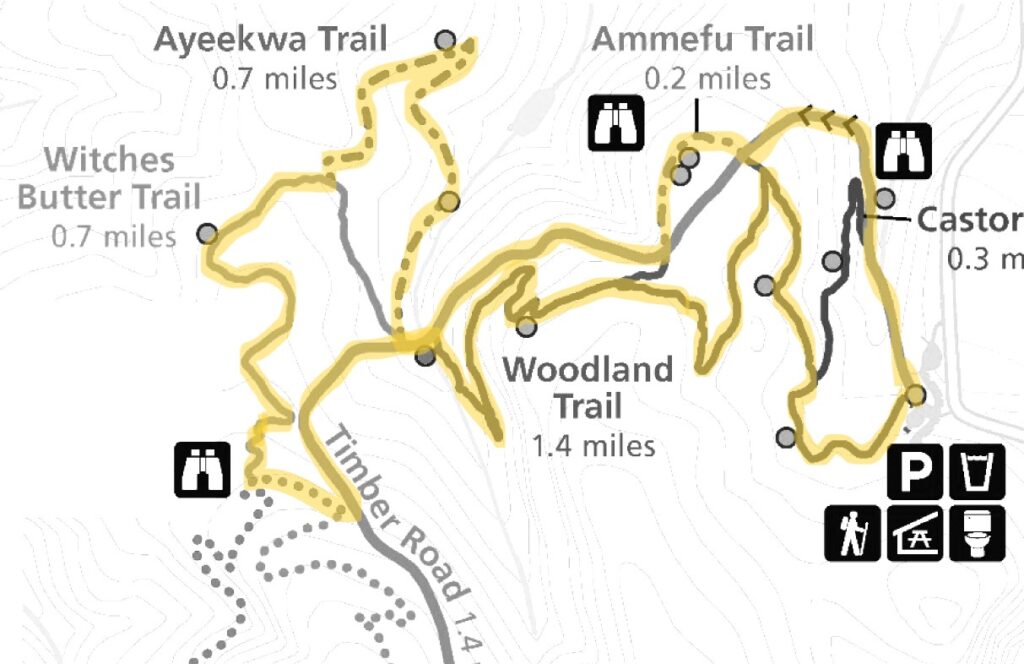
Map:
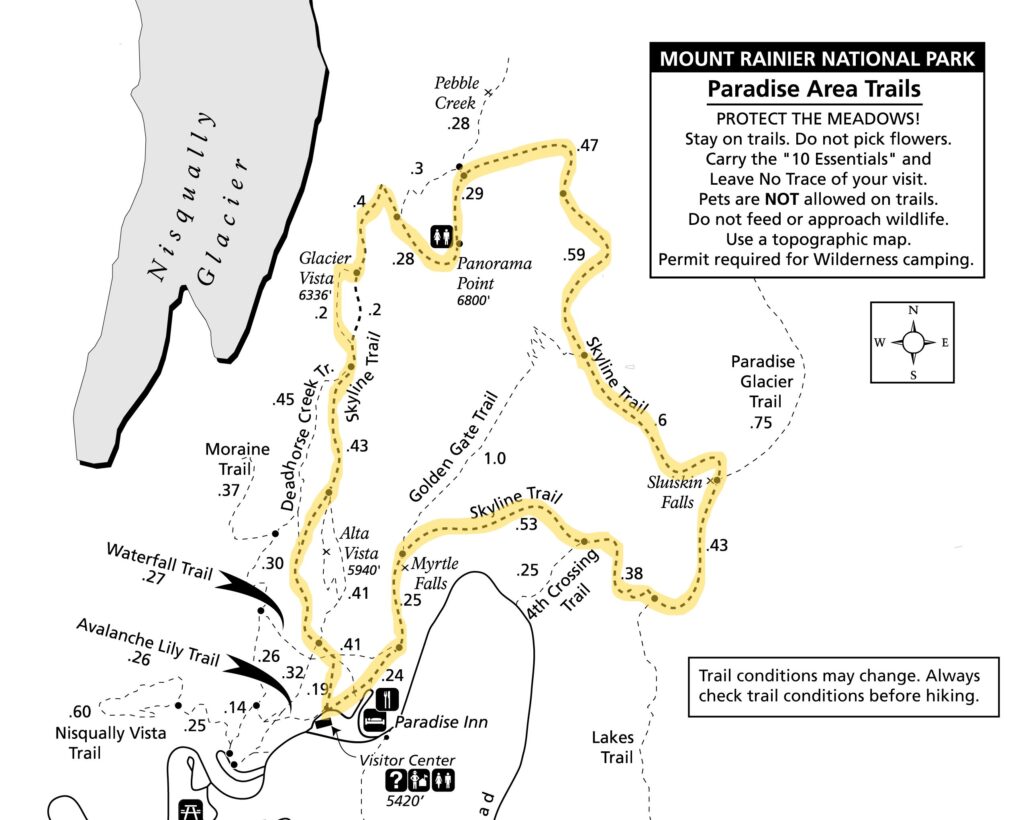
Paradise area trail map and description (from the Mount Rainier National Park website).
Overview:
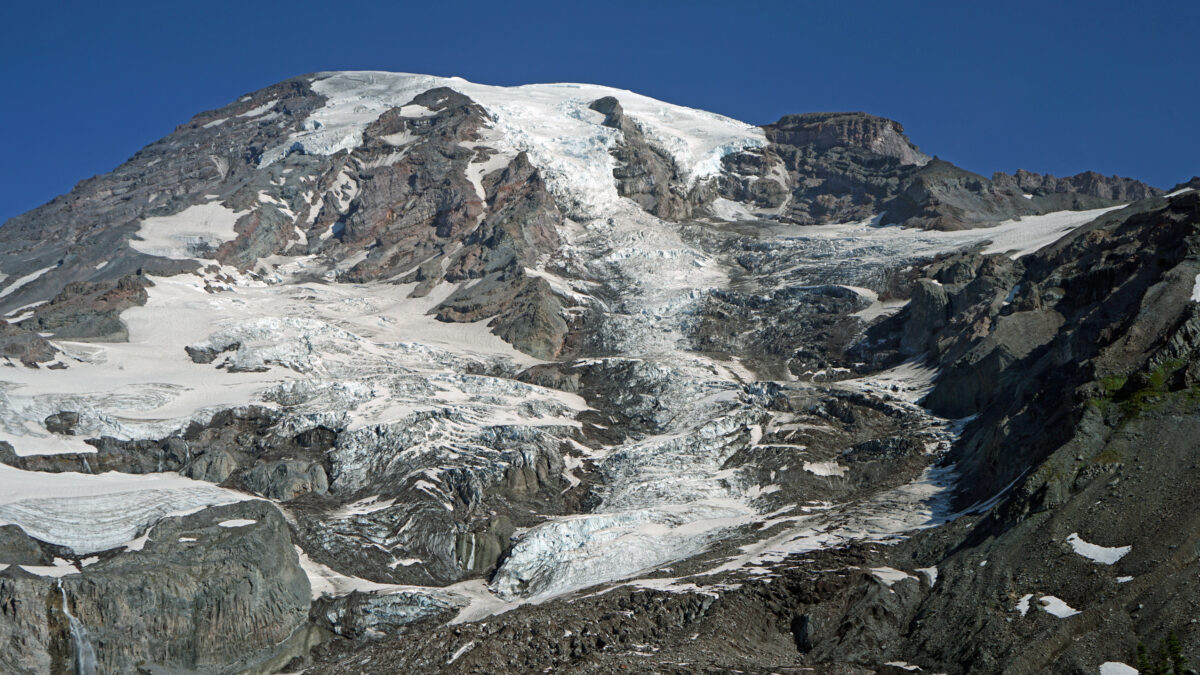
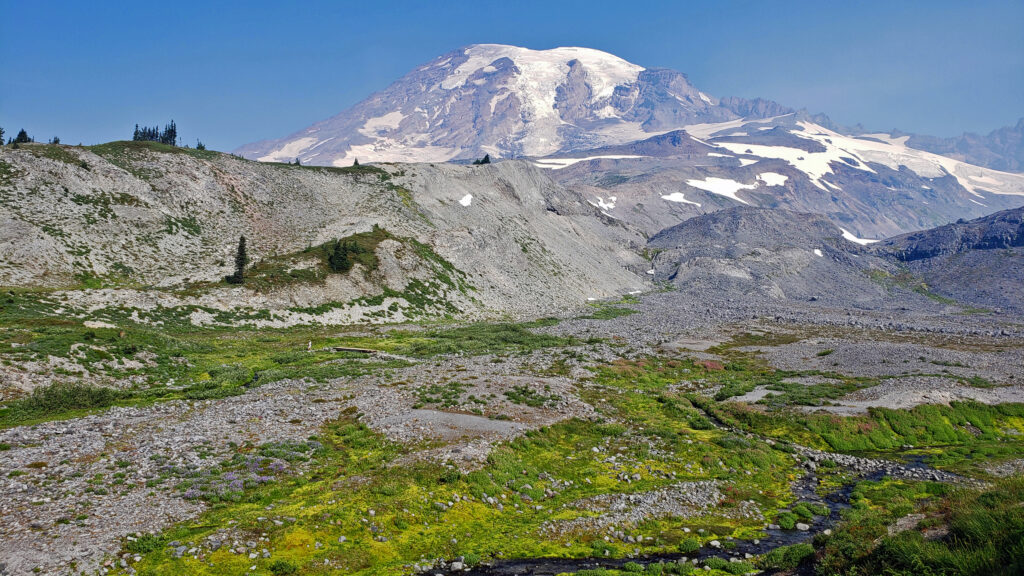
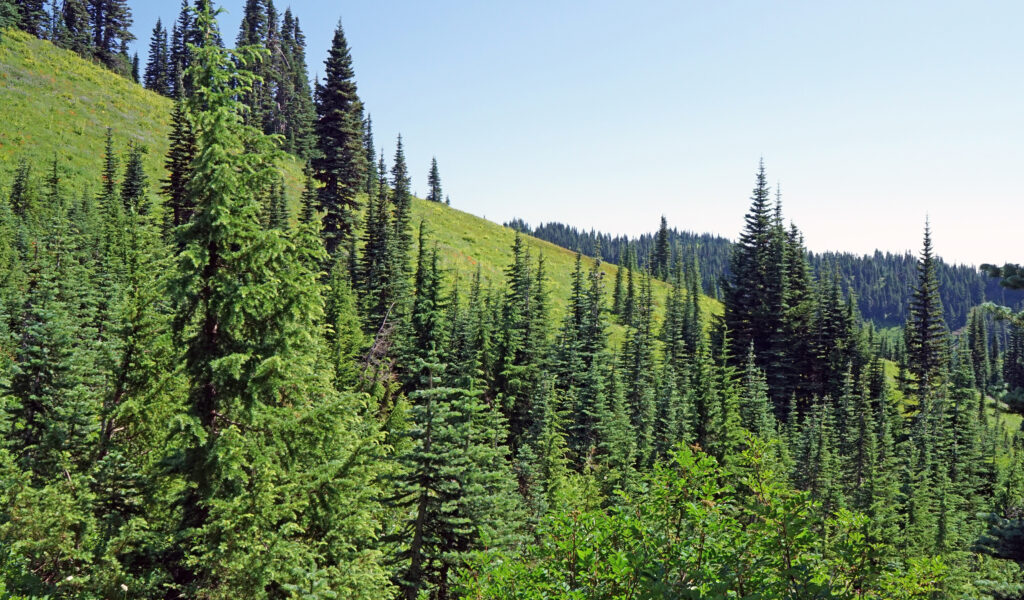
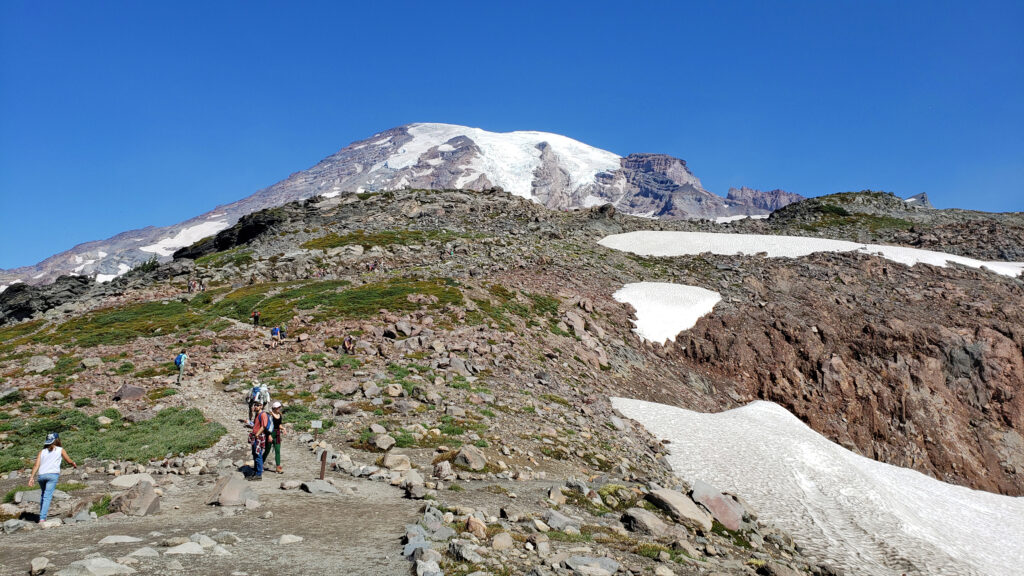
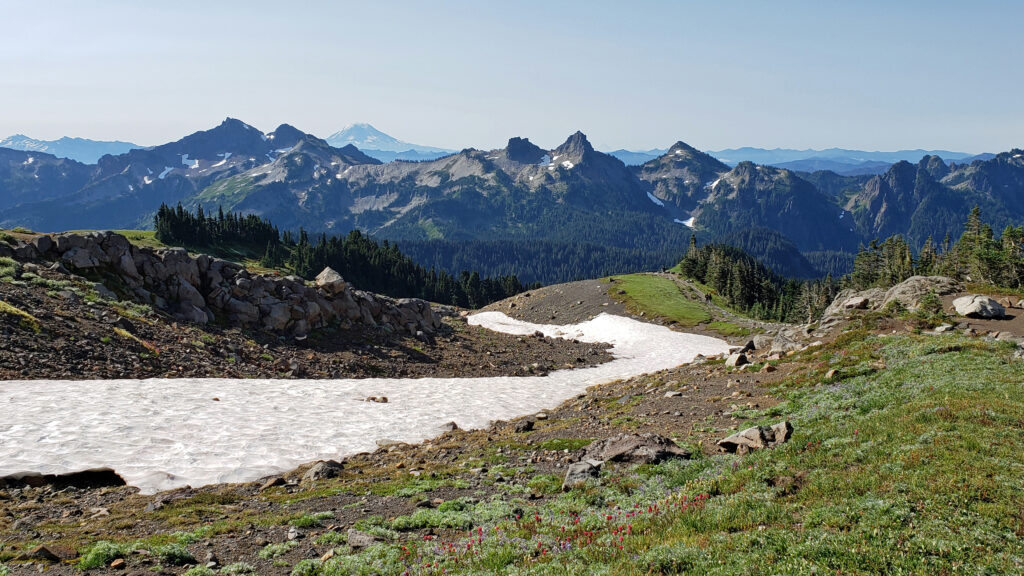
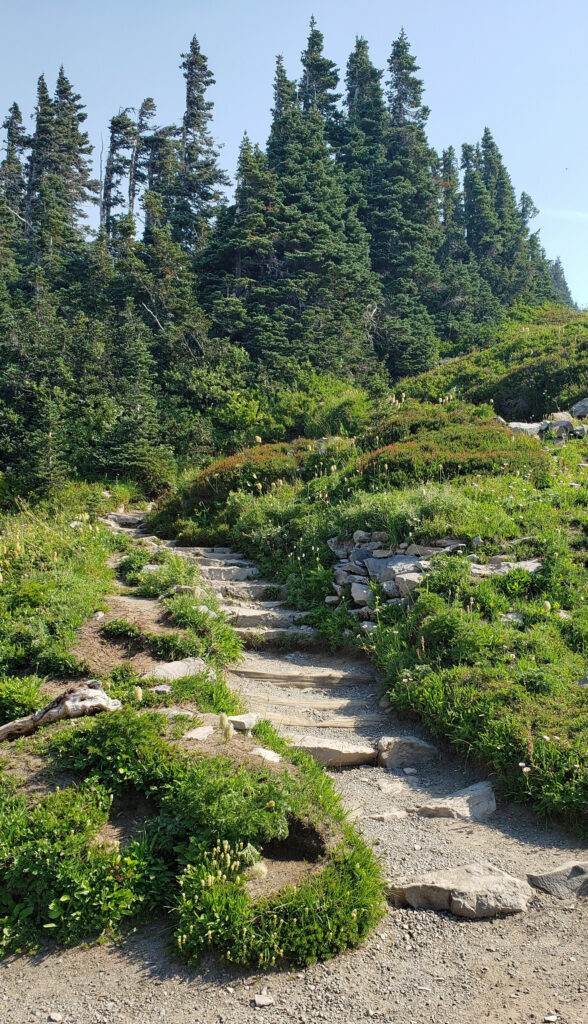
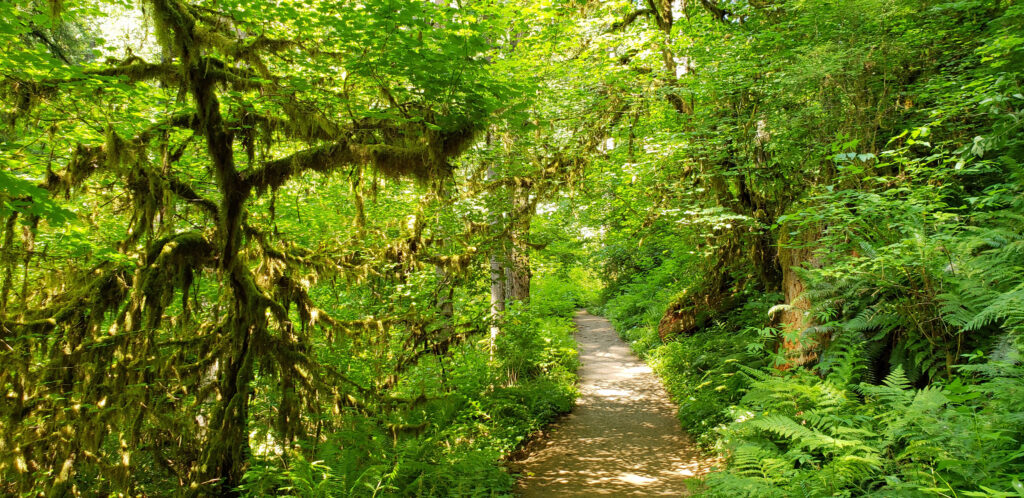
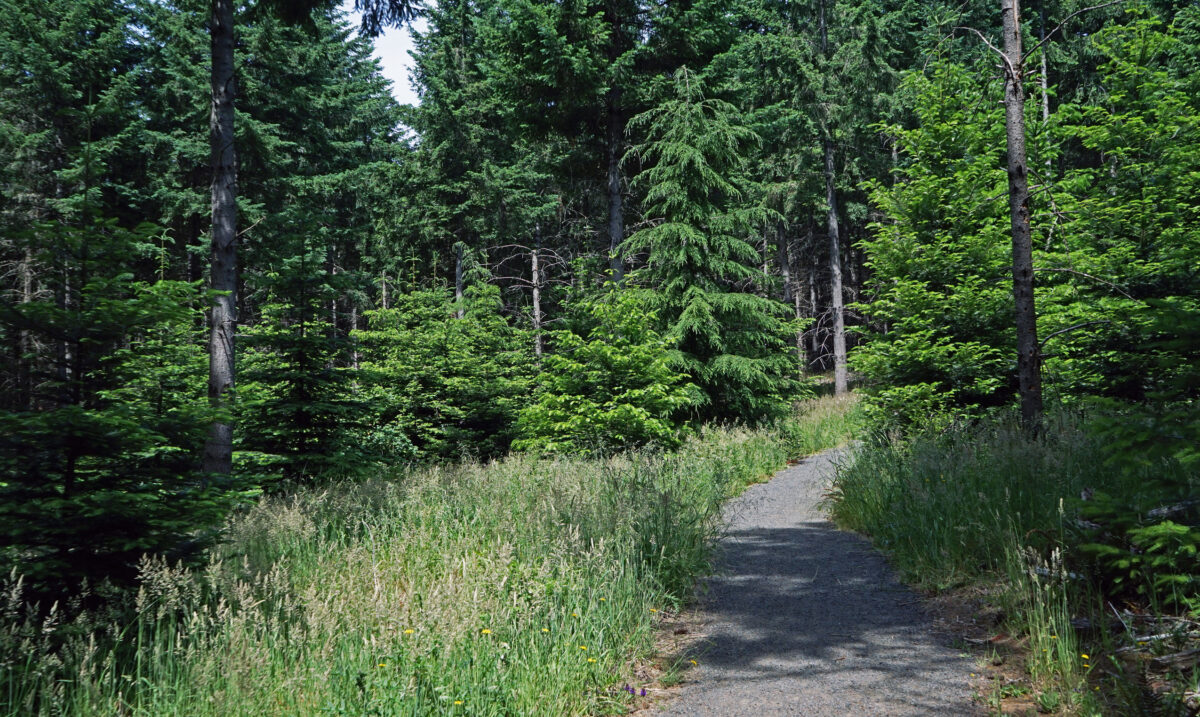
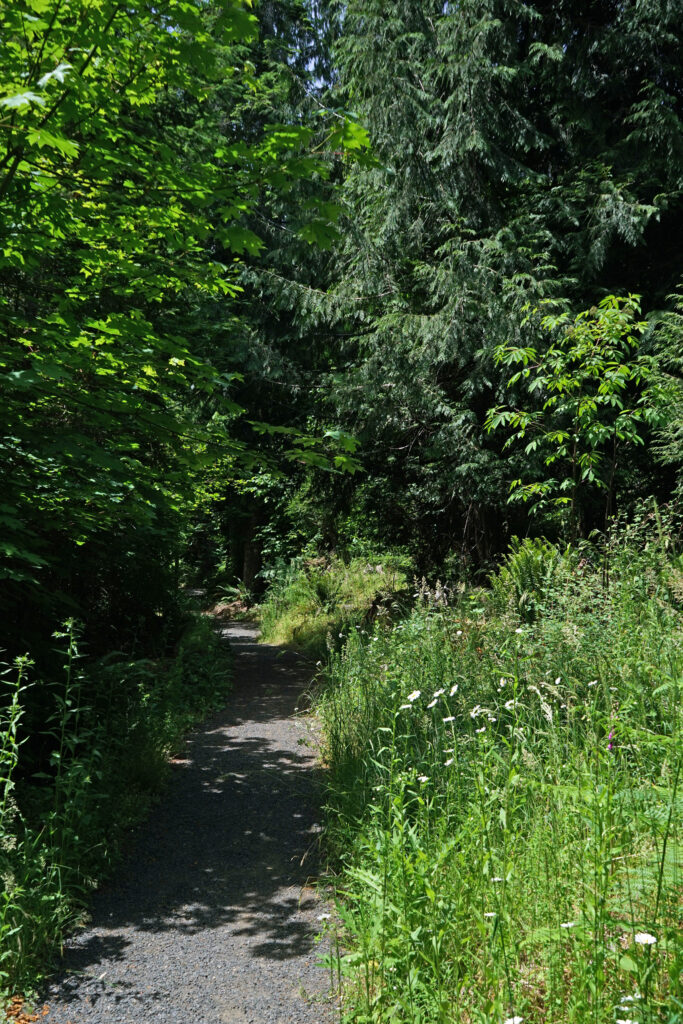
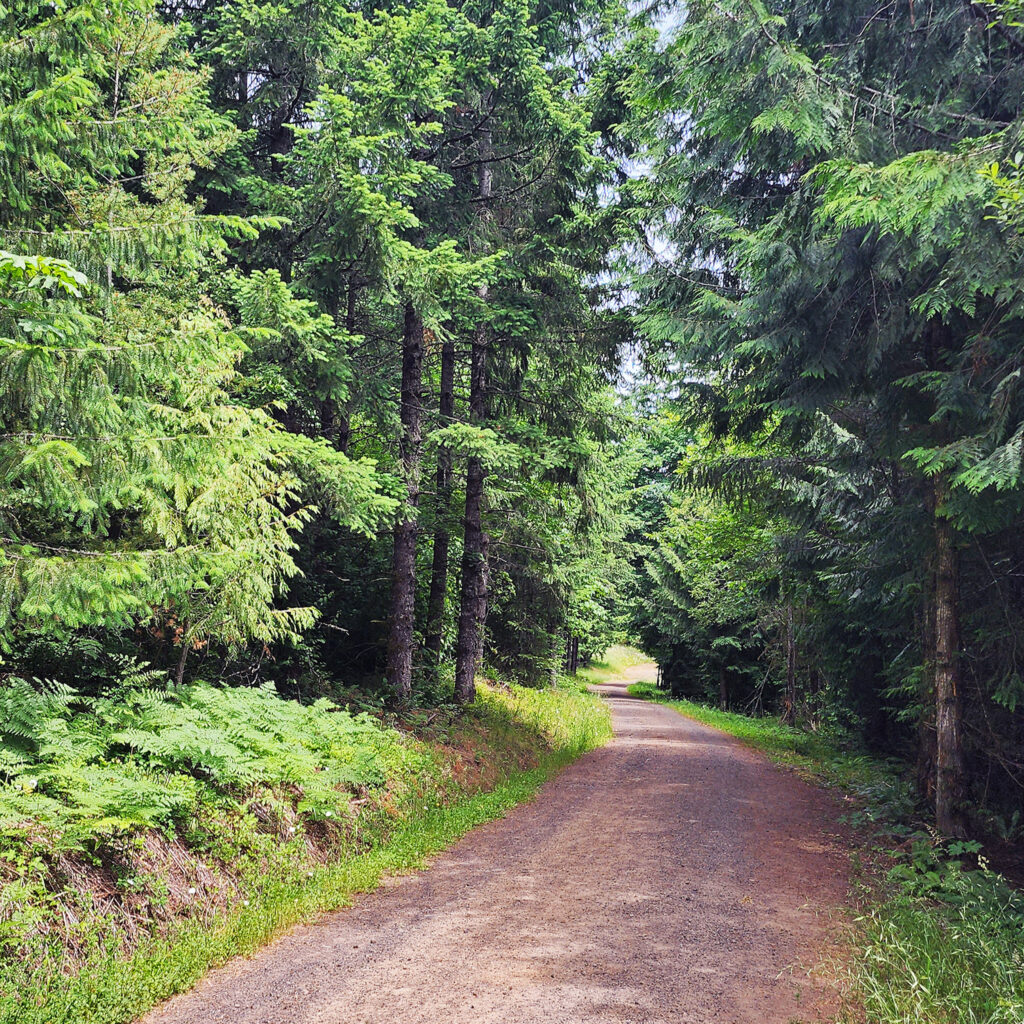
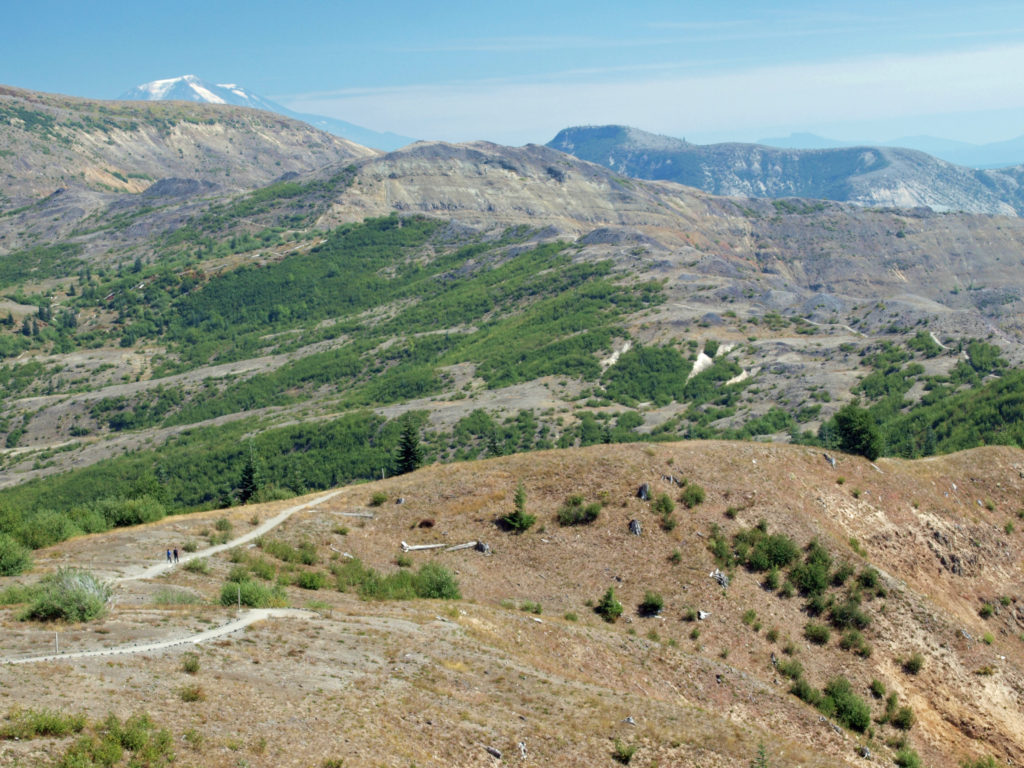
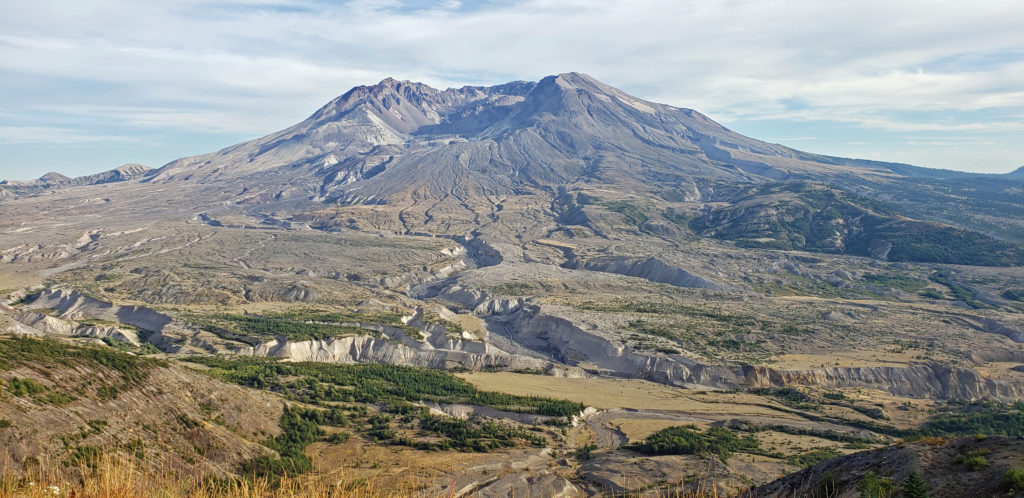
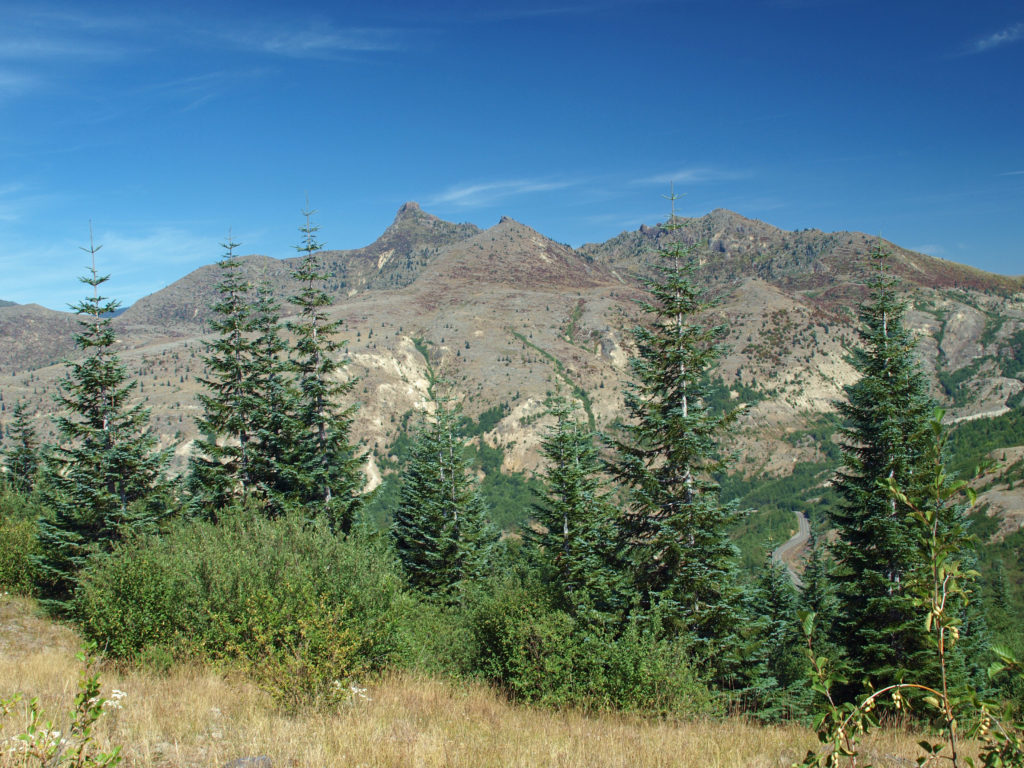
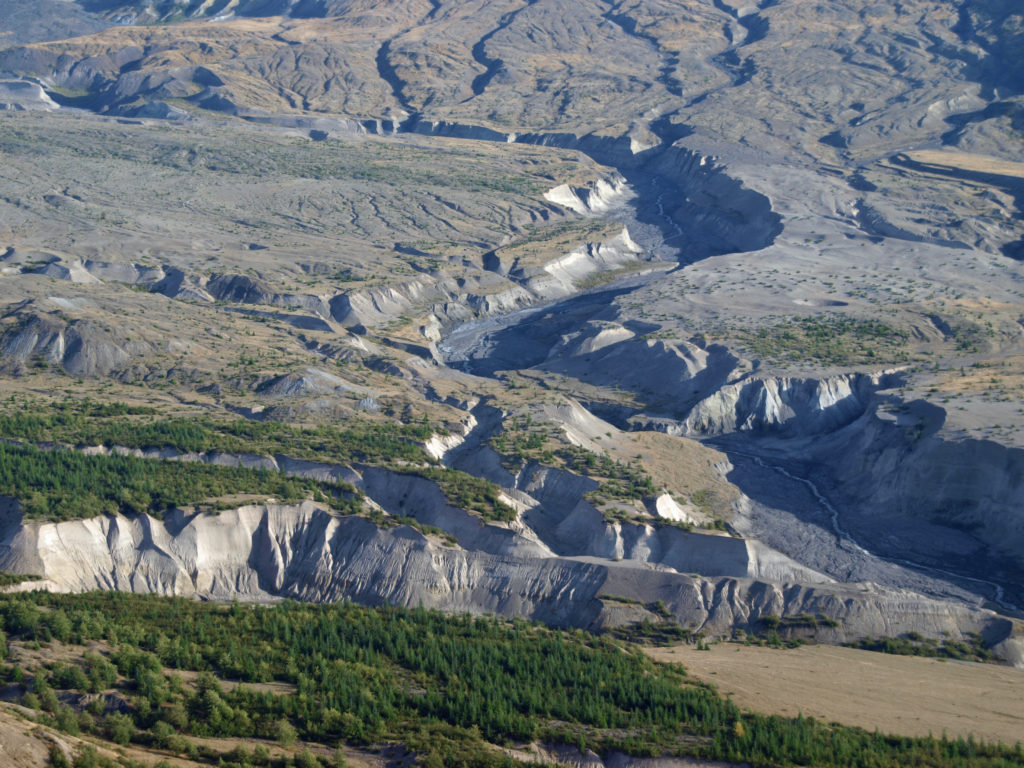
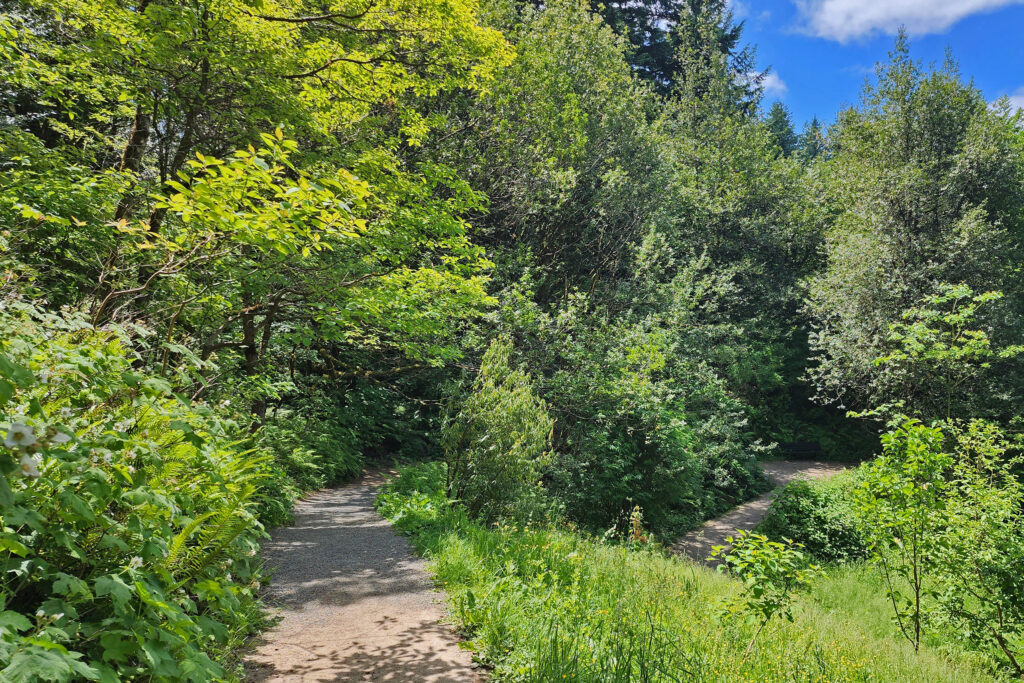
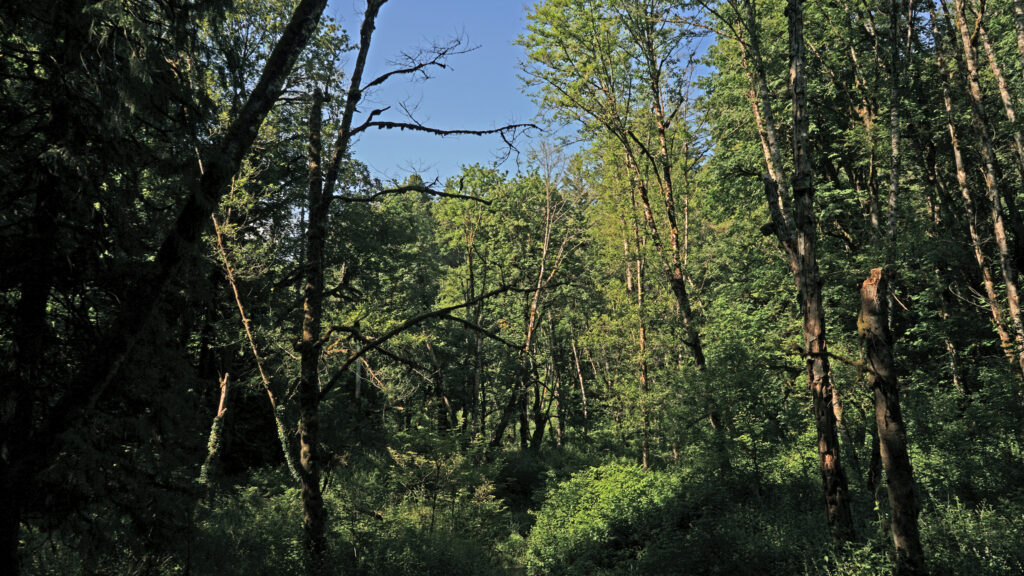
The Skyline Trail loop is one of the Pacific Northwest’s iconic hikes. Beginning at the Visitor Center in the Paradise section of the park, the trail takes you up the mountain with great views of the summit, awesome views of the Nisqually Glacier, and panoramic views south to the Tatoosh Range and Mount St. Helens and Mount Adams in the distance. The high point of the trail is just over 7000 feet in elevation (and still 7400 feet below the summit). The lower portions of the trail take you through alpine forest and mountain meadows. The upper part is all above timberline with open views in all directions.
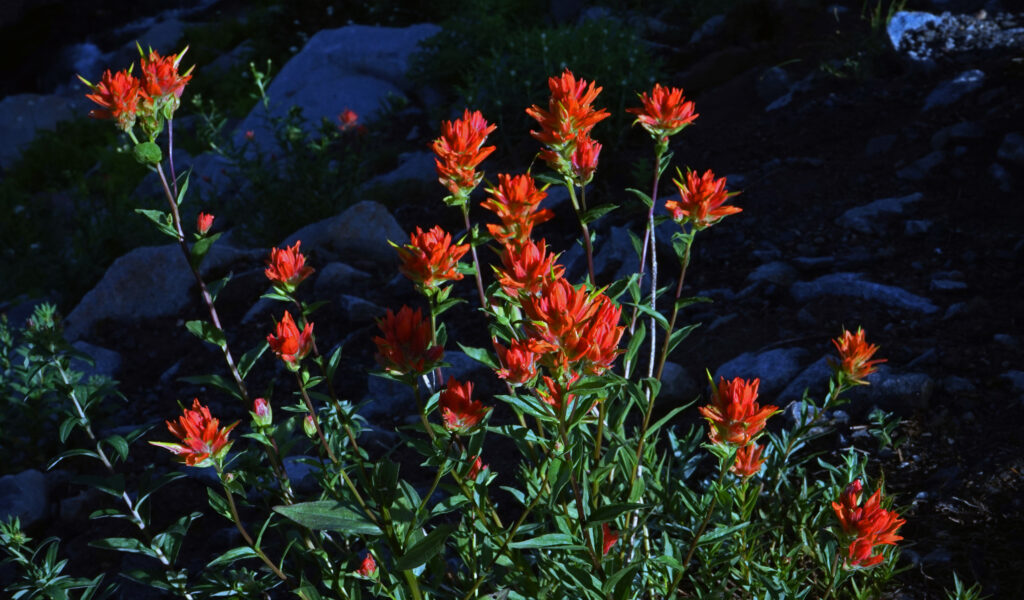
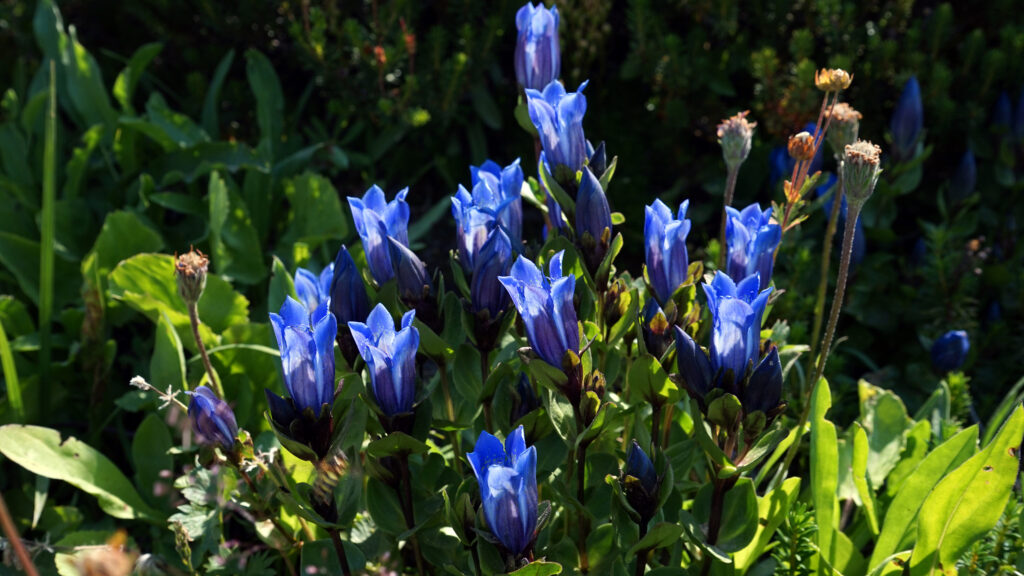
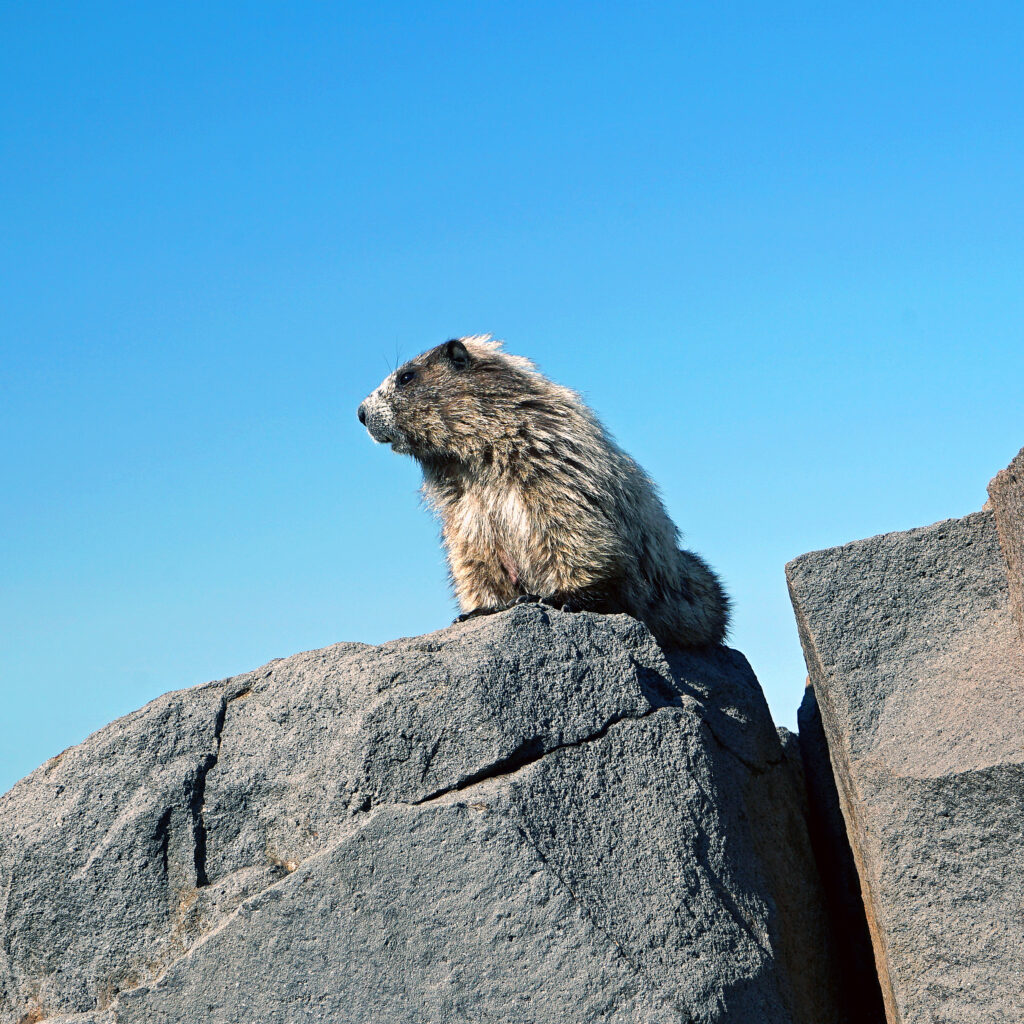
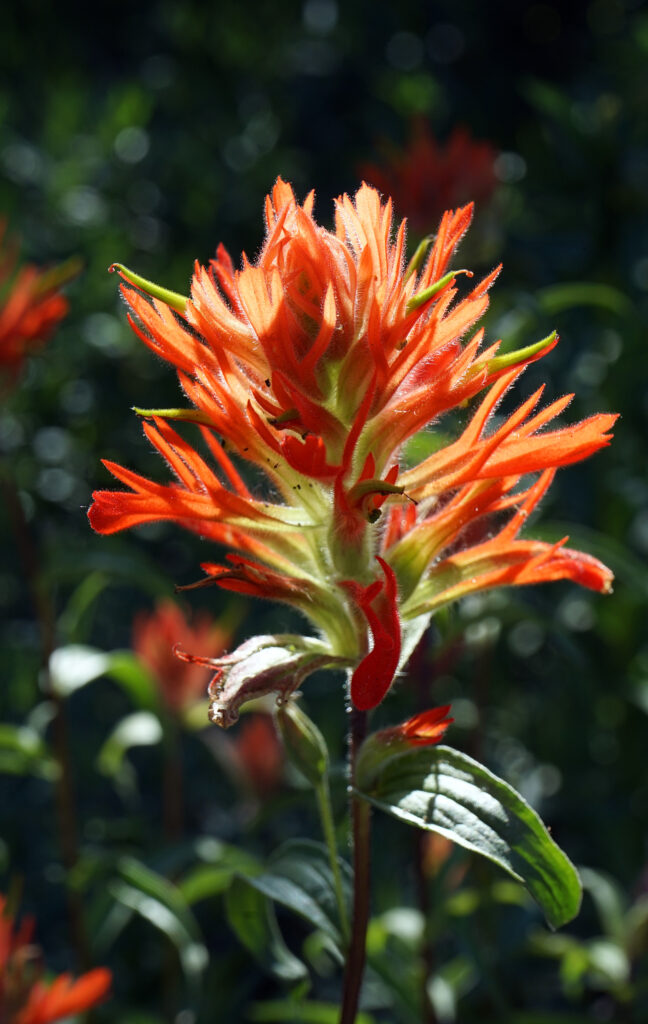
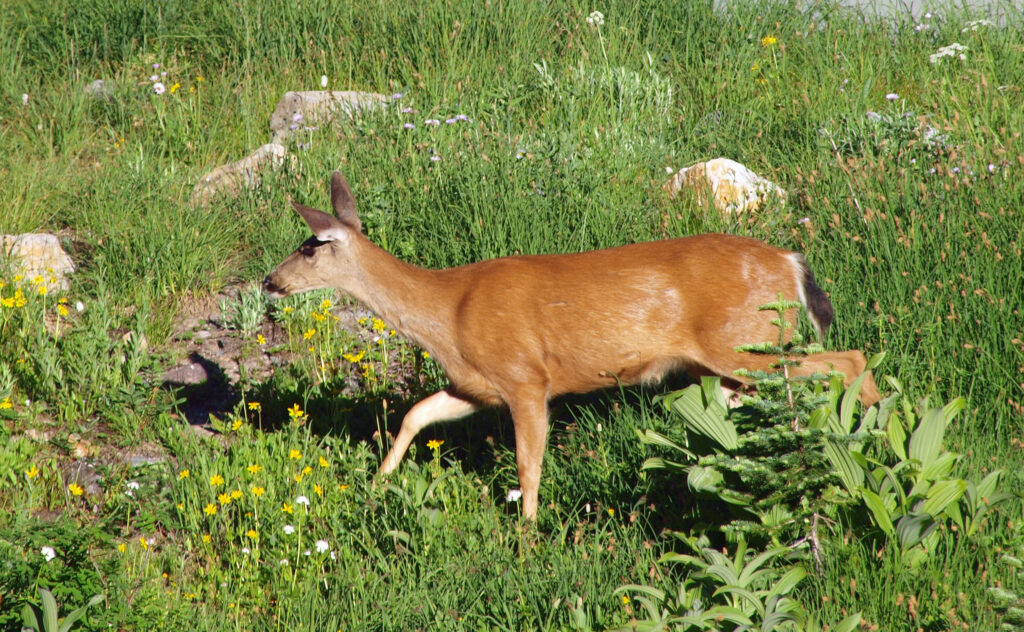
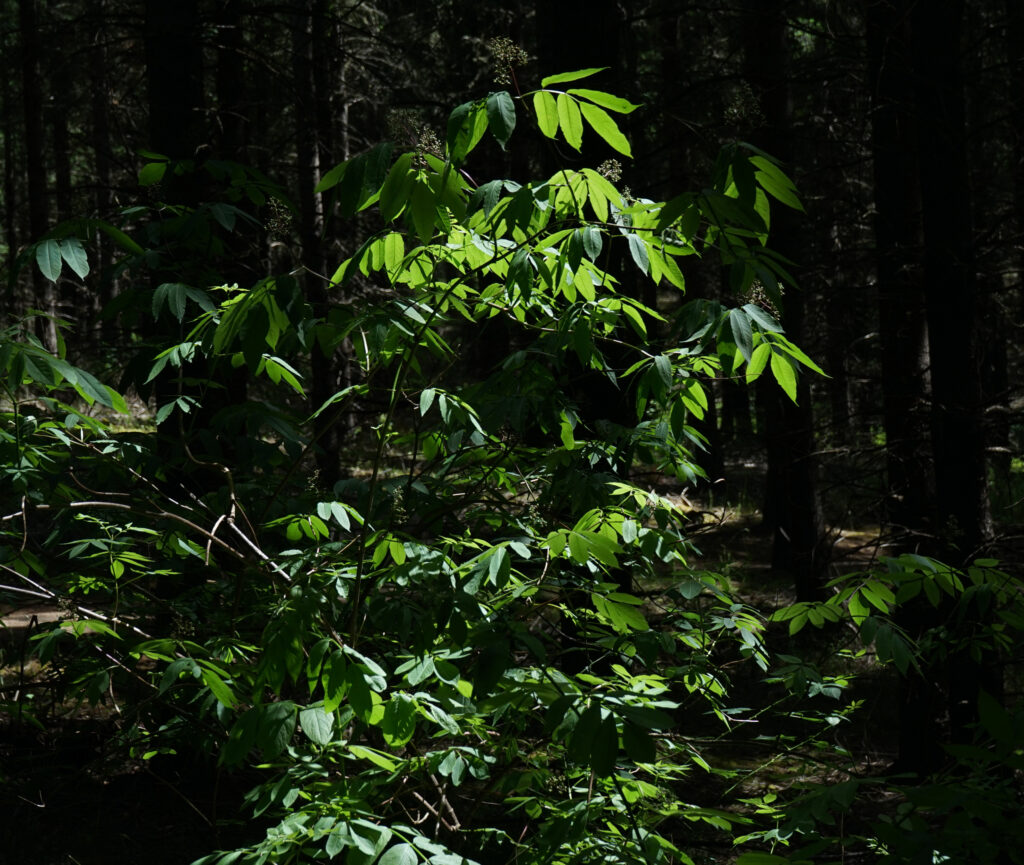
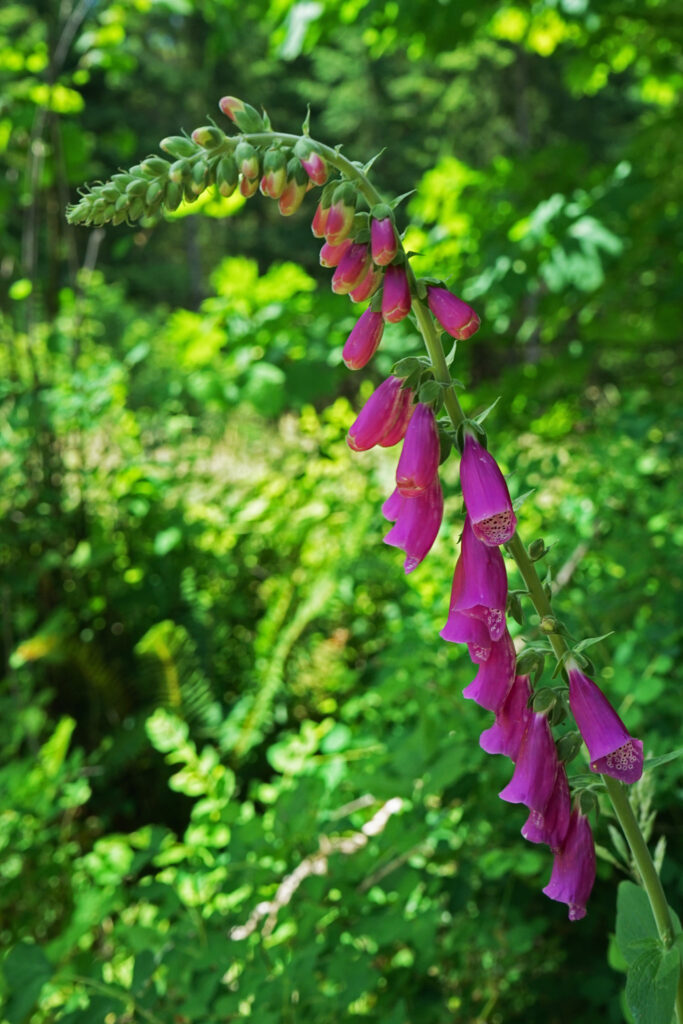
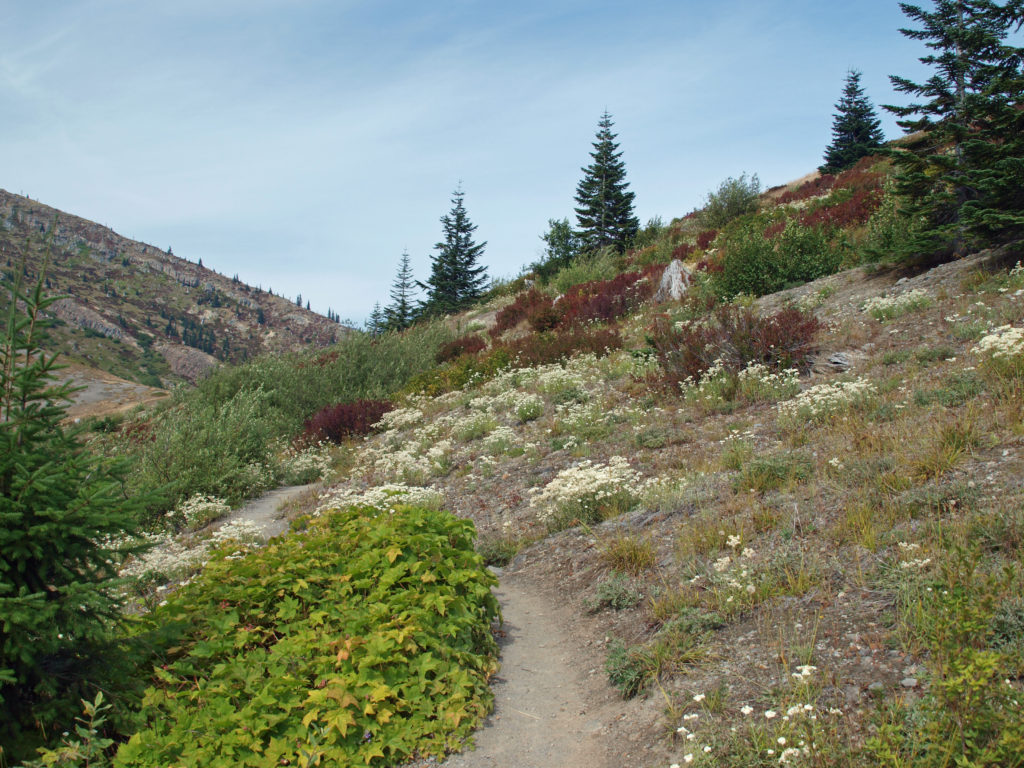
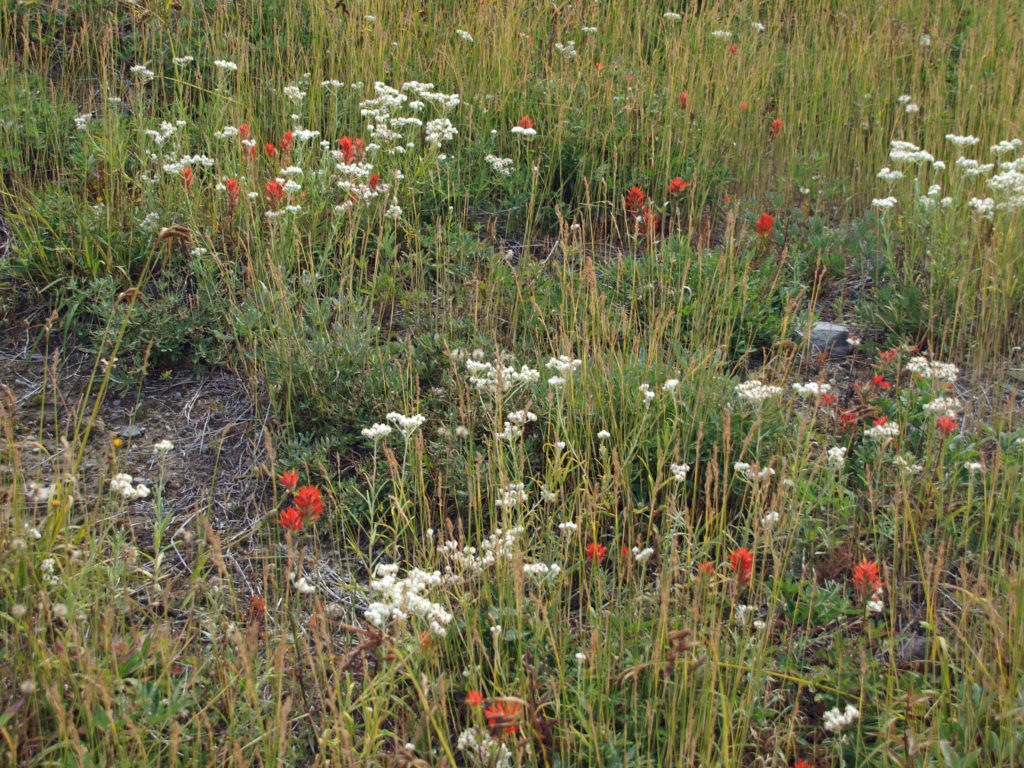
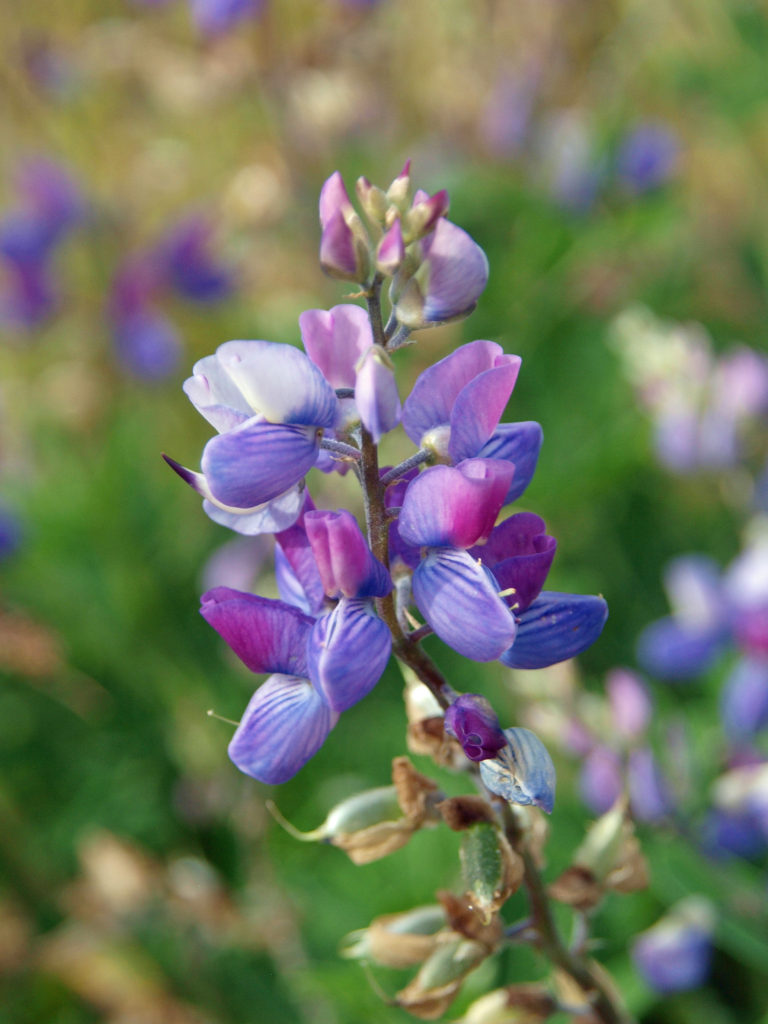
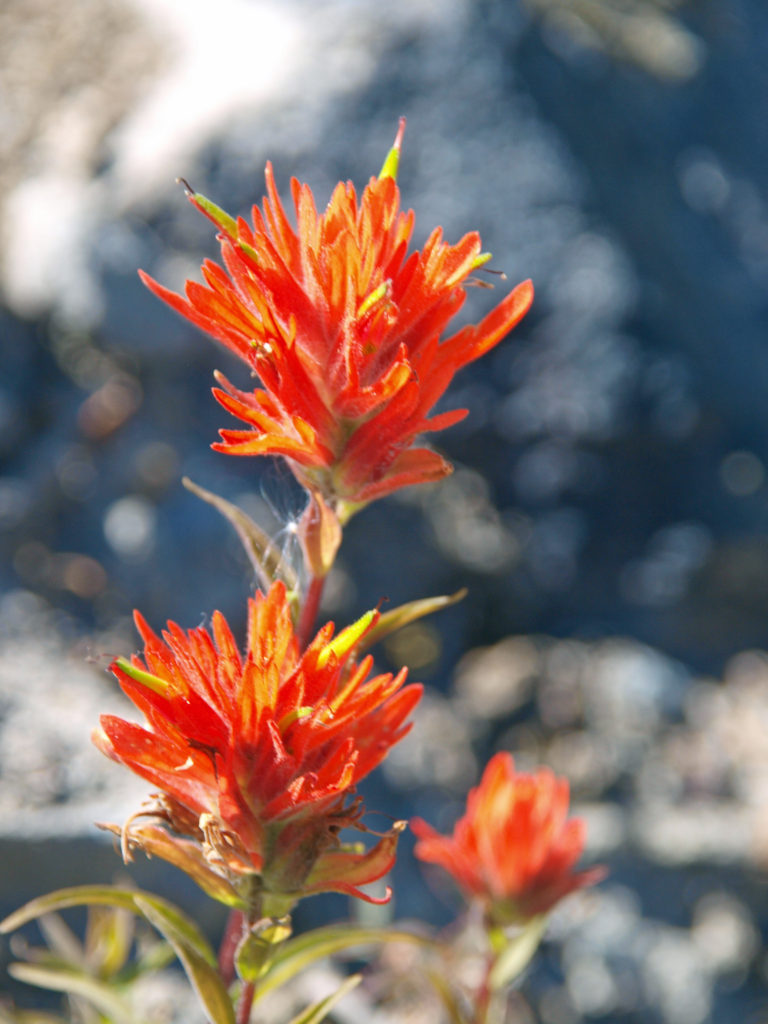
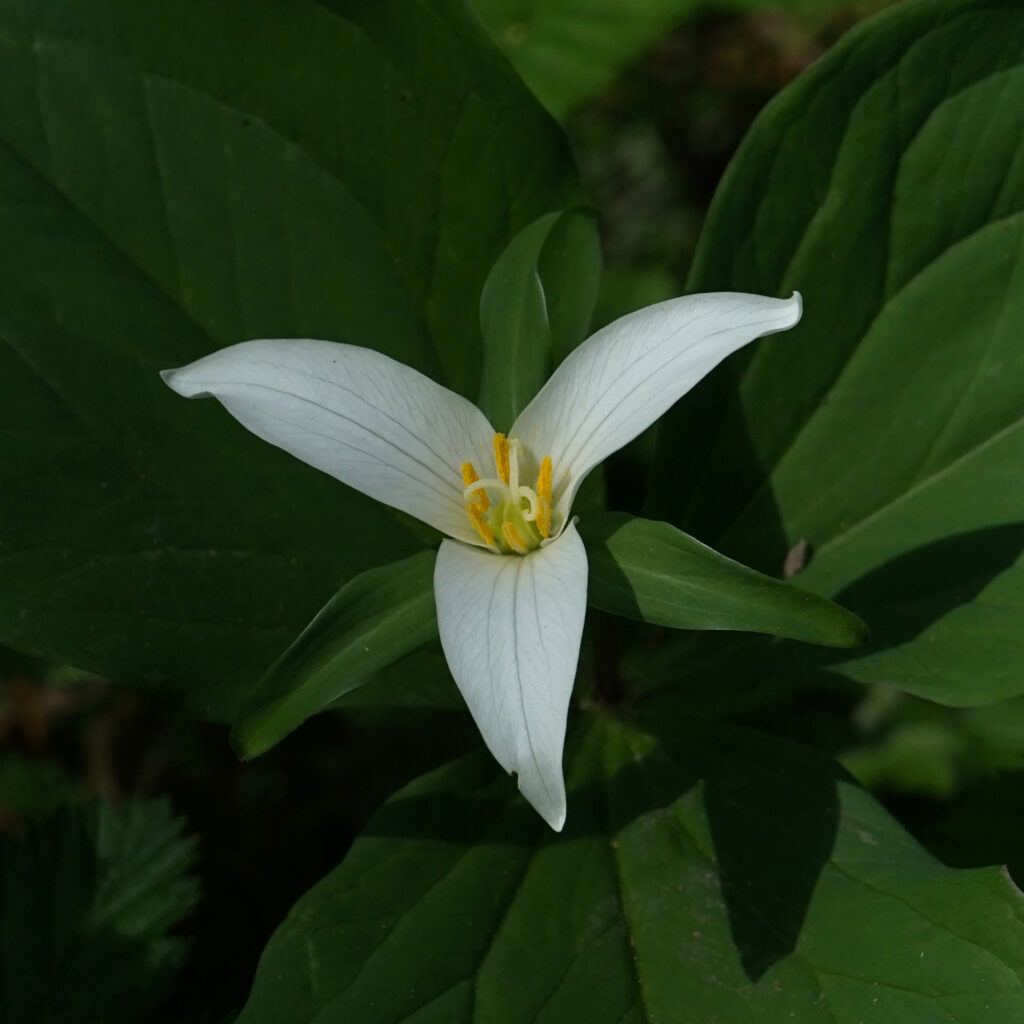
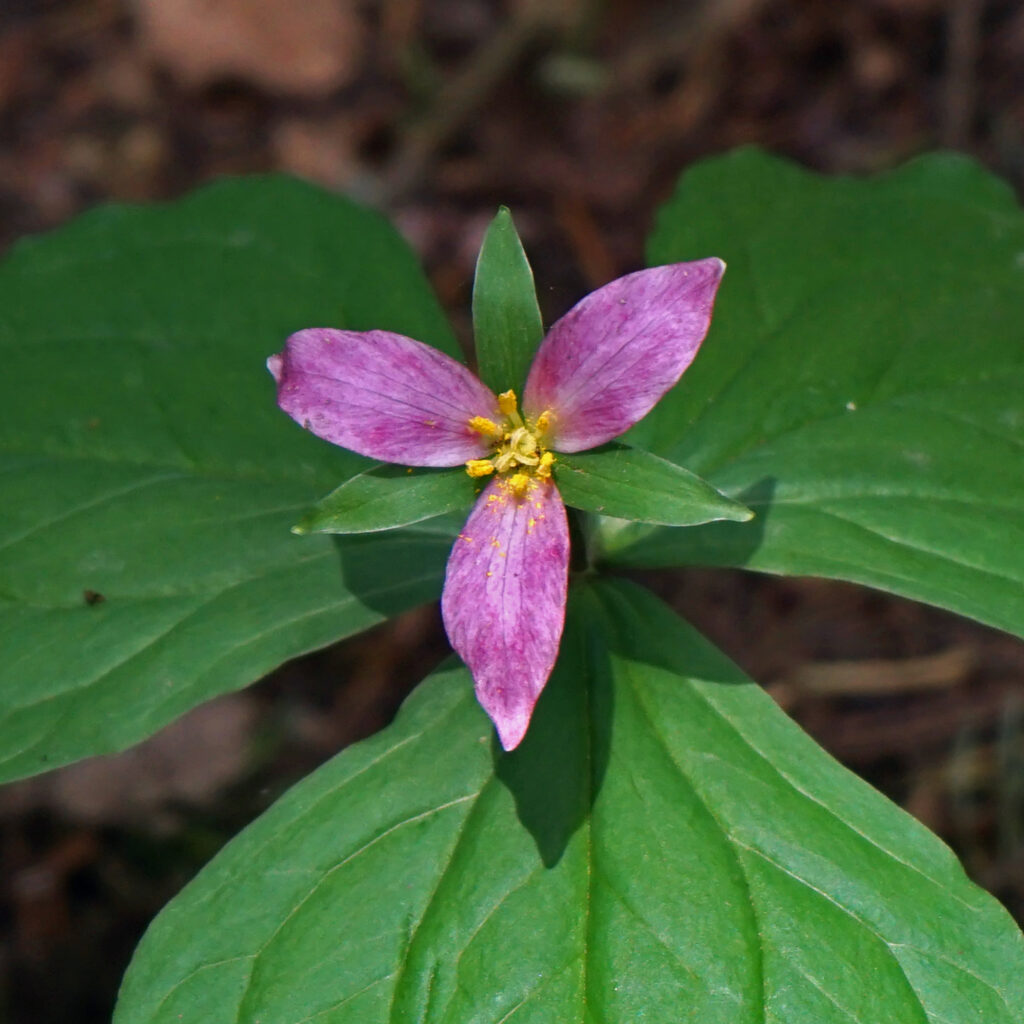
The Paradise area is famous for its spectacular wildflower displays that carpet the meadows, including the alpine meadows above timberline. Look for deer and elk in the lower meadows and forested areas. Look, and listen, for hoary marmots and pikas along the trail. Gray Jays and Clark’s Nutcrackers are common (and tame) below timberline, and you might see White-tailed Ptarmigans in the higher reaches.
The Skyline Trail is a very popular hike for many reasons, and you will have plenty of company on it. But the views are incredible, the mountain is utterly massive, and wildlife and wildflowers are abundant, all of which make putting up with the crowds well worth it.

Getting there:
From Portland, take Interstate-5 north to US Hwy 12 (Exit 68). Follow US12 east to Morton, then Washington Hwy 7 north to Elbe. Turn east on Hwy 706 and proceed to the Longmire Entrance to Mt. Rainier National Park. In the park, follow the signs to Paradise.
From Seattle, take I-5 south through Tacoma to Exit 127 (Hwy 512). Go east on Hwy 512 to Hwy 7, then south to Elbe. From Elbe, proceed as described above.
The park entrance fee is $30 if you don’t have one of the various national park passes and is good for seven days. The park no longer accepts cash payments.
 Best Times to Go:
The hiking season is limited in the Paradise area and even more so for the upper part of the Skyline Loop. Paradise is also the most visited part of the park and is always crowded on summer weekends, so your best bet is to come on a weekday morning, or anytime after Labor Day. Even then, you may have trouble finding a parking spot. There are plenty of other worthwhile hikes in the Longmire and Paradise areas, so come prepared with a Plan B hike just in case.
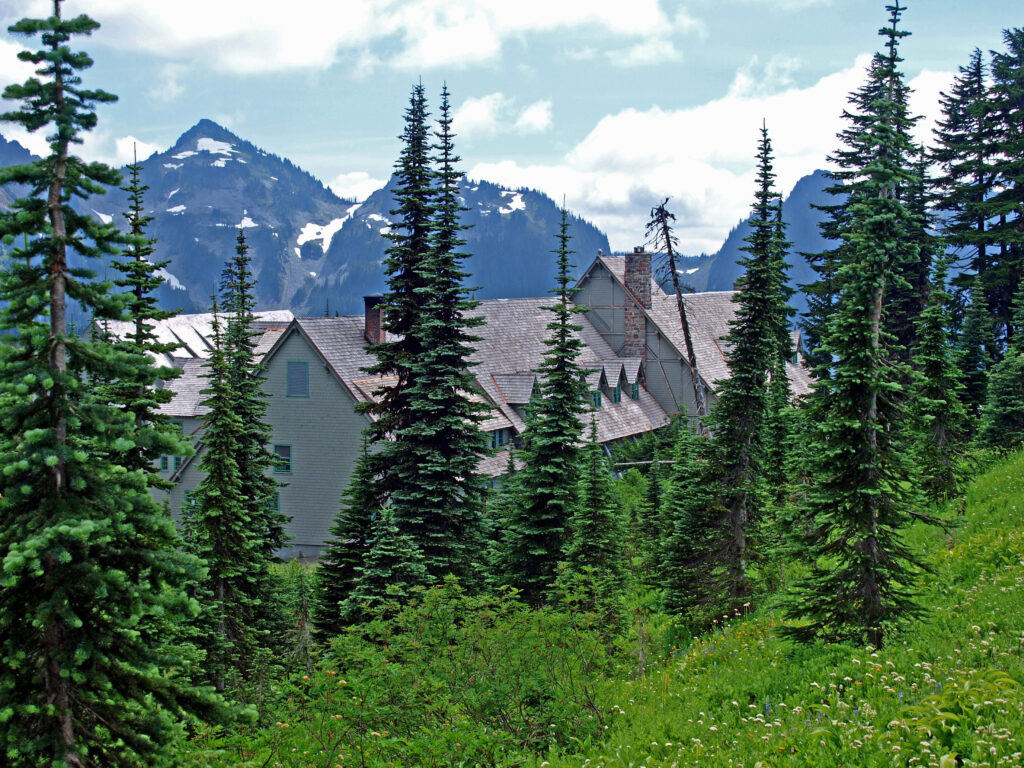
Another option, if you can afford it, is to book a room at Paradise Inn, which allows you to park in the inn’s parking lot. But even that doesn’t guarantee you a parking spot, as we found out one afternoon after returning from a day hike lower on the mountain. The inn’s lot was full, as was the visitor center lot. We had to park in the lower lot and walk to the inn. The National Park Inn in Longmire is another lodging option to consider.
Trailheads:
The trail begins and ends near the Henry M. Jackson Memorial Visitor Center. Restrooms and drinking water are available in the visitor center. You can also start the hike from Paradise Inn, just uphill from the visitor center. Parking at the visitor center is limited and fills up early in the day. Parking at Paradise Inn is restricted to visitors staying at the inn. An alternative trailhead starts at the lower parking lot. (There is a trail to the visitor center, or you can take the Deadhorse Creek Trail up the mountain and join the Skyline Trail just below Glacier Vista. Starting at the lower trailhead adds only about two tenths of a mile to the hike.)
 The hike:
From the trailhead at the visitor center, the trail heads straight up the mountain on a moderately steep grade. There are a myriad of trails crisscrossing the Paradise area above the visitor center, but most of the trail intersections are well signed. If in doubt, just head uphill. But bring a trail map, just in case.
At the 0.2-mile mark, you’ll come to a junction with the Alta Vista Trail, a side trail that takes you to a good viewpoint before rejoining the Skyline Trail. The Alta Vista Trail adds a little to the elevation gain of this hike, but doesn’t add any distance.
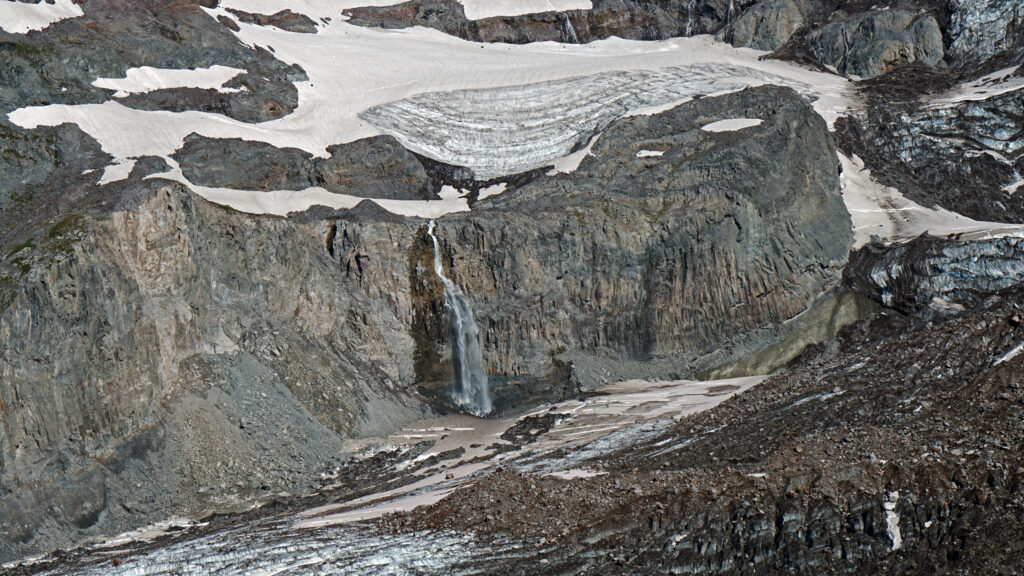
Stay on the main trail at the junction with the Deadhorse Creek Trail. The next trail junction, at the one-mile mark, is with the Glacier View Trail. Like the Alta Vista Trail, the Glacier View Trail parallels the Skyline Trail and doesn’t add any distance to the hike, but does provide a good view of the massive Nisqually Glacier.
Above Glacier View, the Skyline Trail switchbacks up a steeper section of the mountain above timberline. At the 1.6-mile mark you come to the junction with the Upper Skyline Trail (which may be signed as the Pebble Creek Trail). Staying on the main trail will take you to the well-named and very popular Panorama Point, with sweeping views down to Paradise Inn and the visitor center, across to the Tatoosh Range, and beyond to Mount St. Helens and Mount Adams. The Upper Skyline Trail is a three tenths of a mile shortcut and bypasses the often crowded Panorama Point. If you take the shortcut, stay right at the next junction to rejoin the main trail above Panorama Point.

Just above Panorama Point is a restroom open during the summer (it may be closed after Labor Day). Follow the trail going straight up the mountain where you will come to the eastern junction with the Upper Skyline Trail. Older maps show the Skyline Trail descending from Panorama Point across a snow field to the east and rejoining the Upper Skyline Trail on the ridge beyond. That is no longer the official route and is not maintained, although I saw a group of people taking it the last time I was there. Google Maps also still shows that trail.
Just past the junction with the Upper Skyline Trail, you’ll reach the high point of the hike at 7040 feet. From there, the trail traverses the rocky southeastern slopes of the mountain, then descends to the junction with the Golden Gate Trail at the 3.3-mile mark of the hike. Taking the Golden Gate Trail, which switchbacks down a steep slope before rejoining the Skyline Trail, cuts about a mile off the total distance of the hike.
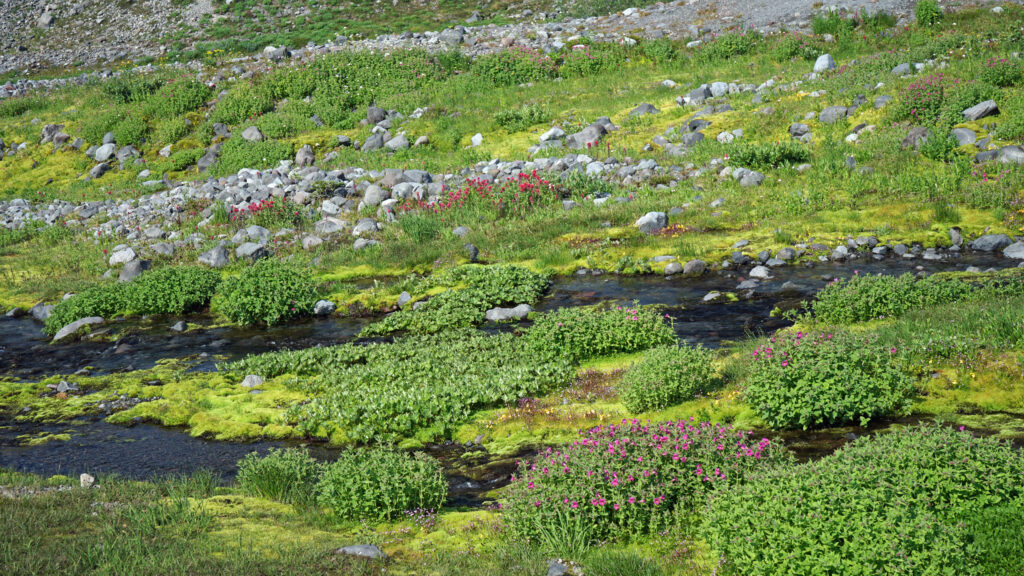
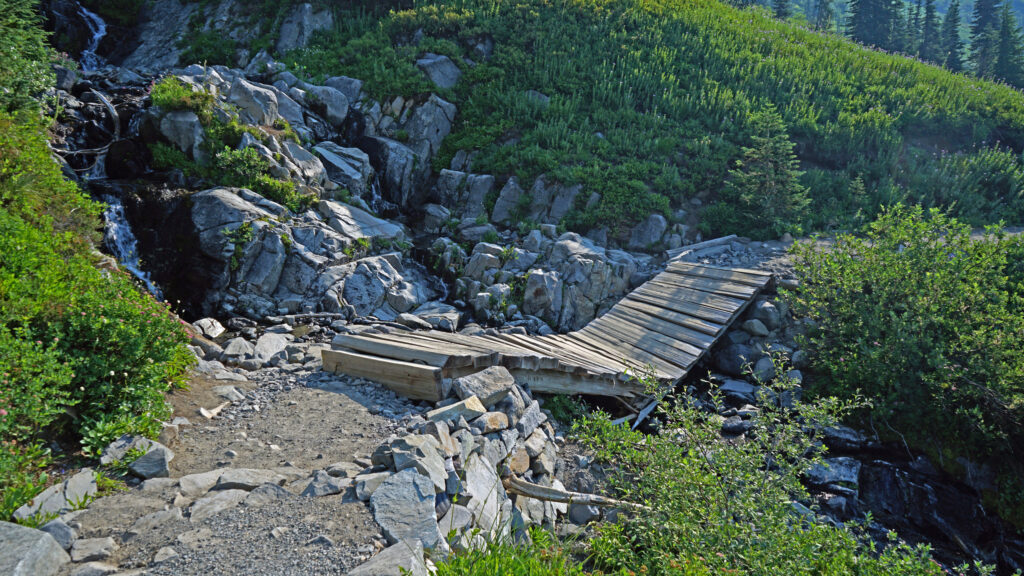
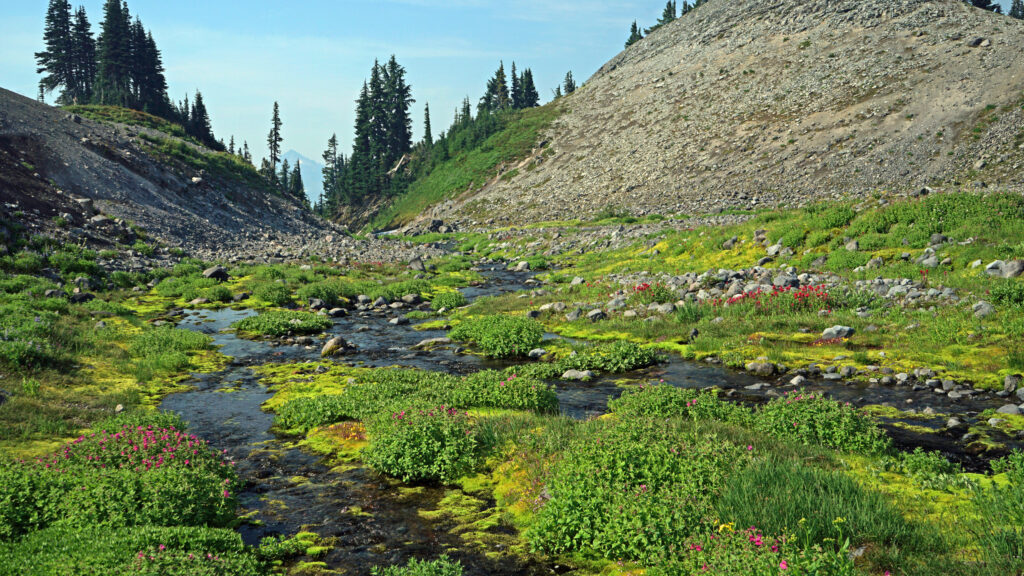
Past the Golden Gate Trail junction, the Skyline Trail follows the crest of a ridge, then descends to a beautiful alpine meadow near the headwaters of the Paradise River. After crossing the river, which is still a small creek at that point, you will come to the junction with the Paradise Glacier Trail at the 3.9-mile mark of the hike, which once led to the famous Paradise Ice Caves. The caves no longer exist, however. Beyond the junction, look for the Stevens-Van Trump Historical Marker, commemorating the first ascent of the mountain in 1870.
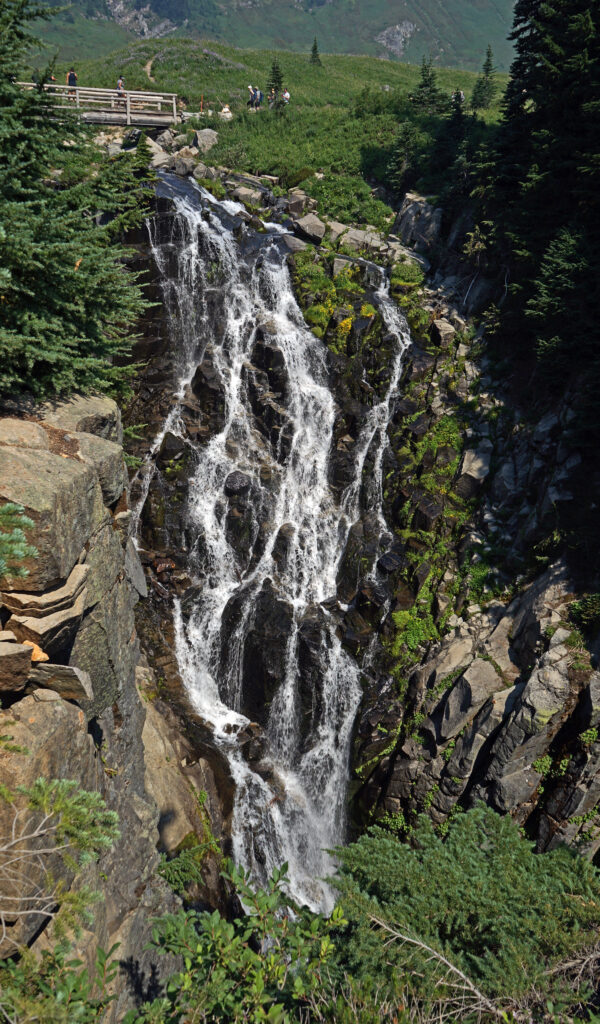
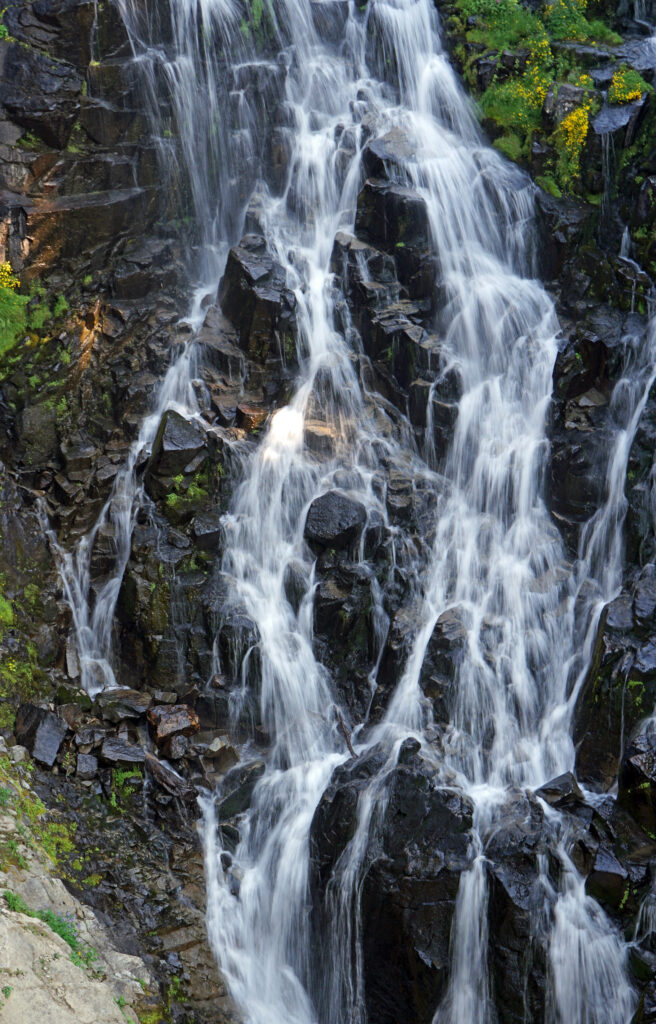
Beyond the monument, the trail parallels the edge of a 1000-foot drop off to Stevens Creek to the east before turning west. Stay right at the junction with the Lakes Trail and follow the Skyline Trail as it switchbacks down to meet the Paradise River again. Stay right again at the 4th Crossing Trail junction. The trail then traverses the slope above the river and crosses over a ridge. Just past the lower junction with the Golden Gate Trail, you come to Myrtle Falls at the 5.2-mile mark. Myrtle Falls is one of the most photographed spots in the park, and one of the most crowded. Welcome back to civilization. From Myrtle Falls it’s a short half-mile jaunt back to the trailhead.
 Other area attractions and activities:
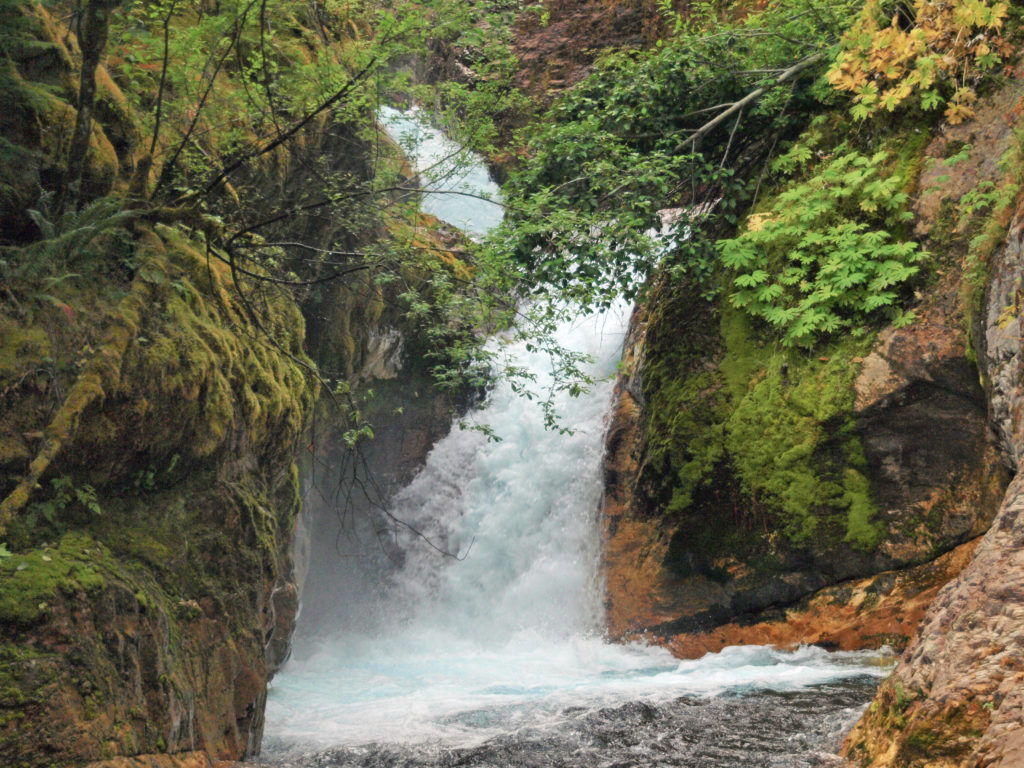
Mount Rainier National Park offers innumerable attractions other than this hike. The Longmire area has an interesting history and a number of interesting hikes. Between Longmire and Paradise there are several waterfall hikes. The Reflection Lakes area below Paradise has several other nice hikes, as do the Stevens Canyon and Ohanapecosh areas. And the Sunrise area on the east side of the mountain has spectacular views of the mountain and many trails. And, as its name suggests, it offers especially gorgeous views of the mountain at sunrise.
Conclusion:
The Skyline Trail, even if you hike only a portion of the loop, should be on every hikers bucket list of destinations. There simply is no other high altitude trail that is as accessible and as scenic in the Pacific Northwest.
Posted September 8, 2023 by Alan K. Lee
All photos ©Alan K. Lee
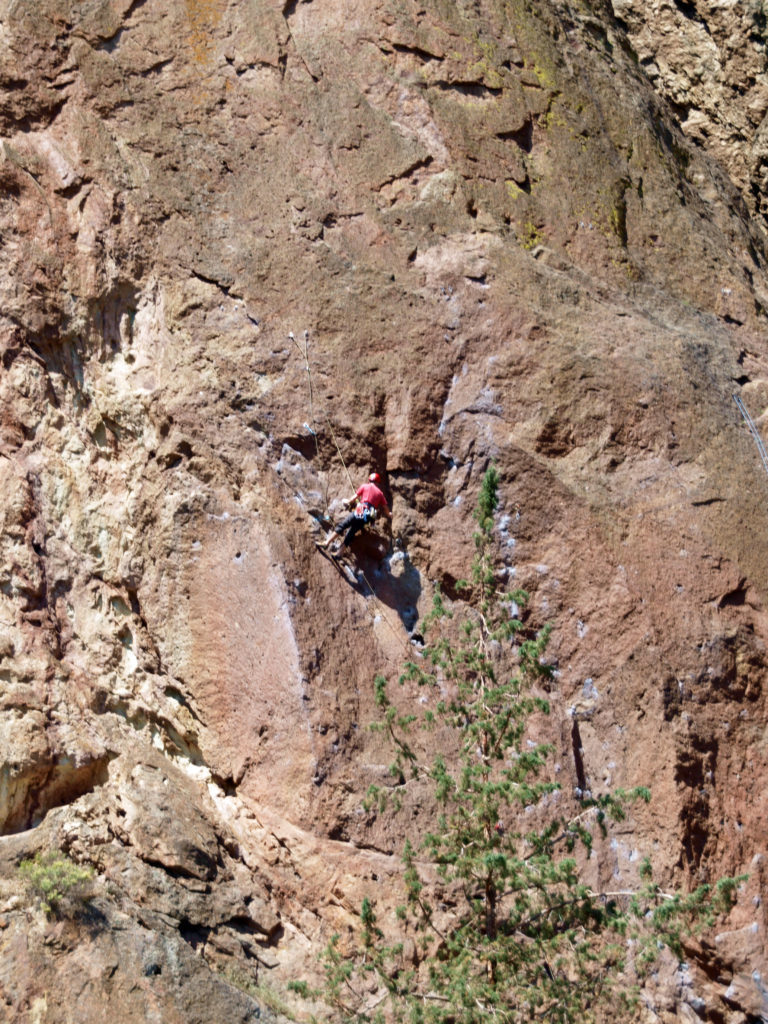
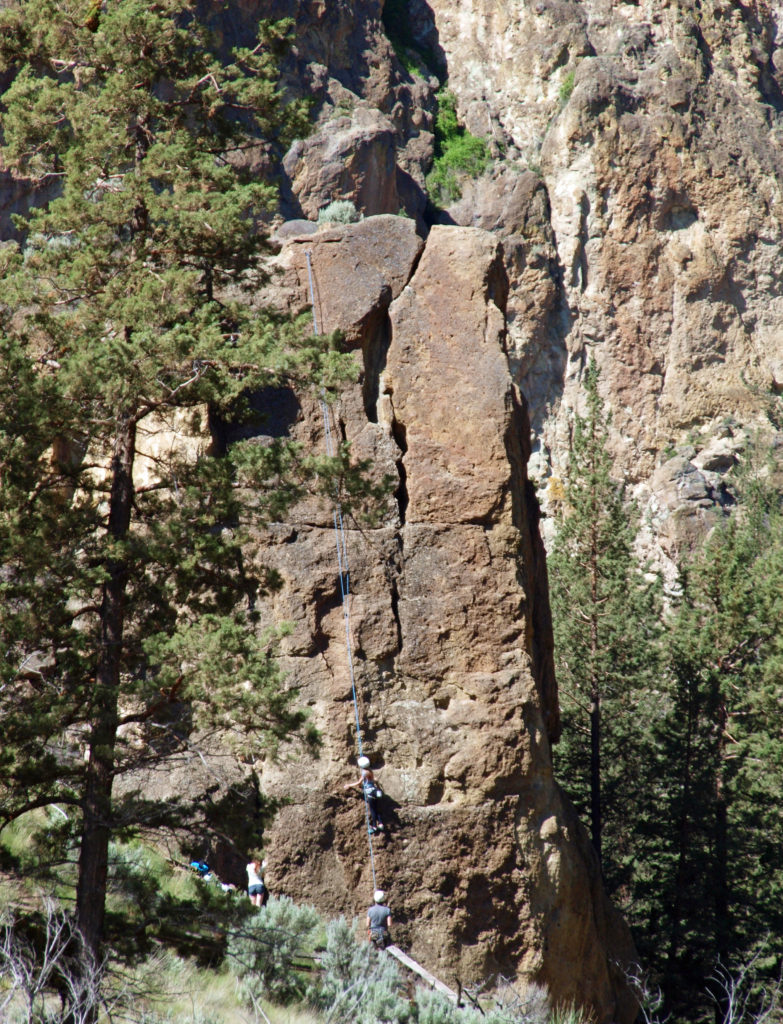
 Several thousand climbing routes exist within the park, including more than a thousand bolted routes. Climbers literally come from all over the globe to climb here. And an extensive trail system within the park offers hikers a variety of routes of varying lengths and difficulty. Many of the trails are multi-use trails, open also to mountain bikers and horseback riders. Click
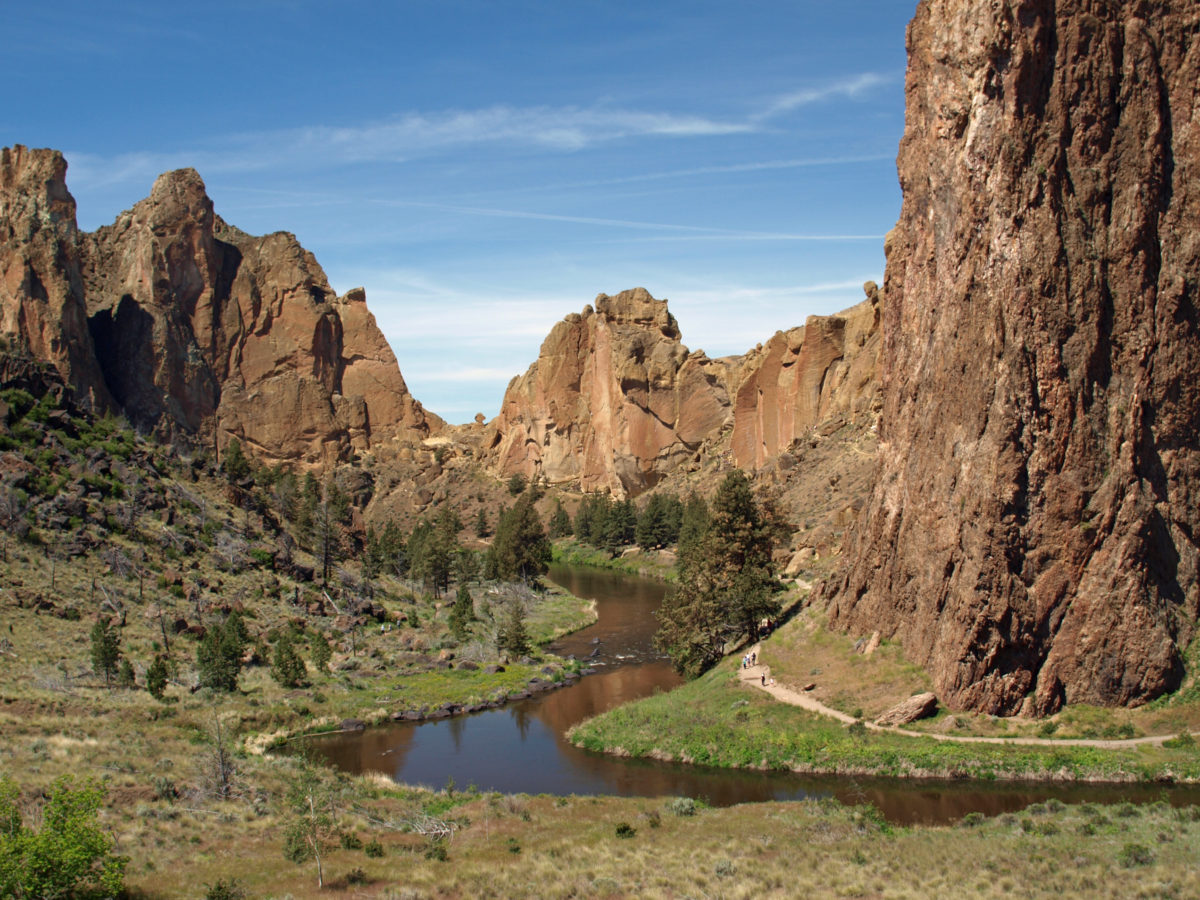
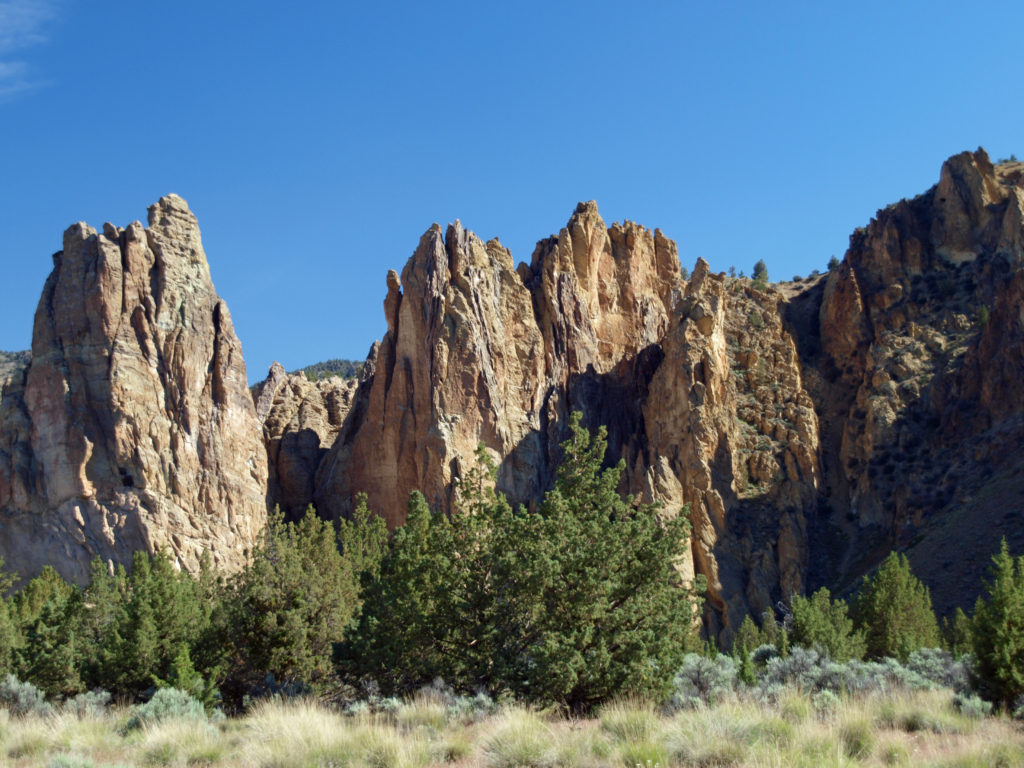
  Thirty million years ago the area that is now Smith Rock was on the western rim of the Crooked River Caldera. Over time, nearby volcanic eruptions filled the caldera with ash that compacted into volcanic tuff. The tuff was later overtopped with basalt lava flows from vents about fifty miles away. The Crooked River then eroded much of that, leaving the formations we see today.
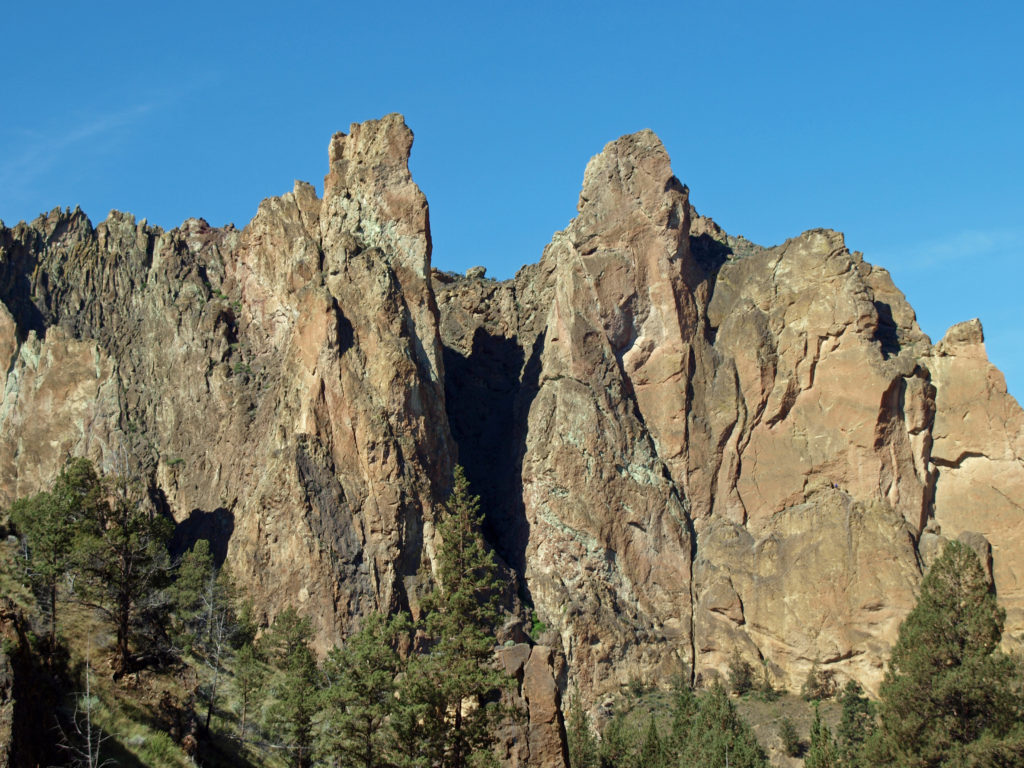
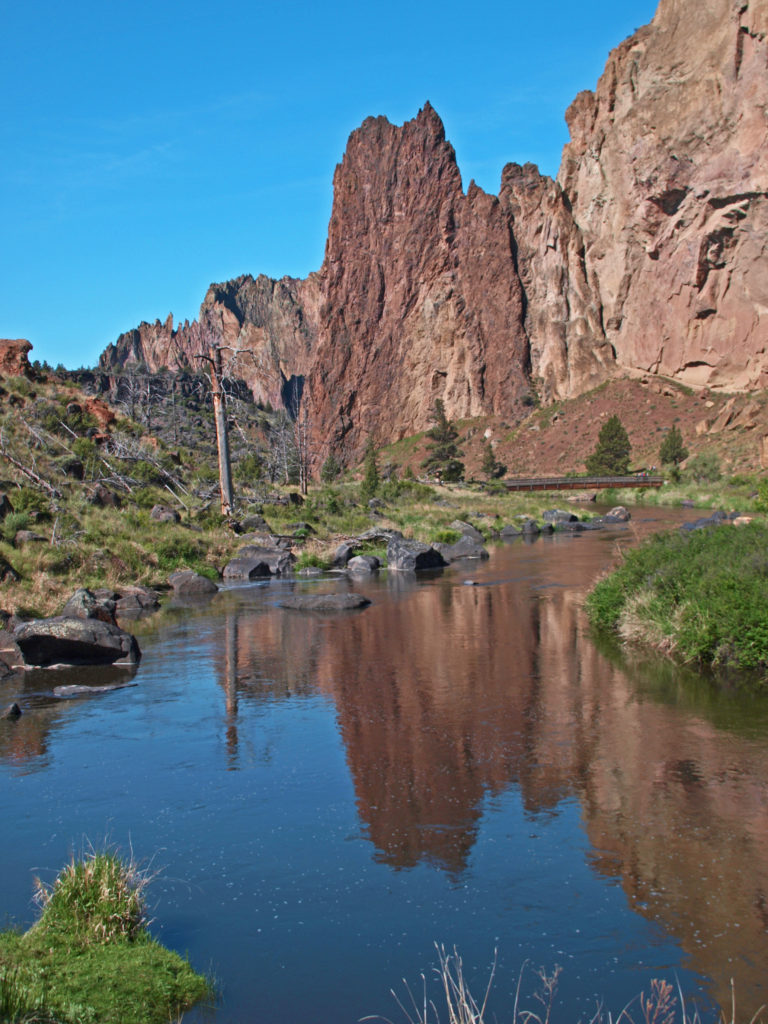
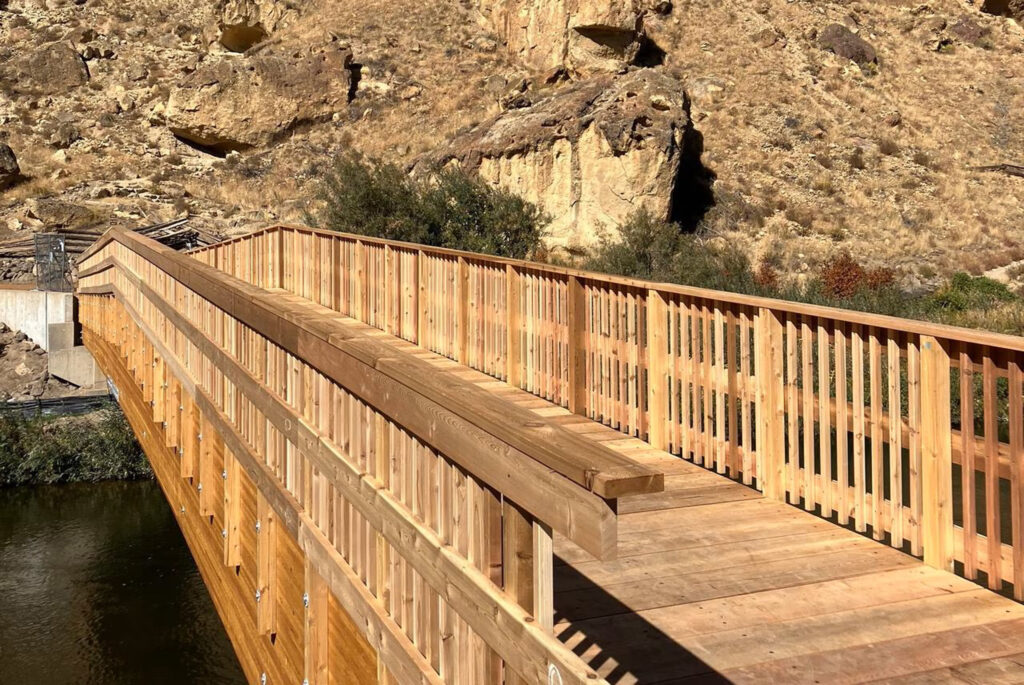
 On summer weekends you need to come early to have a chance of finding a place to park. The parking areas fill up quickly, and it’s not unusual to see cars parked along both sides of the road leading to the park and people walking in the road. There has been a shuttle system proposed that would allow visitors to park in the nearby town of Terrebonne and bus into the park, but that (to the best of my knowledge) has yet to be implemented. Even during the week, and on spring and fall weekends, parking can be a problem.
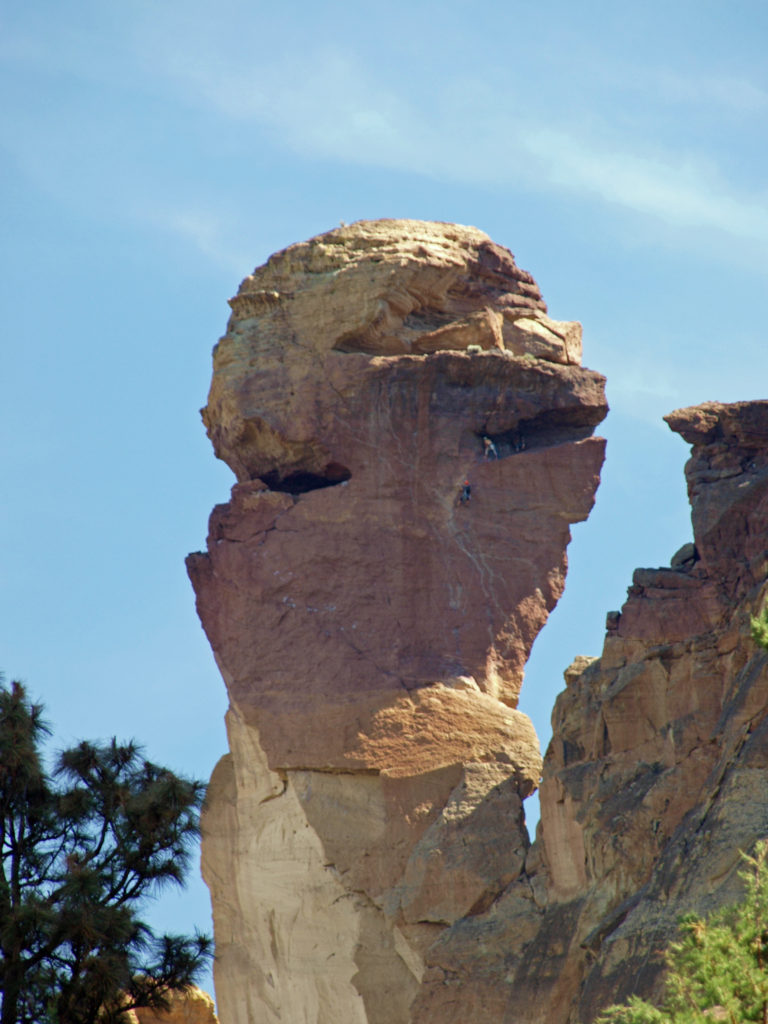
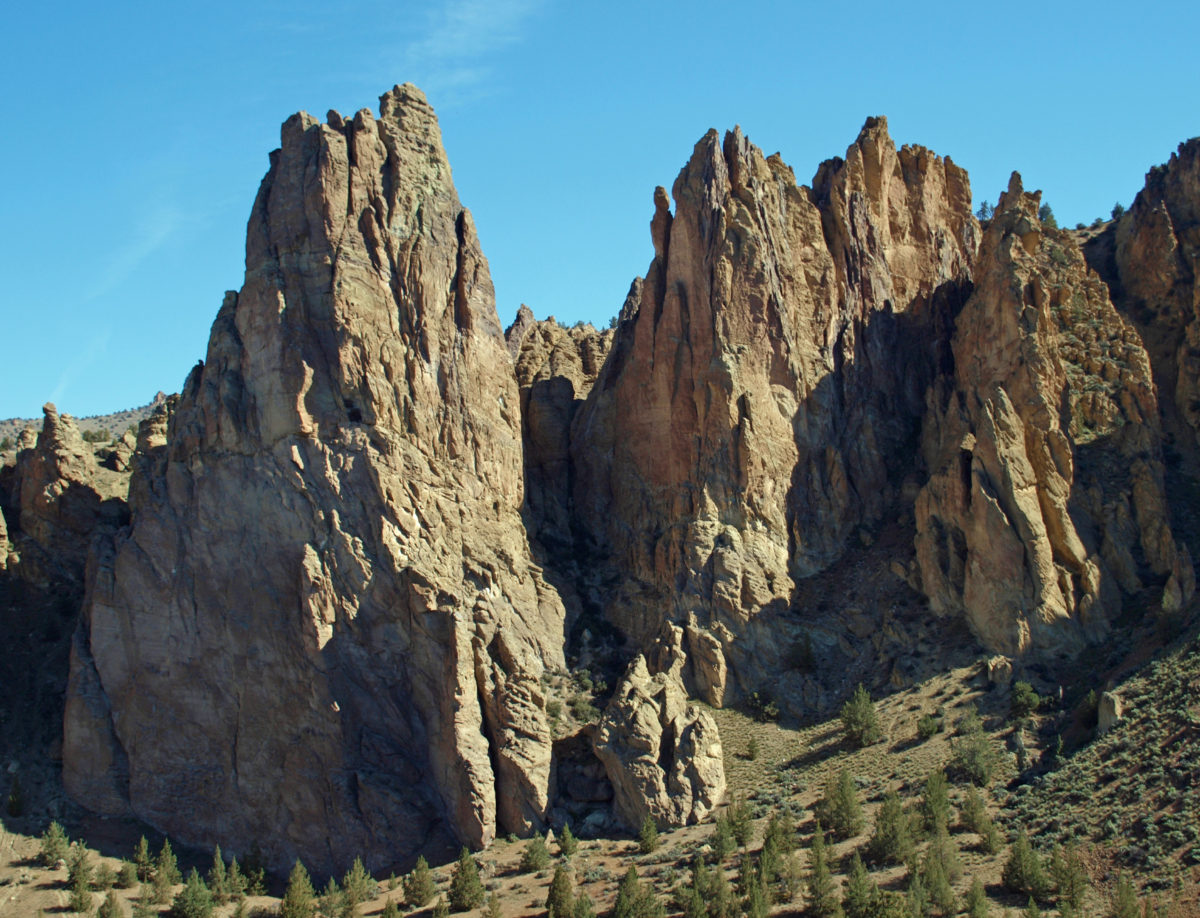

 Despite the crowds and other problems, Smith Rock is a Pacific Northwest bucket list destination, not to be missed. It’s a spectacularly beautiful place. But if you’re looking for a wilderness experience, you won’t find it at Smith Rock (except maybe in the middle of winter). If you don’t mind sharing the place with others, though, the park is large enough that visitors tend to spread out, and even at full capacity the park doesn’t feel overly crowded if you get a little ways away from the parking areas. (A recent visitor survey found that 69% of the respondents felt the park to be somewhat to very crowded, however.)
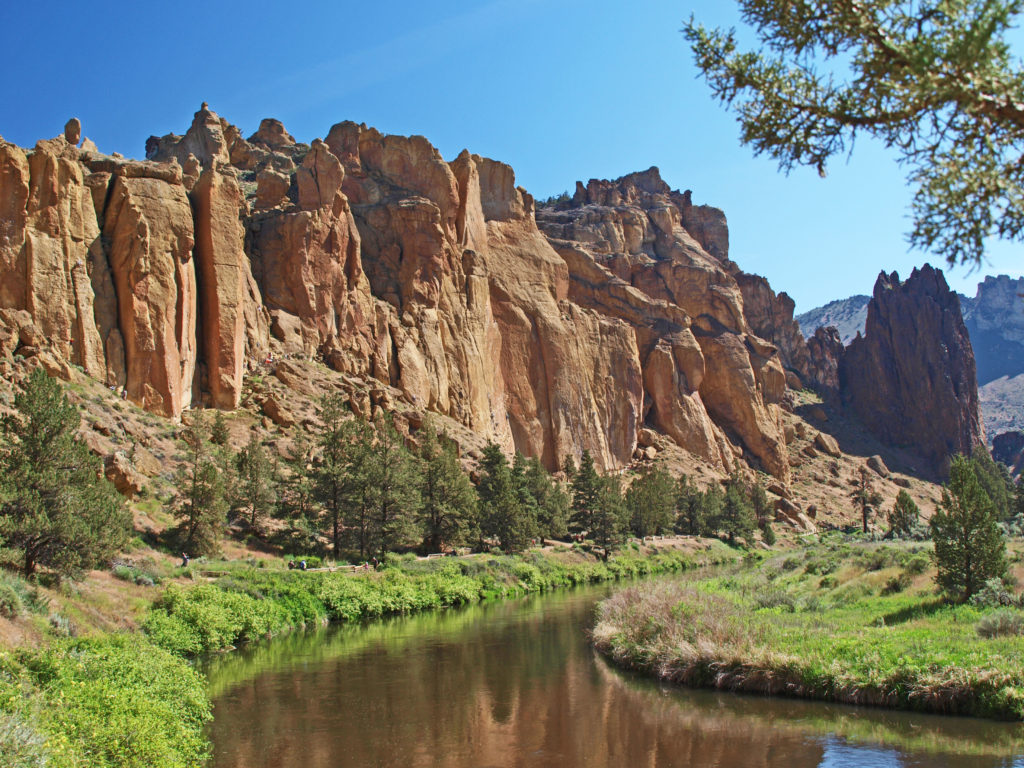
 The park is located just east of the town of Terrebonne, which is about 25 miles north of Bend, Oregon, and about 140 miles southeast of Portland. For more information, go to the
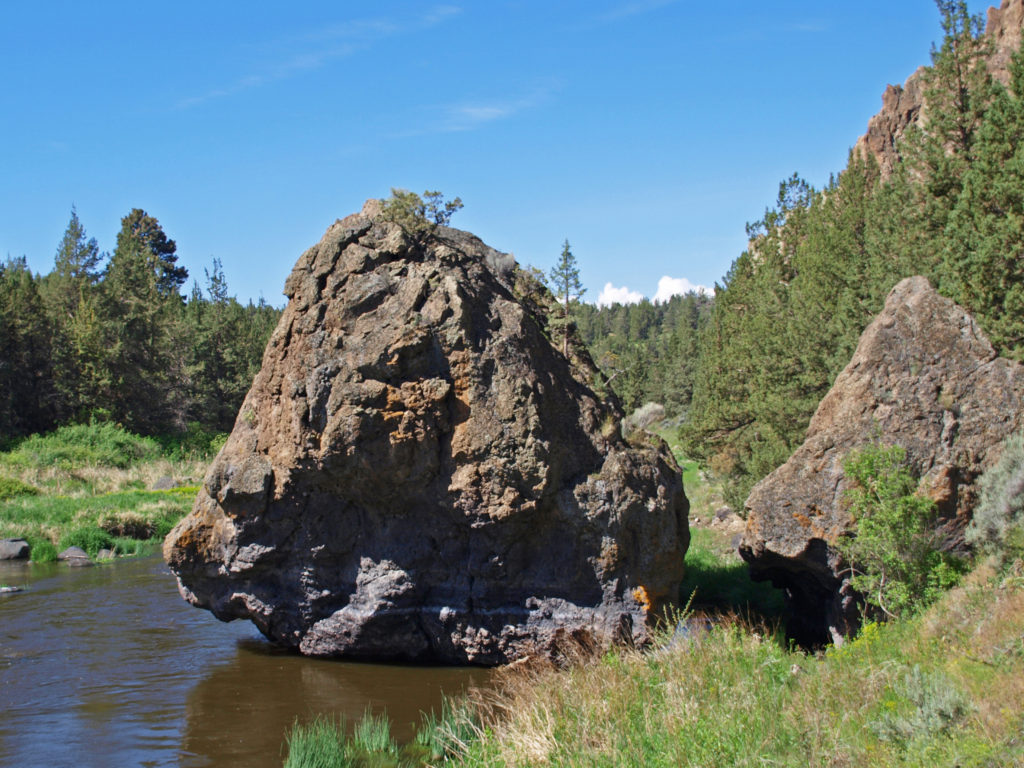


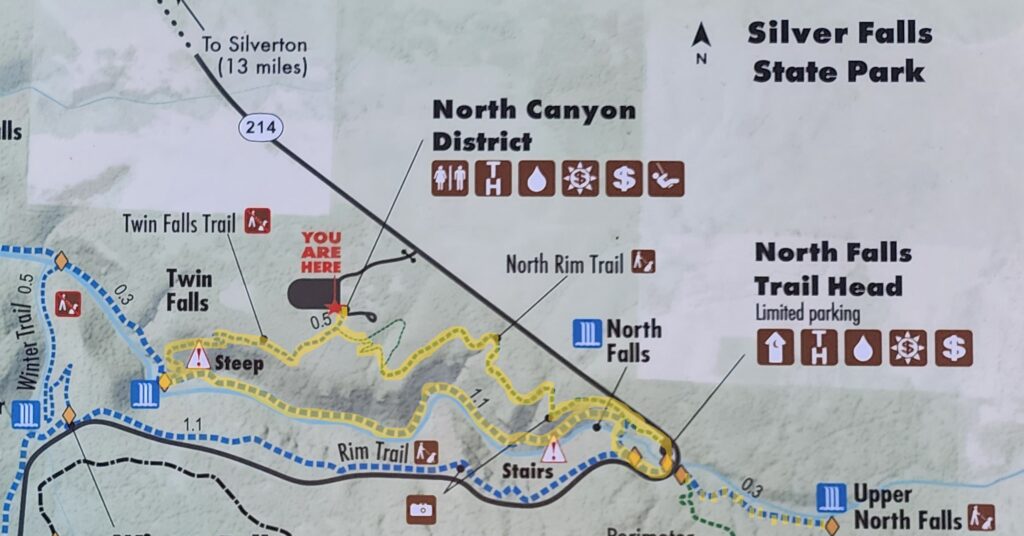

 Beyond the Twin Falls Trail junction, the North Rim Trail meanders through the forest, passing a children’s play area and a small two-table picnic area.
 For a map of the entire park, click
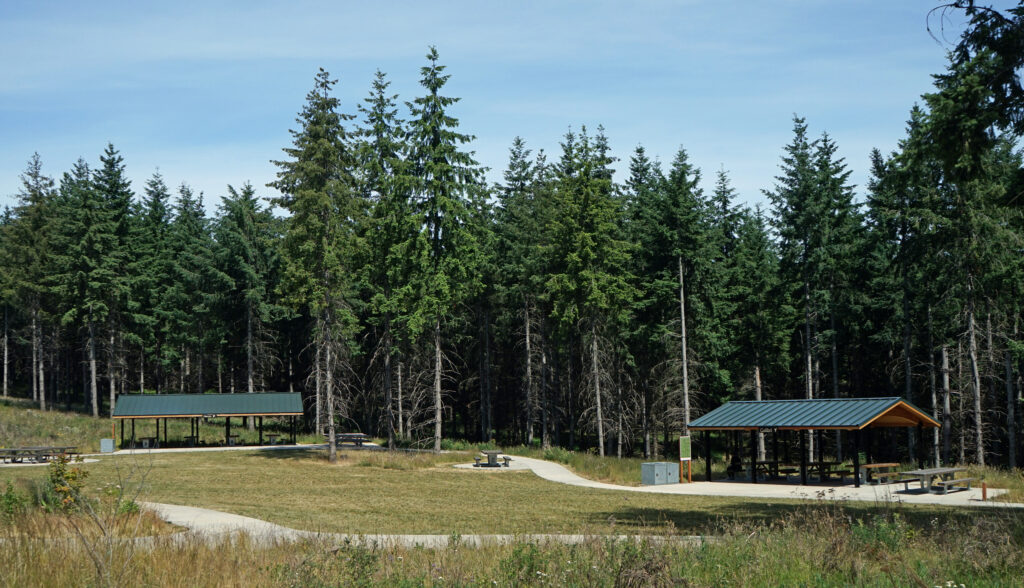
 Chehalem Ridge Nature Park is in a rural area with no other close by hiking or biking opportunities, but the west metro area, not far from Chehalem Ridge, has an abundance. Some of my favorite hikes in the area include

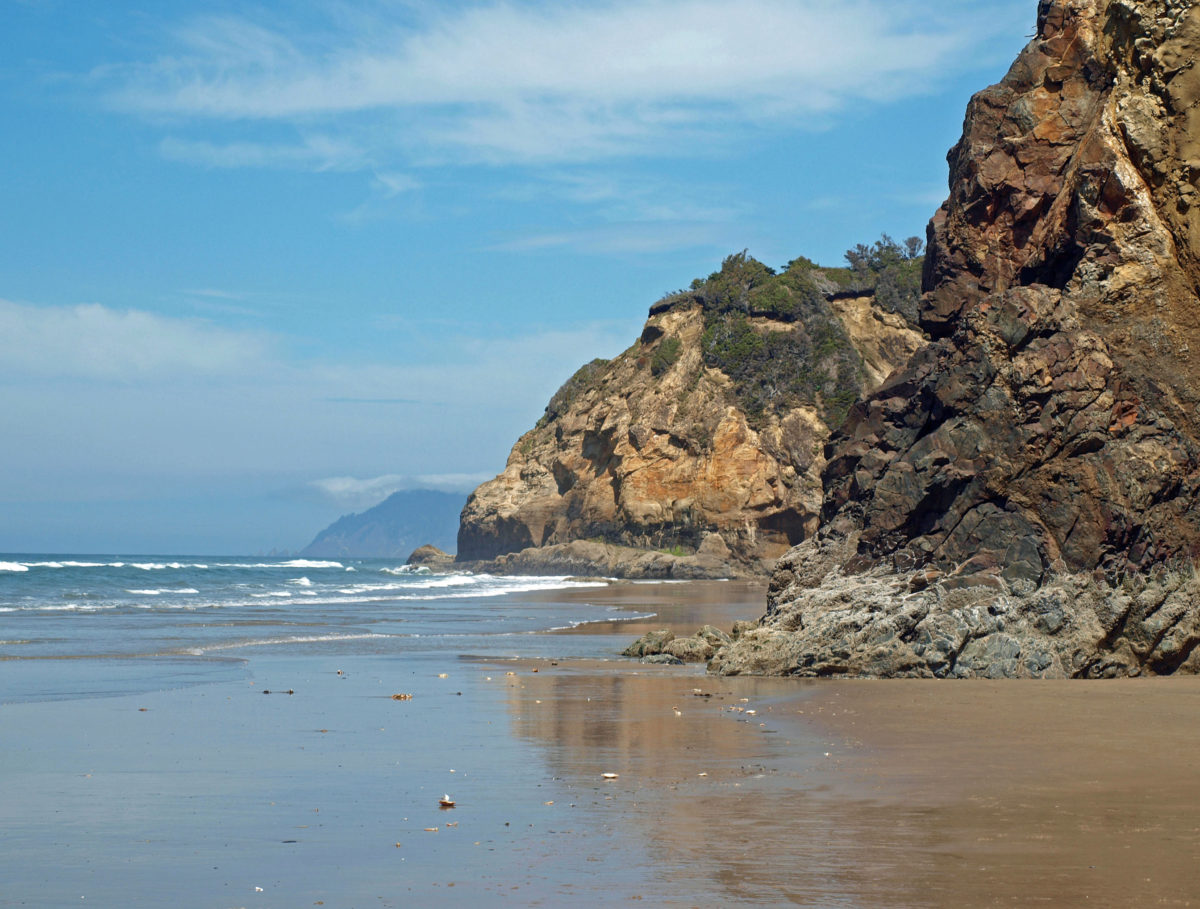
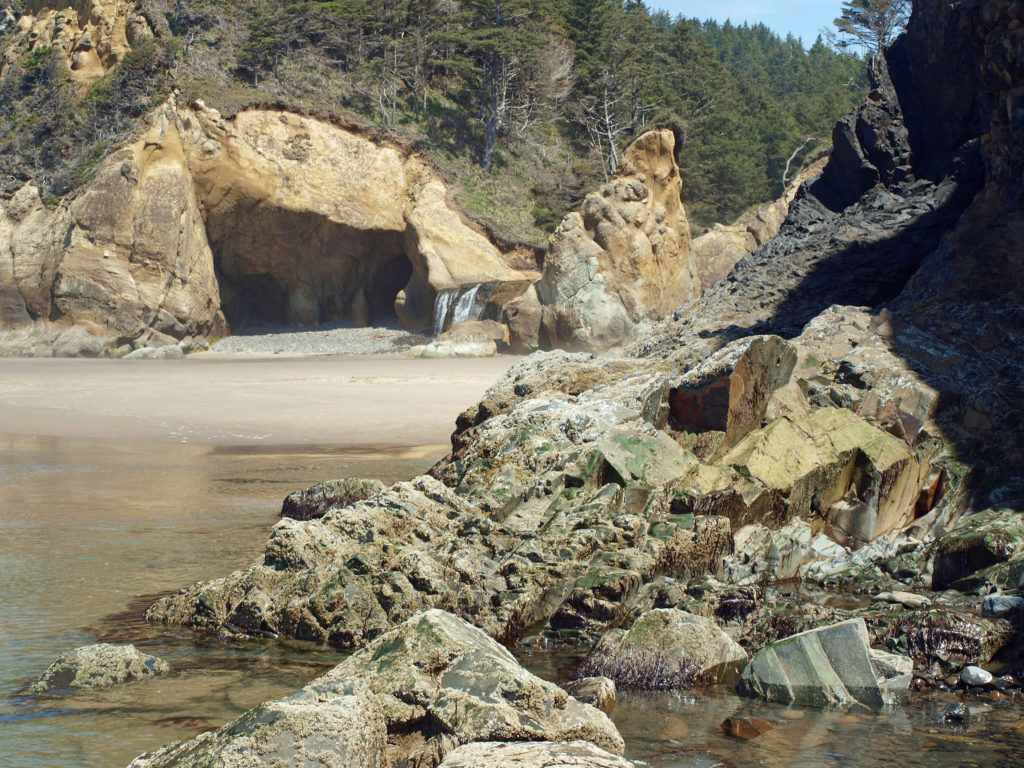
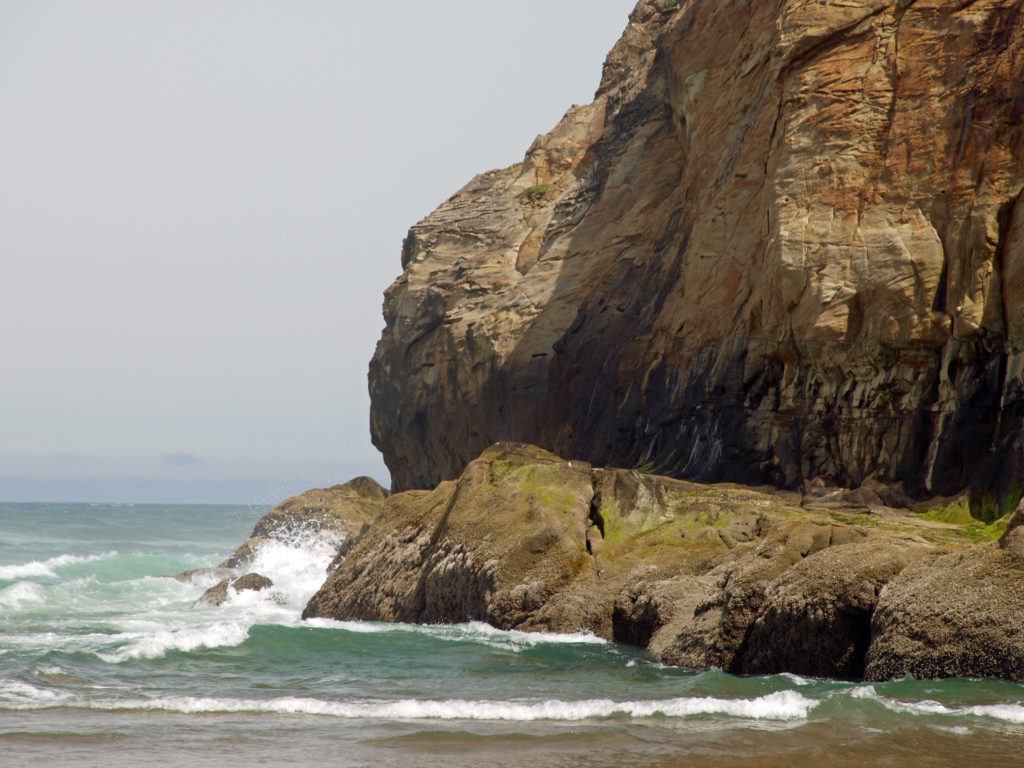
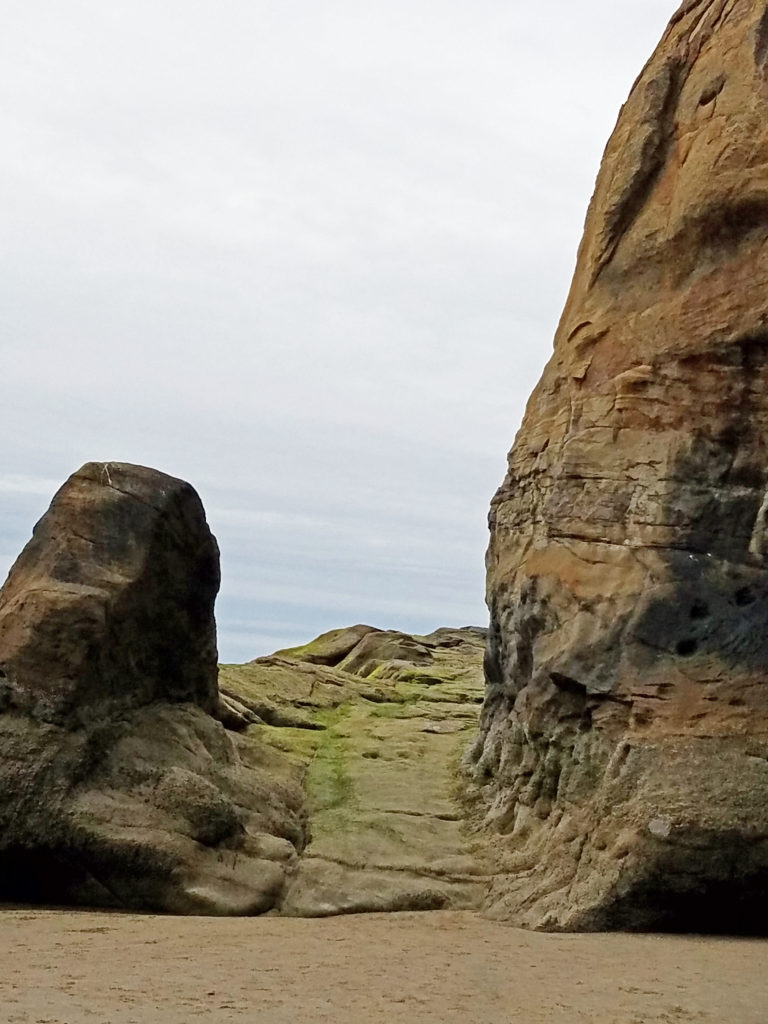
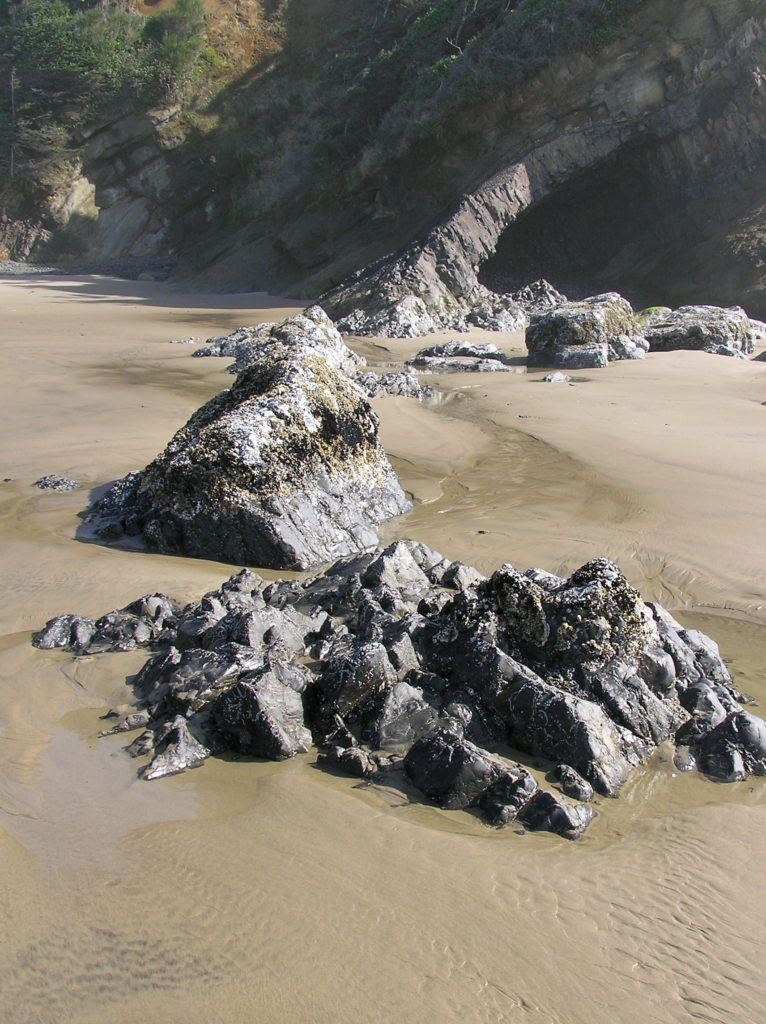
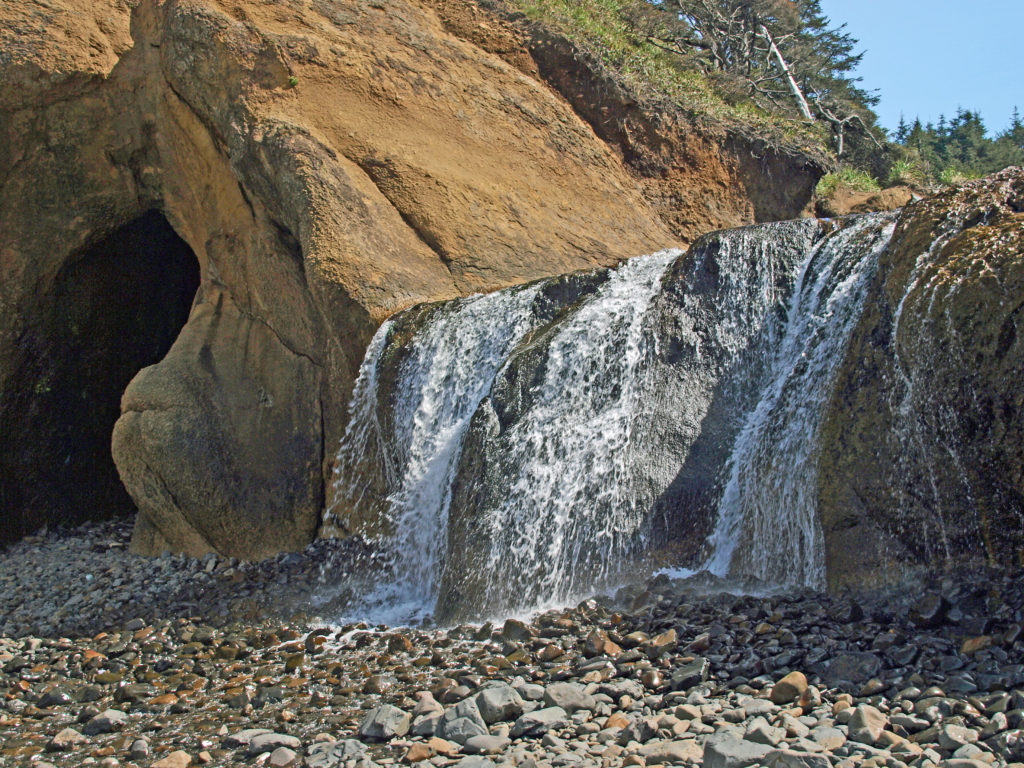
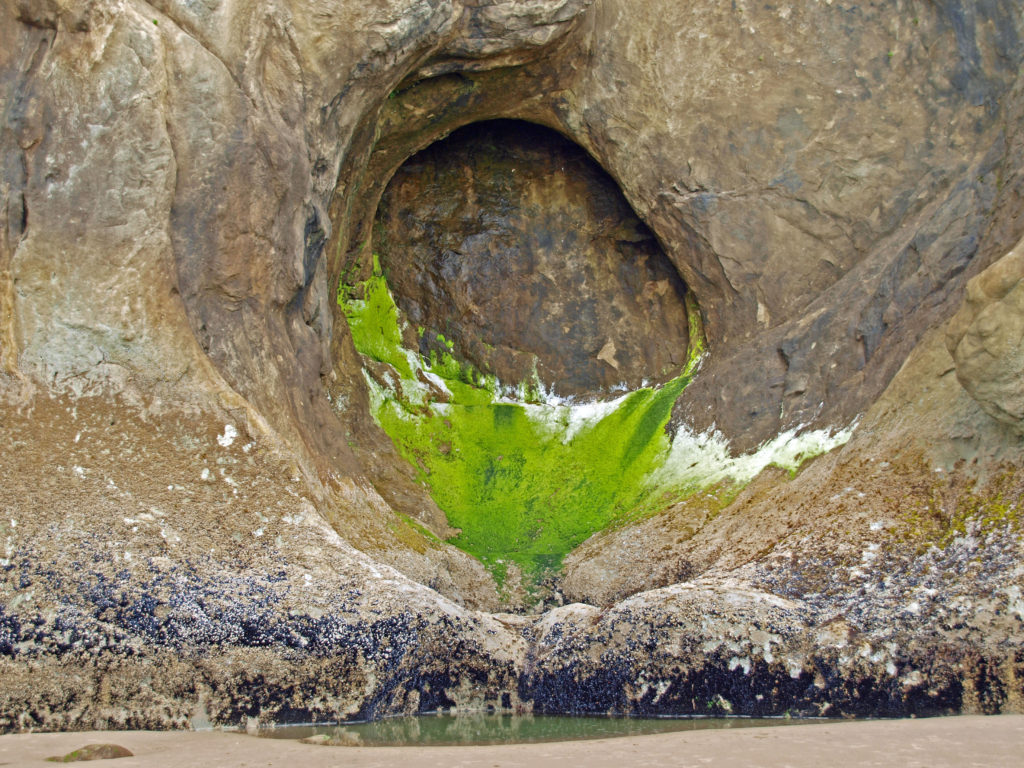
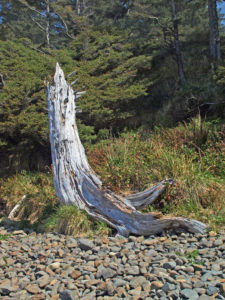
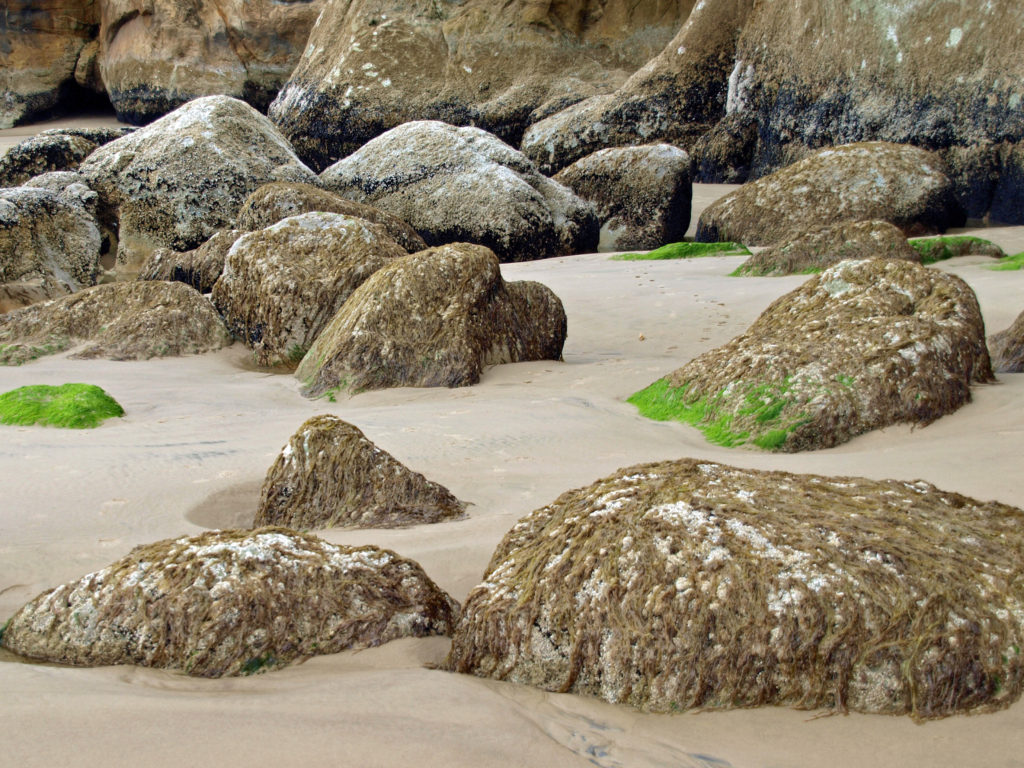
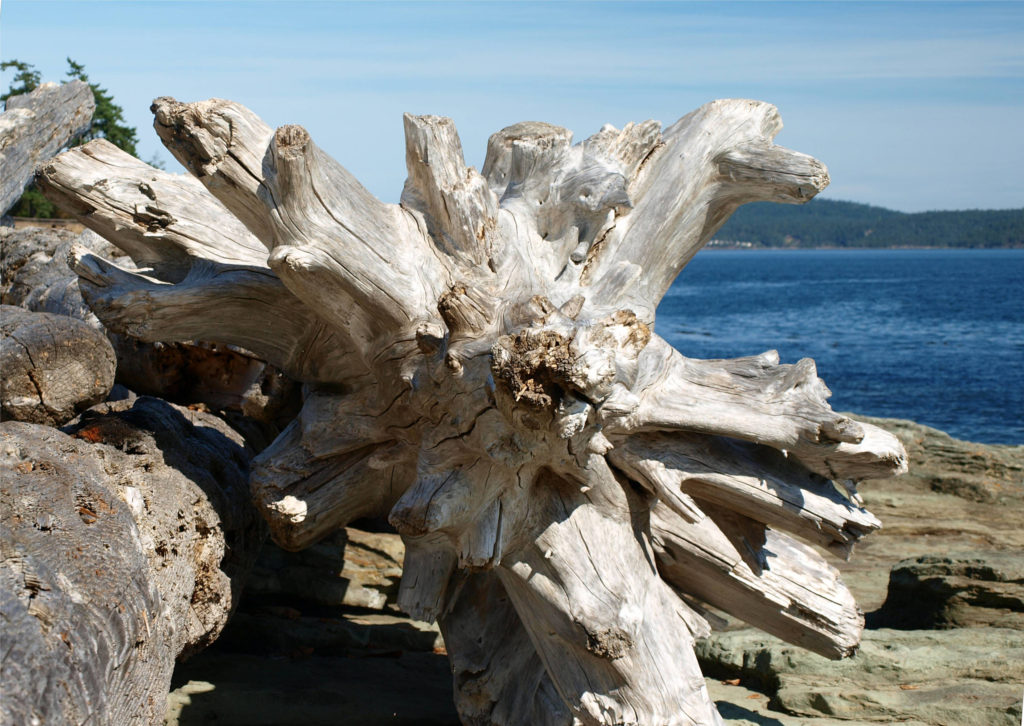
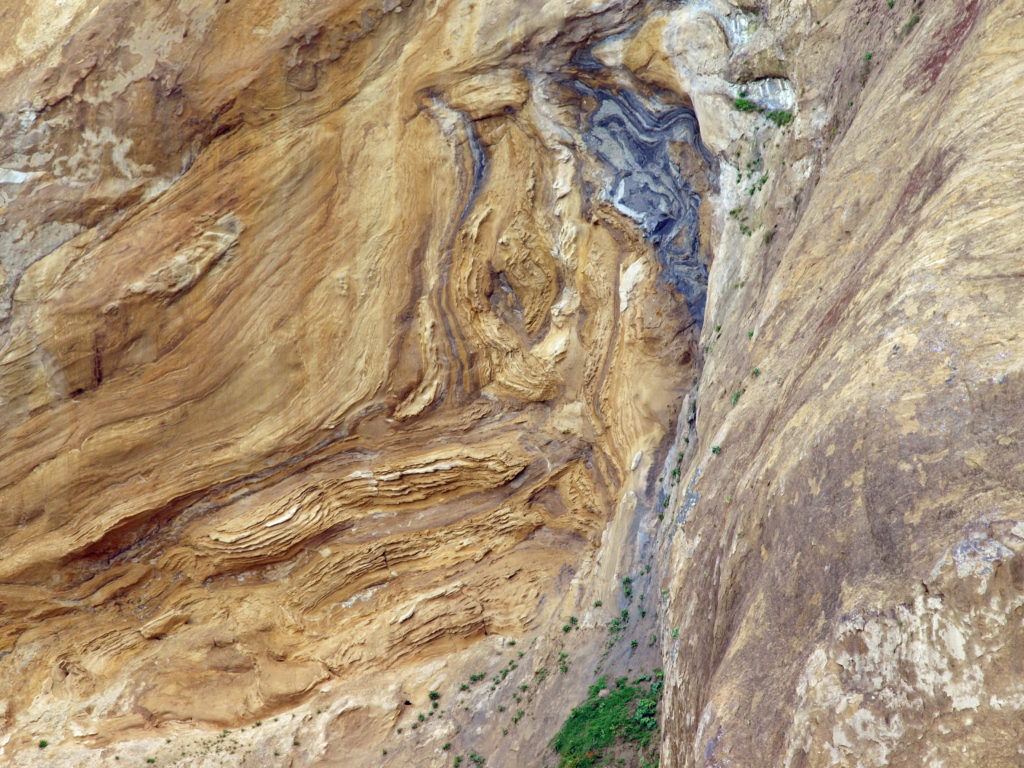 I love the eroded sandstone rock formations found at Hug Point. The layered sandstone of the point has been warped and folded by tectonic processes and eroded by wind and water into fantastic formations. The tidewater rocks are covered in green algae and seaweed, barnacles, and mussels. The rocks, sand, colorful vegetation, waves, and ever changing light make for great photo opportunities.
 Hug Point State Park is located about five miles south of Cannon Beach. The point can also be reached from Arcadia Beach State Park, about a mile to the north. It’s an easy day trip from the Portland area, but there many other attractions in the area, so many visitors spend a weekend or longer in the area.
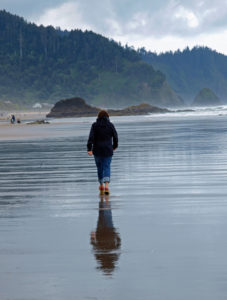
 The nearby towns of Cannon Beach, Seaside, and Manzanita all have numerous motels, BNBs, and other accommodations, as well as many restaurants and cafes serving fresh seafood and other locally sourced foods.
 One note of caution, though. If you go, pay attention to the tides. The waterfall and caves that draw most of the visitors to Hug Point State Park are nestled between Adair Point, immediately north of the beach access, and Hug Point itself. At high tide it can be difficult or impossible to get around these two points, so it is possible to get trapped between them.


 Overview:
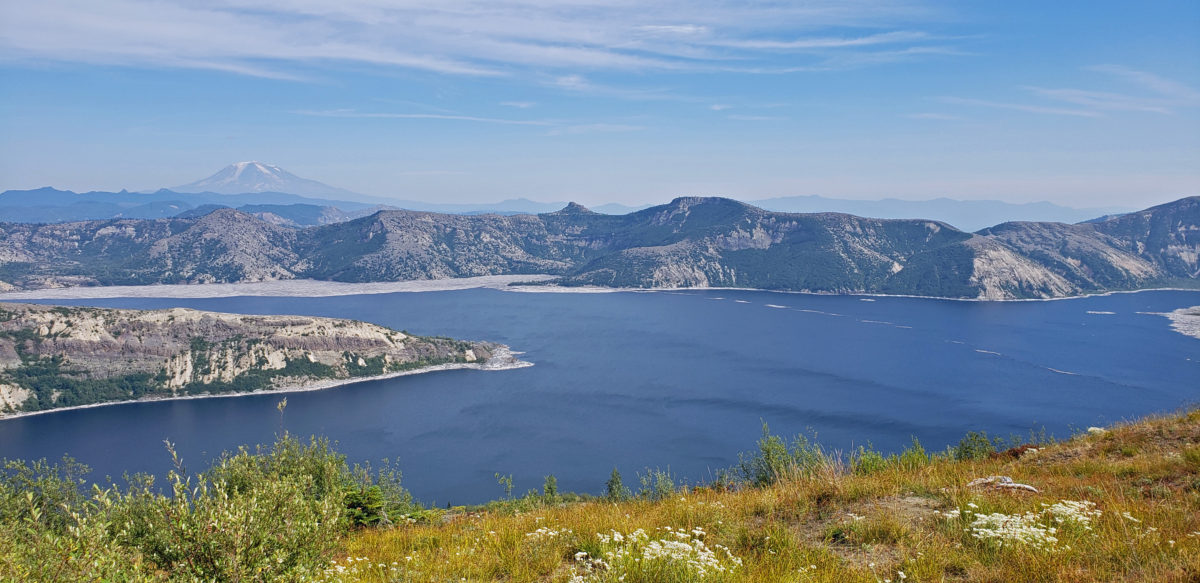
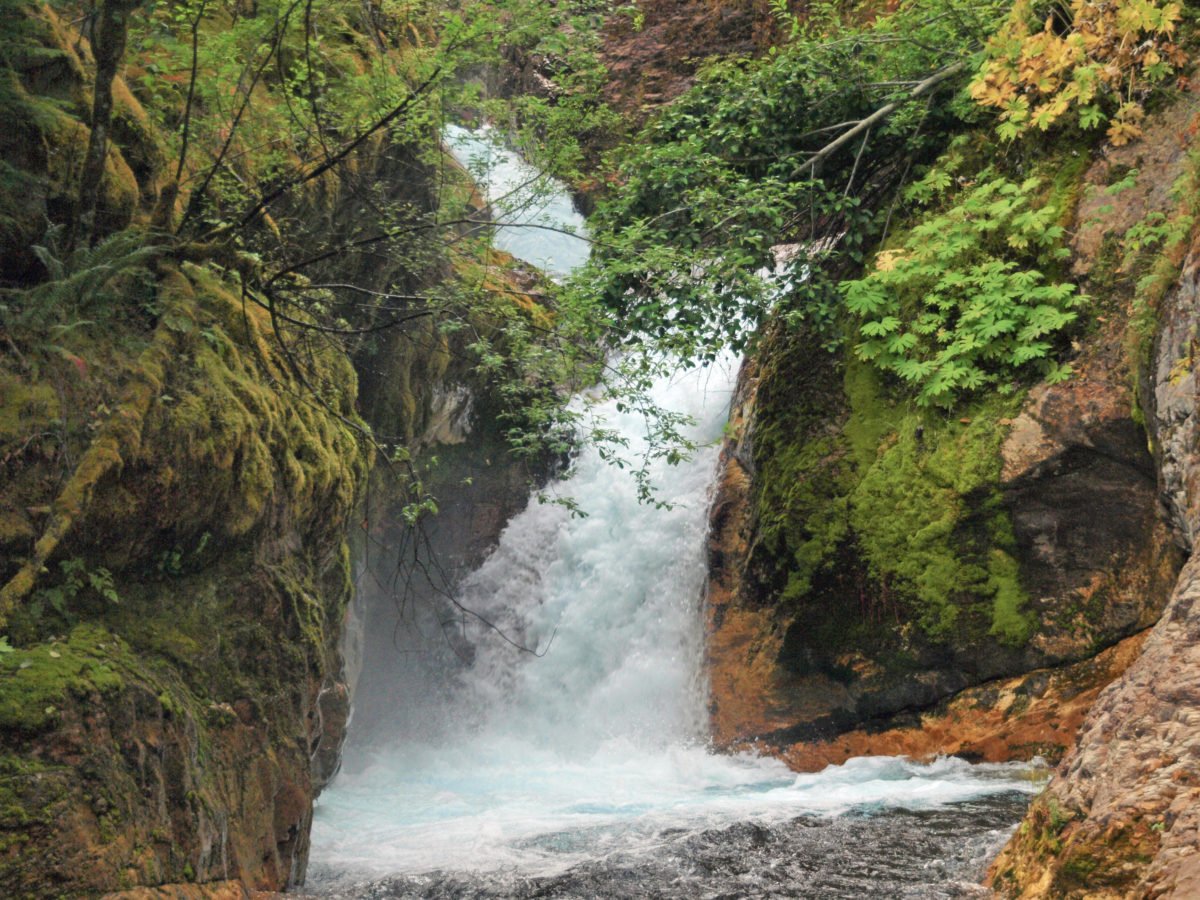
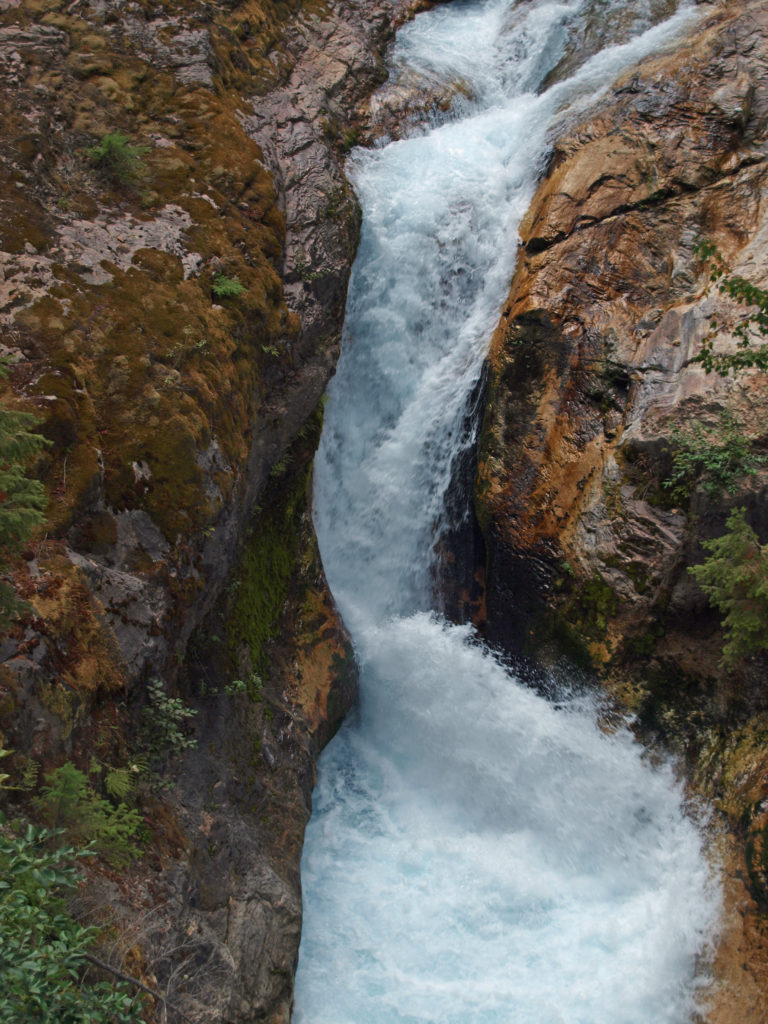
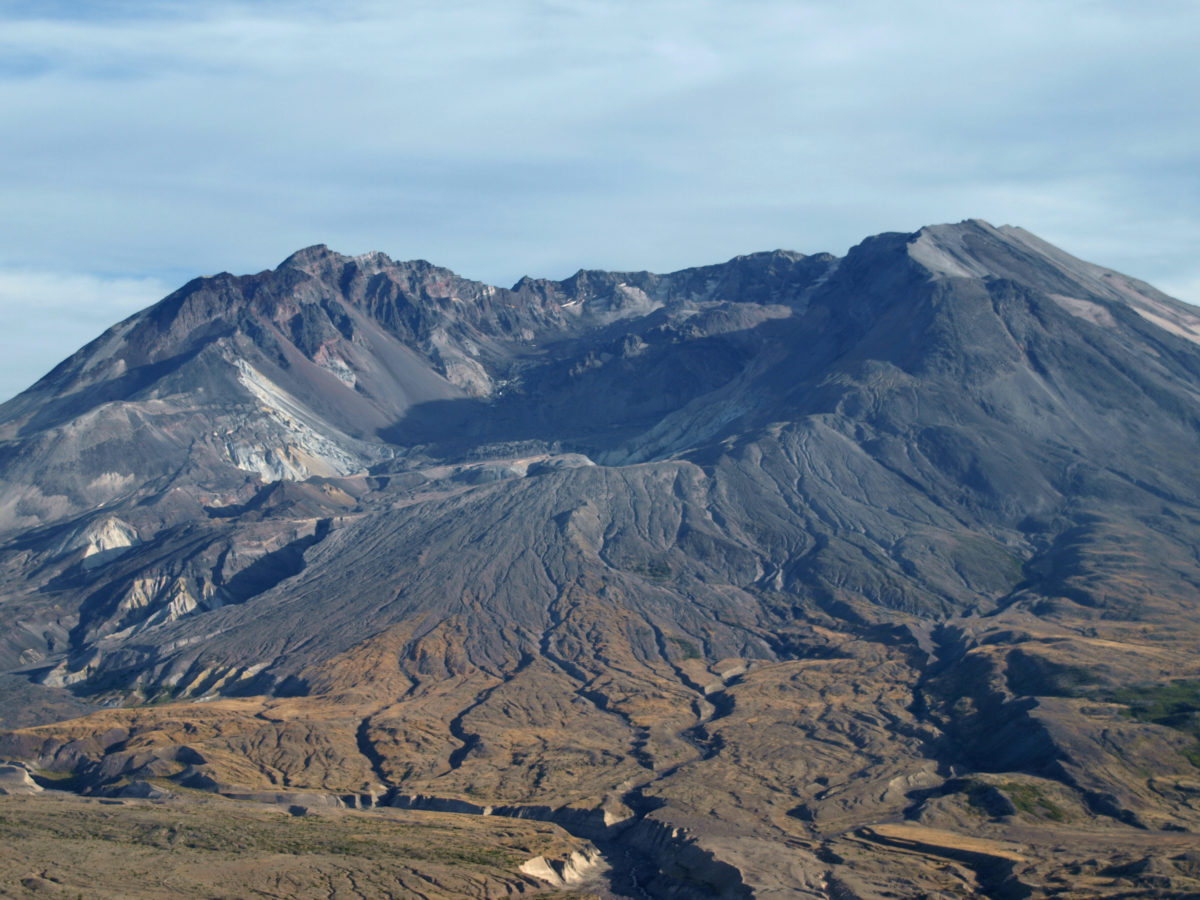
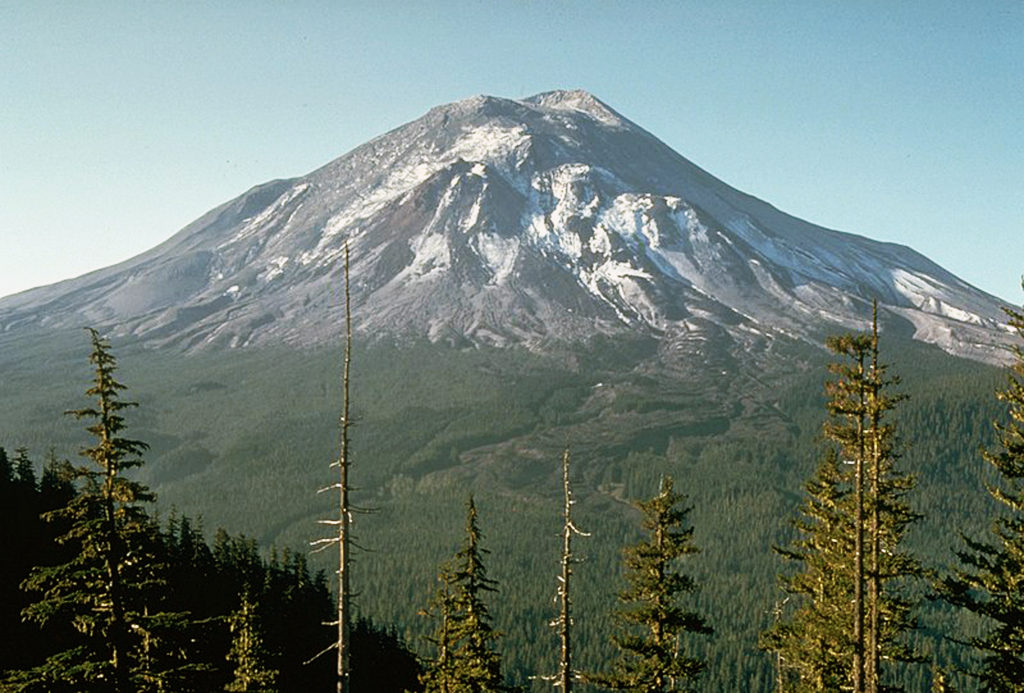
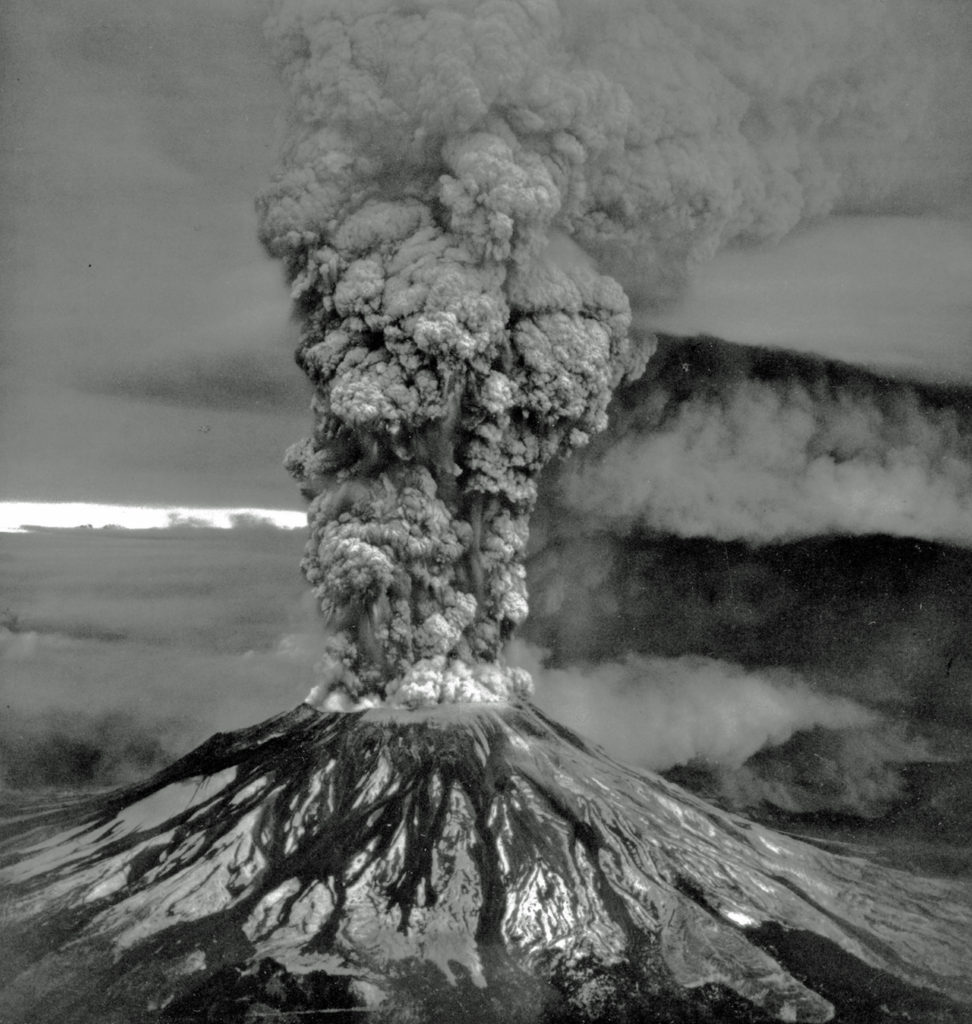
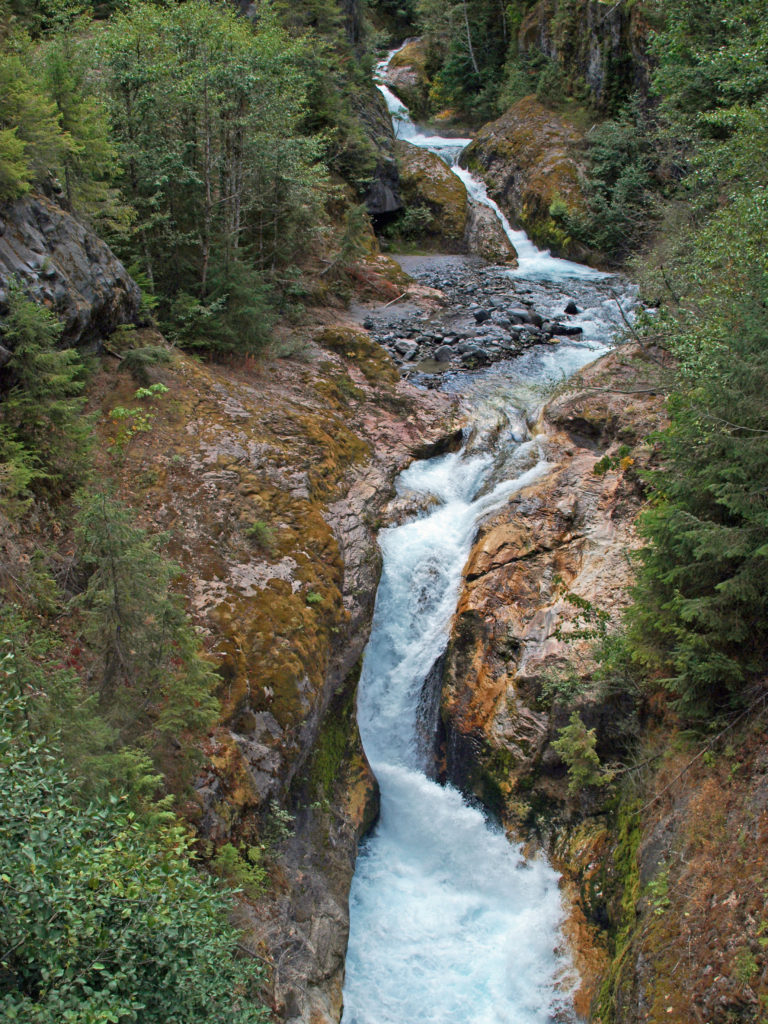 The history of Lava Canyon begins about 3500 years ago when an eruption of Mount St. Helens sent a flow of lava down the old valley of the Muddy River, destroying the forest and filling the valley with molten rock. Over the intervening years, the Muddy River cut a new course through the lava flow, and the canyon gradually filled with sediment. Then came the 1980 eruption, which melted the summit glaciers and sent a huge lahar (volcanic mudflow) down the valley, destroying the rebuilt forest and scouring out the built-up sediment, exposing the remnants of the earlier lava flow. What was left is a steeply descending canyon with an almost continuous series of spectacular waterfalls and cascades. (For more information on the 1980 eruption, see my
  Getting there:
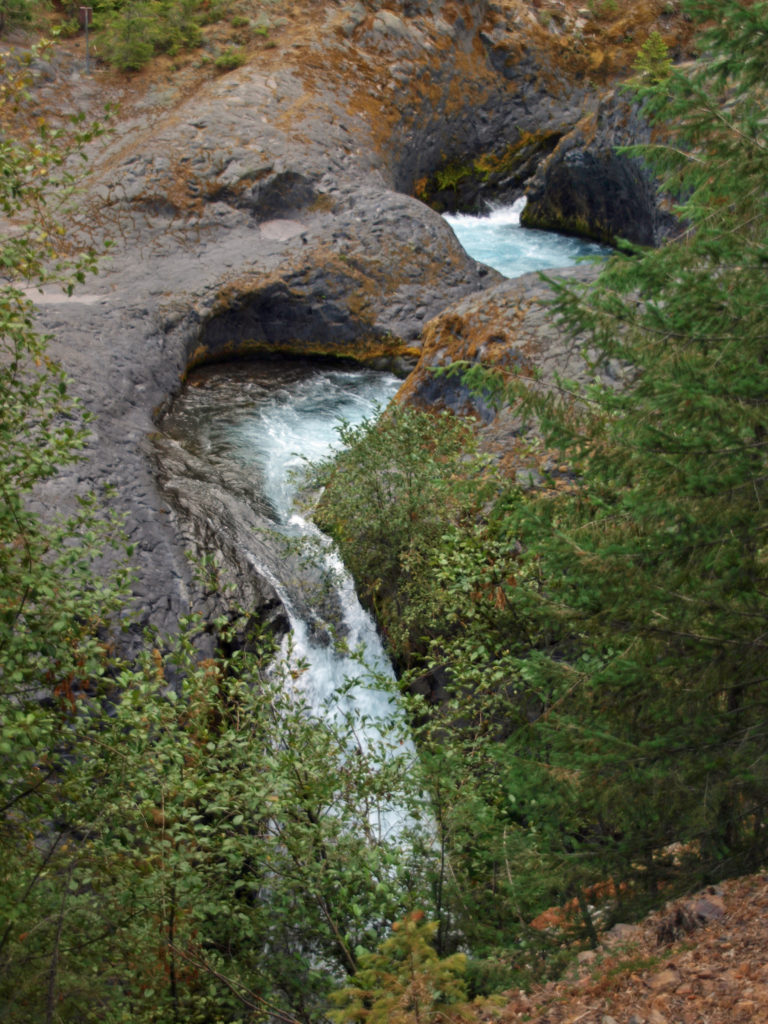 Trailheads:
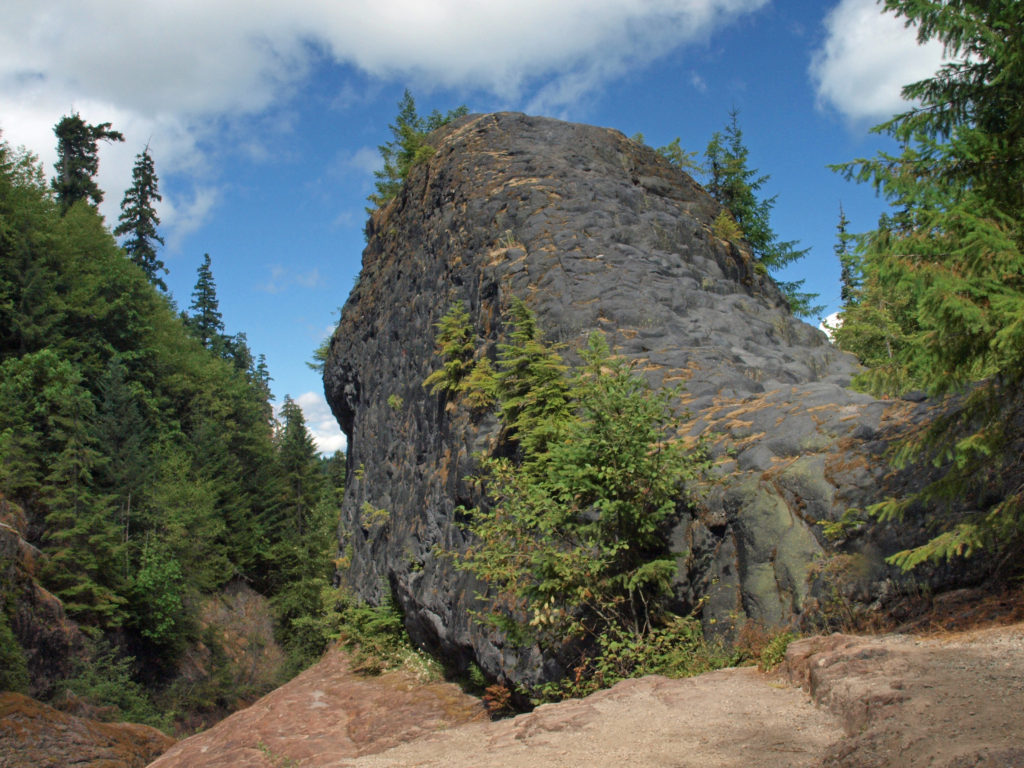 The hike:
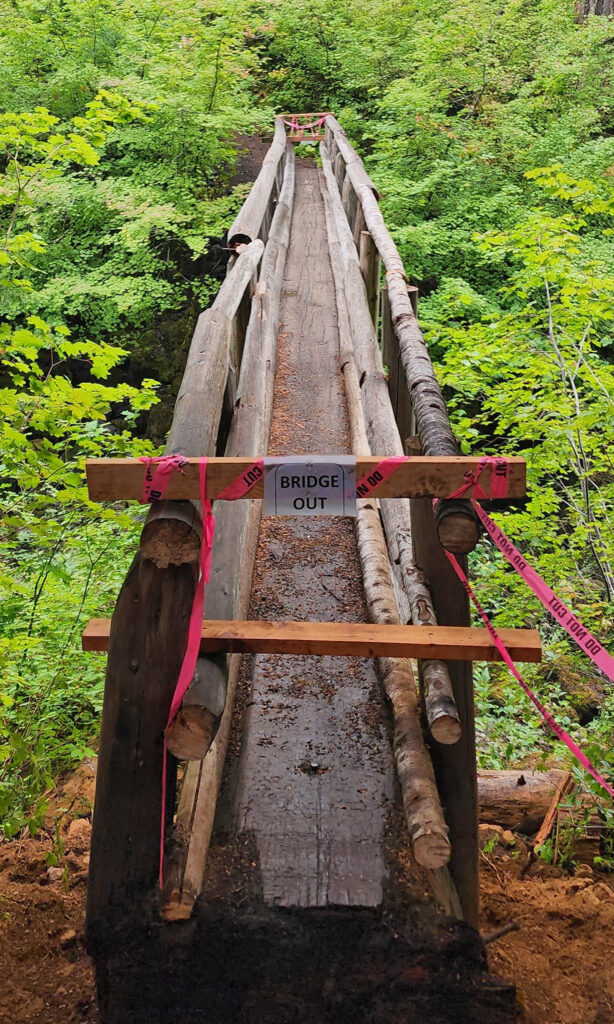
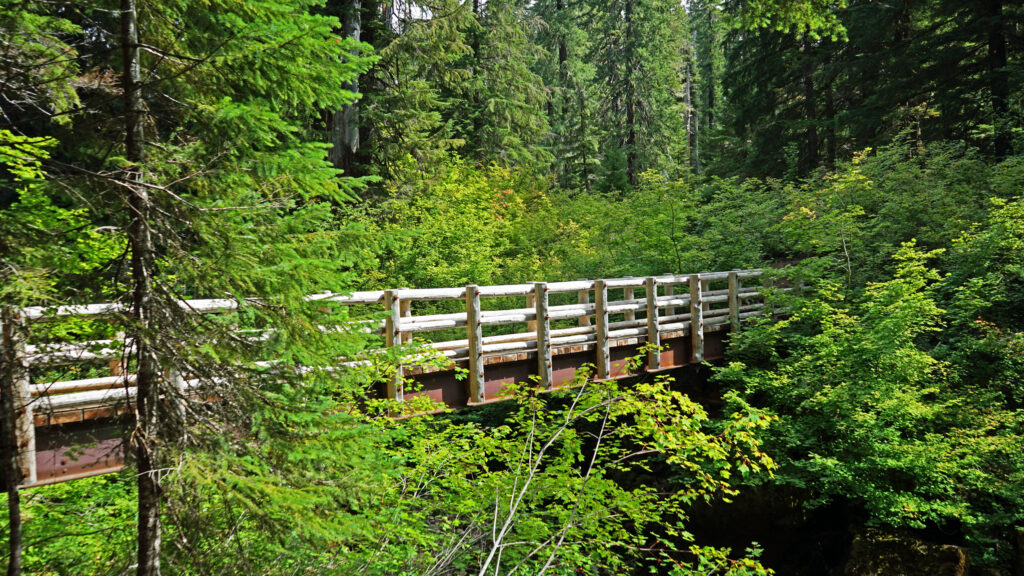
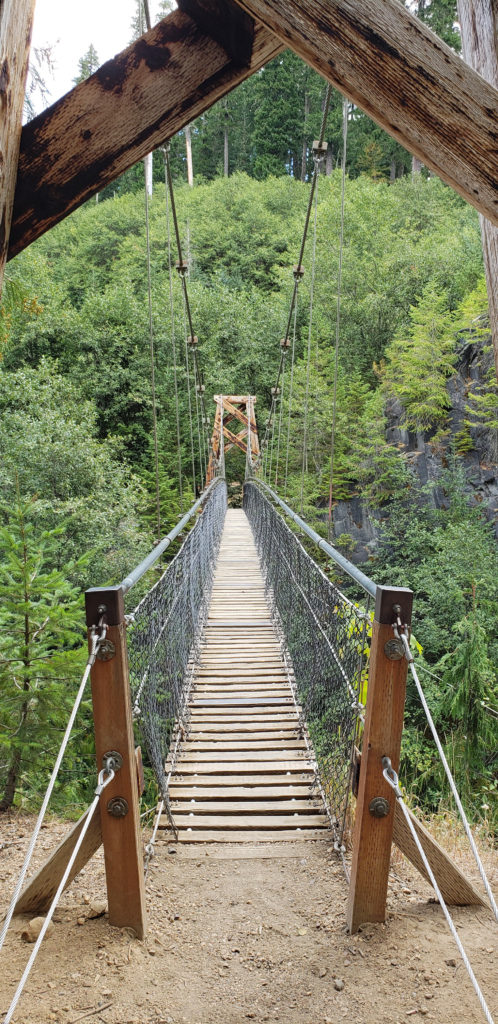 Below the overlook, the path is rock and dirt, steep in places. After another three tenths of a mile, you come to another side trail and a suspension bridge over the river that gives a bird’s eye view of the canyon and waterfalls. On the other side of the bridge is a connecting trail that takes you back to the upper bridge, making for a 1.4-mile loop. (Update: As of June 2023 the suspension bridge is closed. Check the National Forest Service’s
 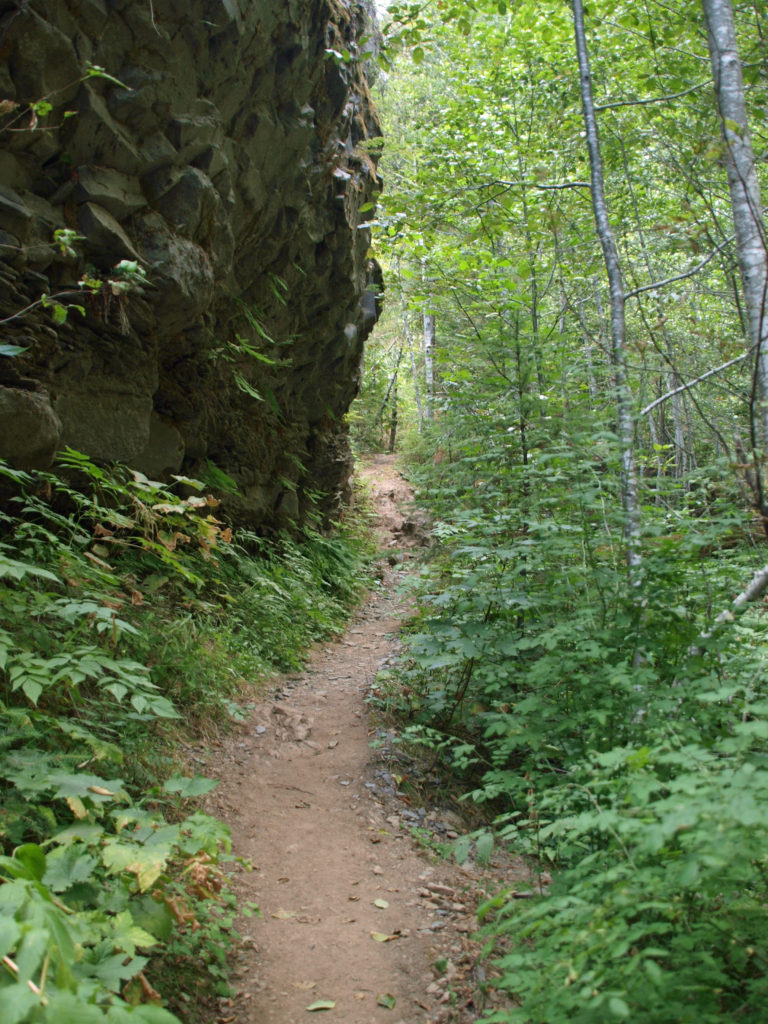 At about the 1.3-mile mark, the trail descends a 40-foot ladder to the base of the rock formation known as The Ship. Before 1980, sediment filled the canyon to the top of The Ship, to give you an idea of how much sediment was scoured out of the canyon. A short but steep side trail (and another ladder) leads to the top of The Ship.
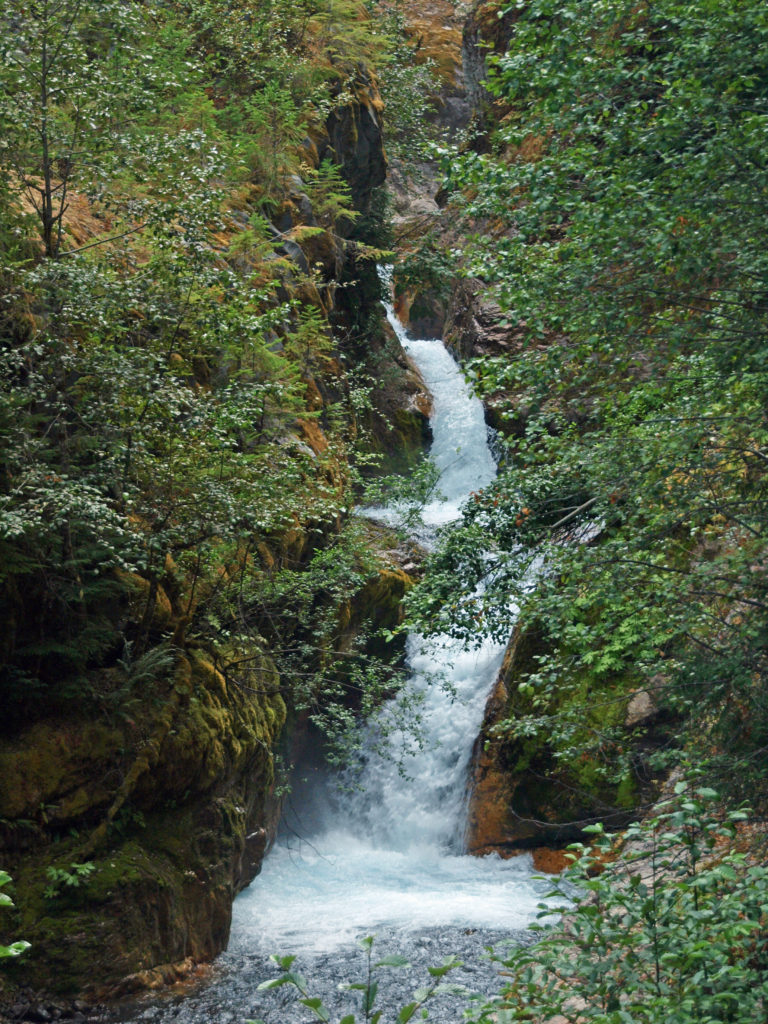 (Below The Ship, the trail continues another 1.5 miles to the lower trailhead. The entire hike from upper to lower trailhead and back is about six miles and the elevation gain coming back is 1350 feet.)
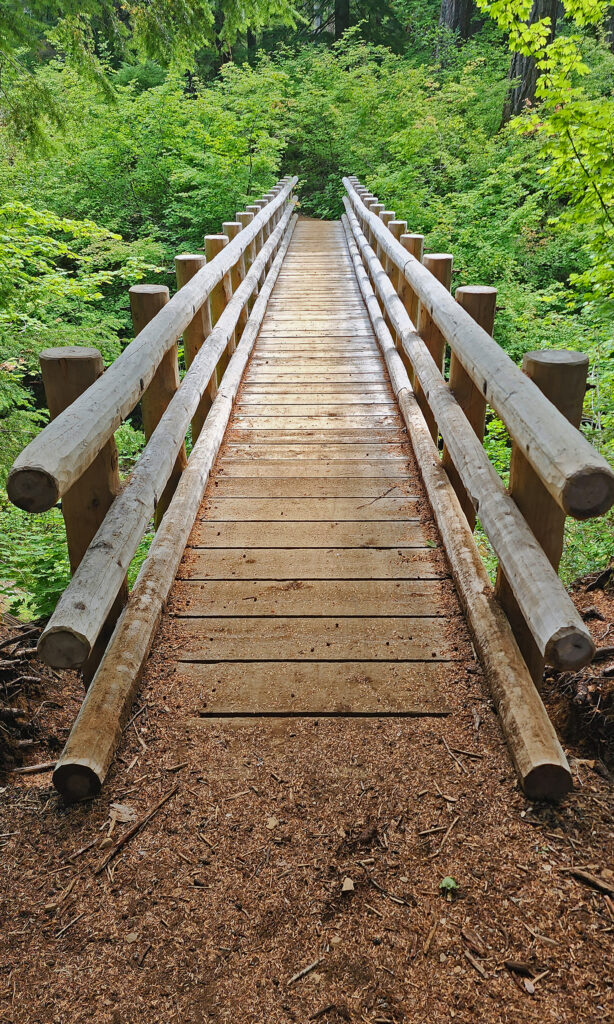
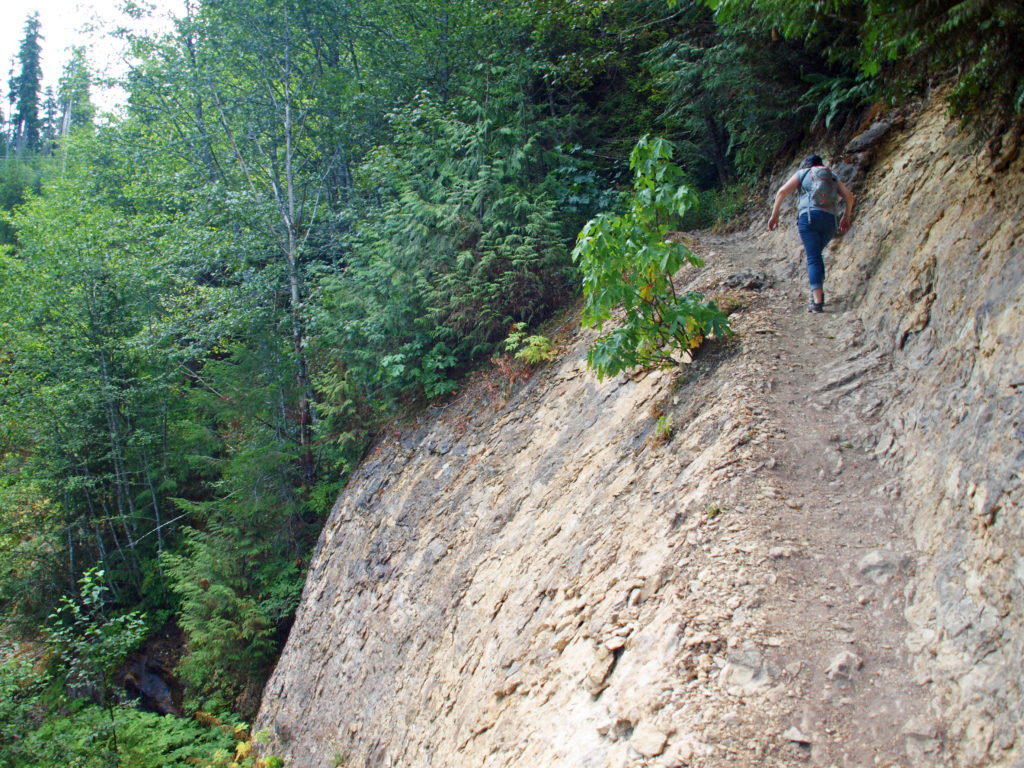 Return from The Ship the way you came. Cross the suspension bridge if it is open and take the trail on the opposite bank to the upper bridge and re-cross the river. The two bridges both give you great views of the river and canyon below.
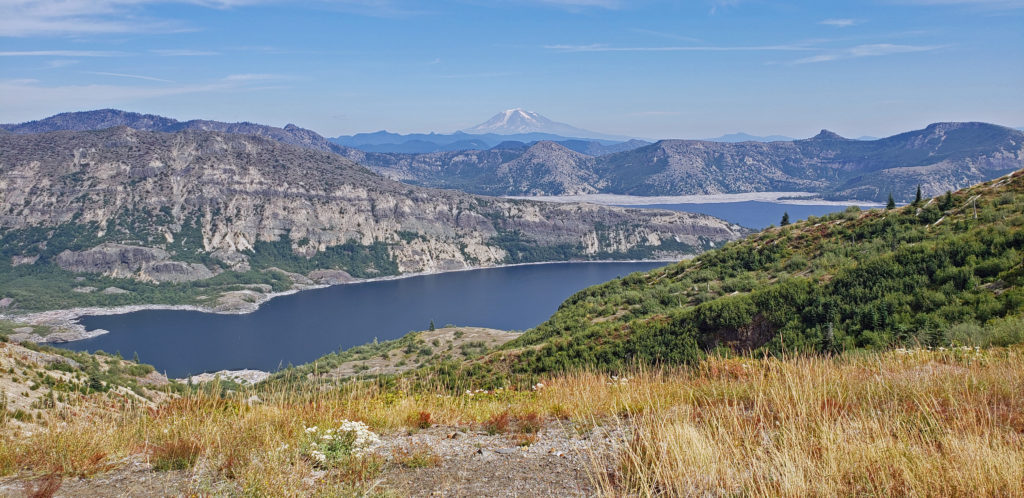
 Originally posted in a different format September 29, 2018 by Alan K. Lee. Updated and re-posted March 23, 2021. Edited, updated and posted in this format June 29, 2023.


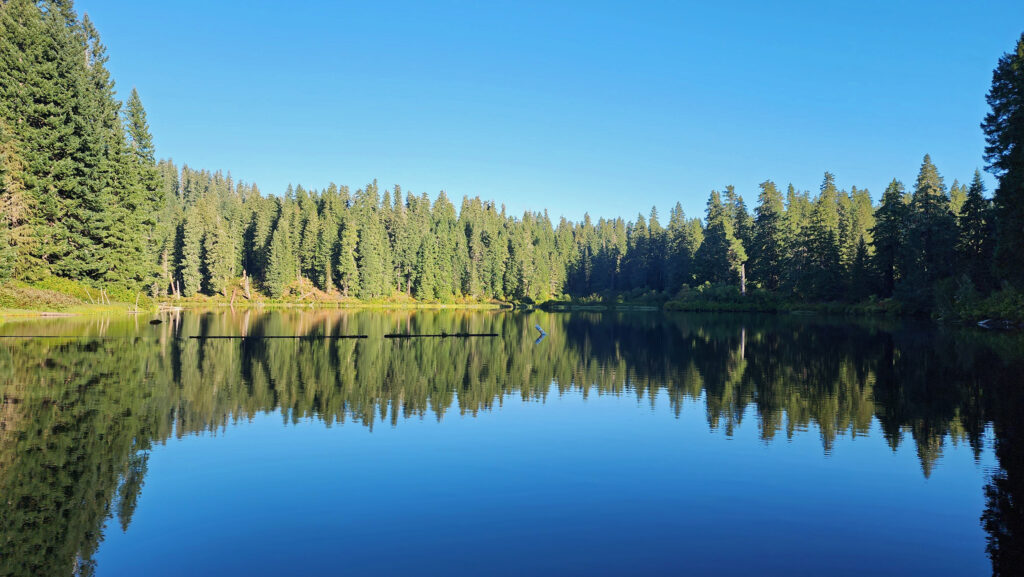
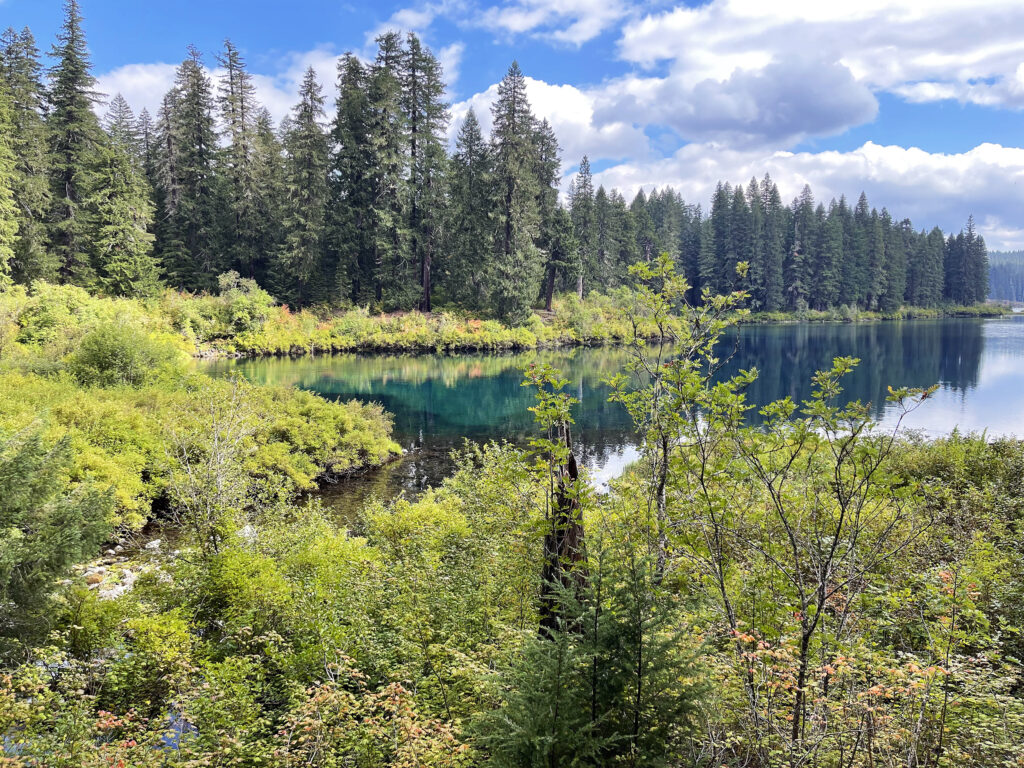
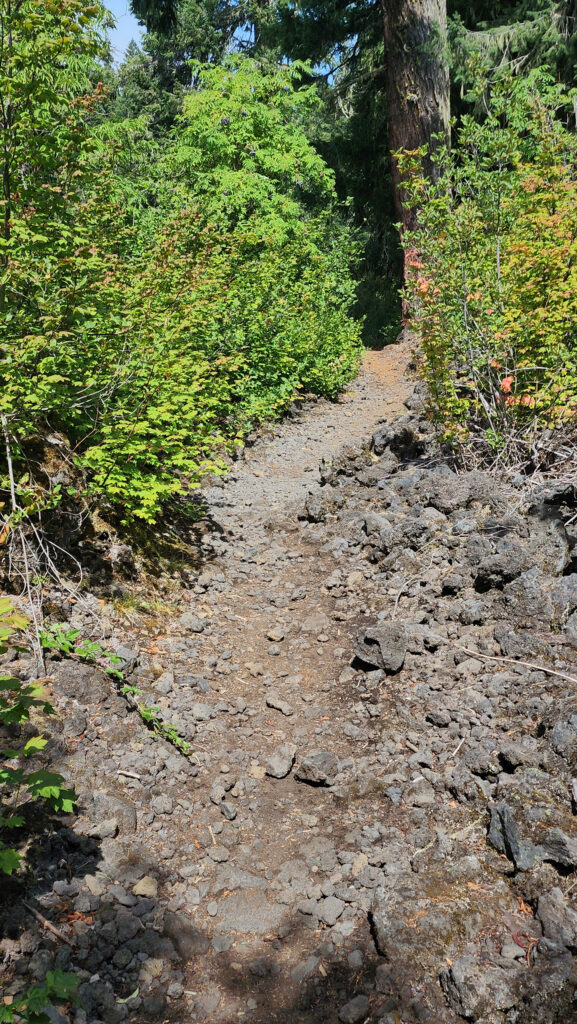
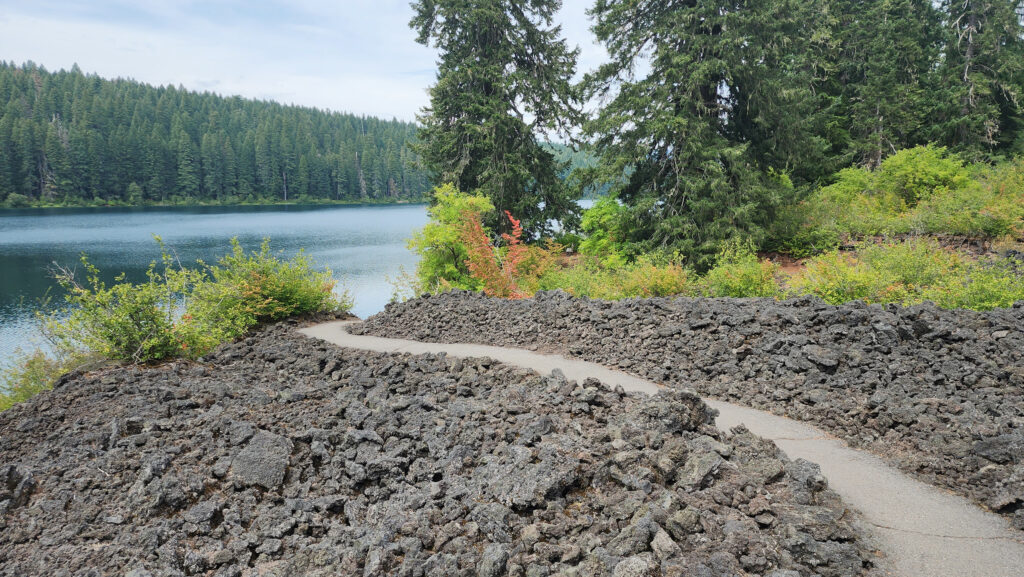
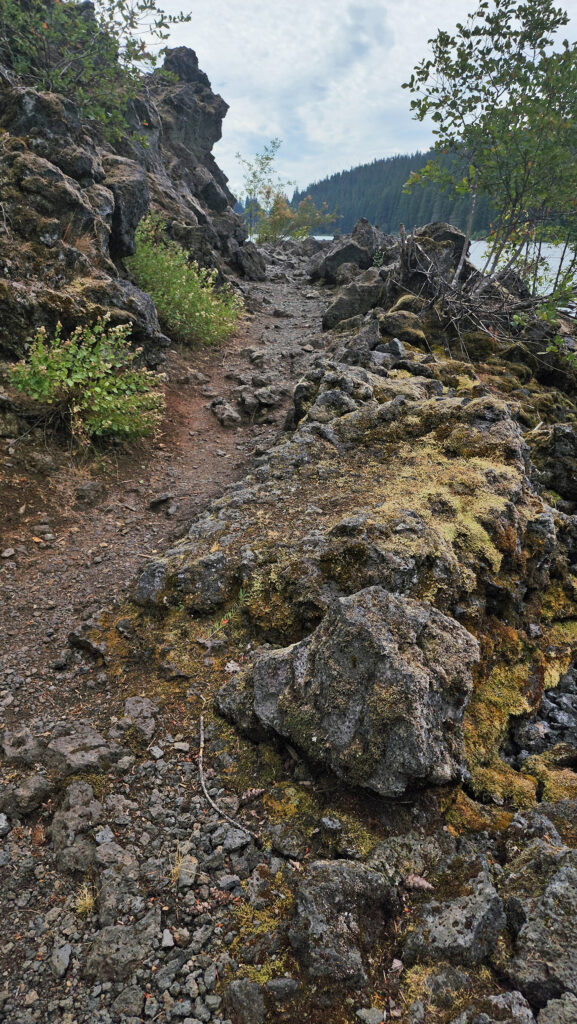 From the Great Spring the trail follows the east shore through the lava fields and forest. Parts of the trail are pretty rough. Good quality hiking boots are advised, although I did this hike in sneakers on my latest visit. But open toed sandals or flip flops are definitely not acceptable footwear on this section of the trail.
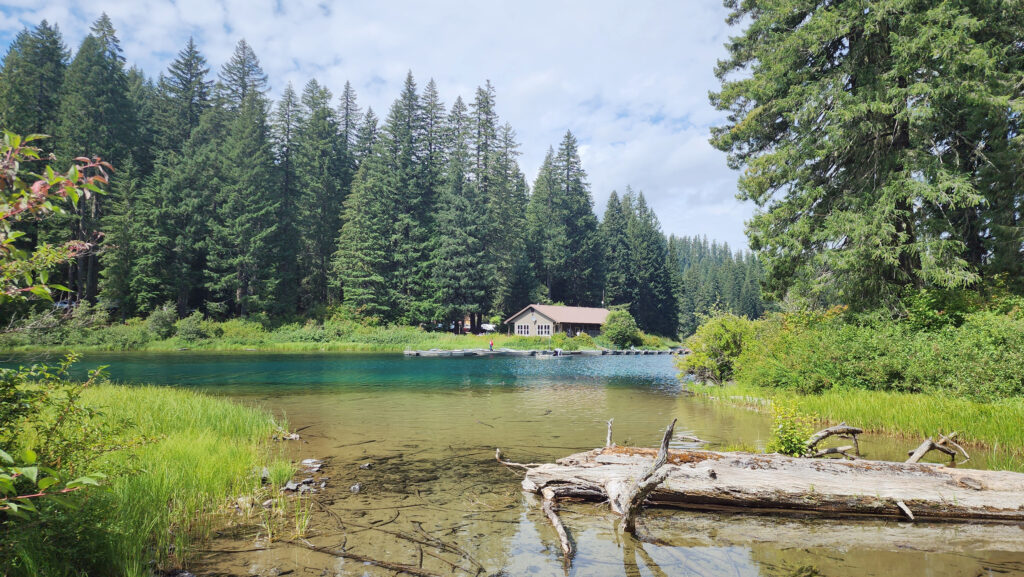


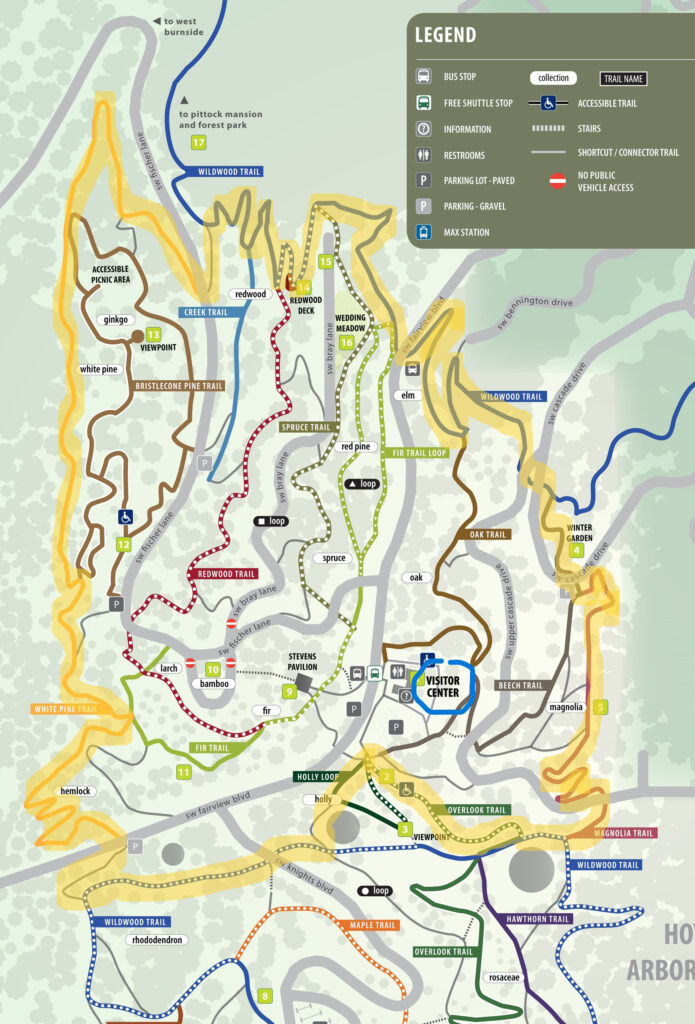
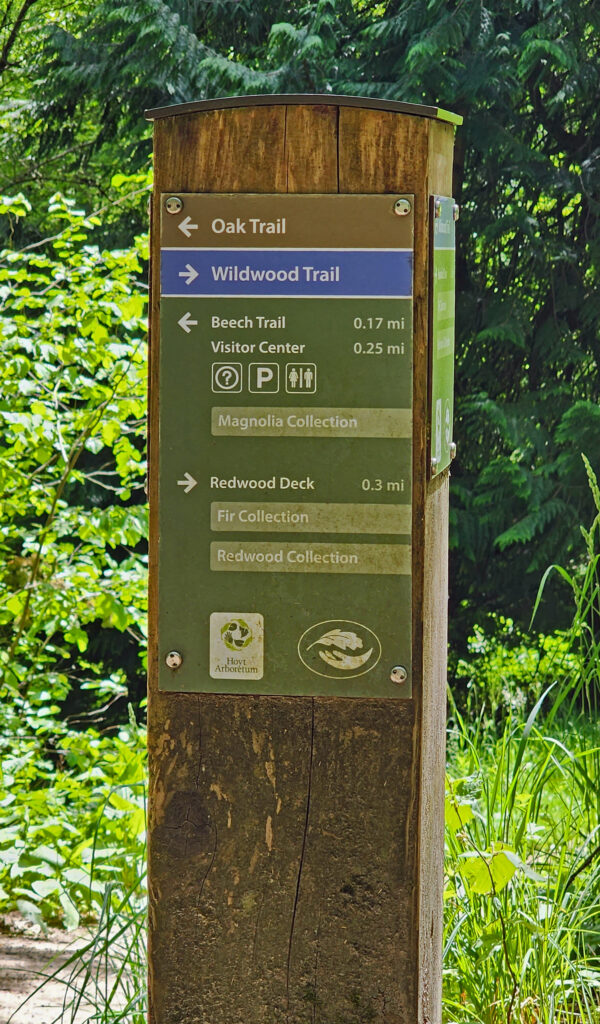 Hoyt Arboretum offers a multitude of possible hikes over its 189 acres and 12 miles of trails. The hike described here passes through many of the arboretum’s tree collections and is a good introduction to the arboretum for anyone that has not visited previously. It also incorporates several short sections of the iconic Wildwood Trail that meanders for 30 miles through Washington and Forest Parks. The trail junctions in the arboretum are well signed, so it would be hard to get lost, but the sheer number of intersecting trails can be confusing. I recommend carrying a map of the trail system whenever you’re hiking in the arboretum. Download and print the arboretum map linked above or pick up a free map and brochure at the visitor center. The brochure provides some interesting information and has a larger and more easily read map than the download.
 Trailheads:


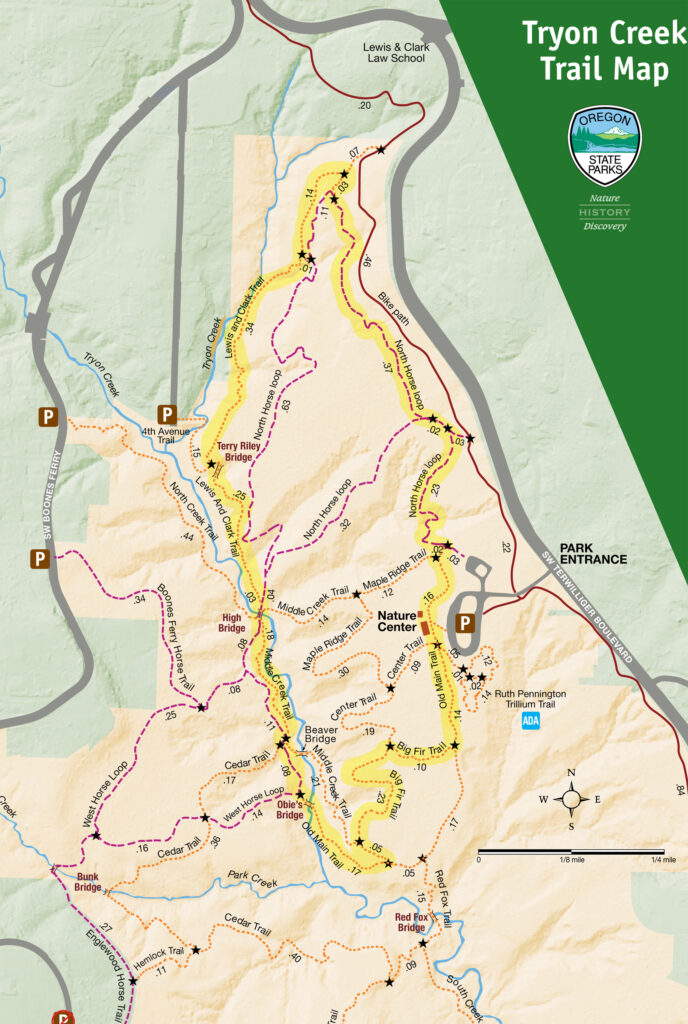
 There are a myriad of loops and out-and- back hikes possible at Tryon Creek. The park has a total of 15 miles of trails, including a short all access paved trail, a paved bike path that runs the length of the park, all-use trails open to horses, and hiker-only trails. Dogs are permitted on leash. Bikes are not permitted, except on the designated bike path. The park is a day-use area only. Camping is prohibited.
 All of the trails are well used, so you’re unlikely to find real solitude here, unless you come during really bad weather. But that doesn’t detract much from the park’s appeal. In general, the farther from the Nature Center that you get the fewer people that you’ll encounter. The southern and western parts of the park are the least used. The hike described here includes two of my favorite trails, the Big Fir and Lewis and Clark trails, but they’re also two of the most traveled trails in the park.
 Getting there:
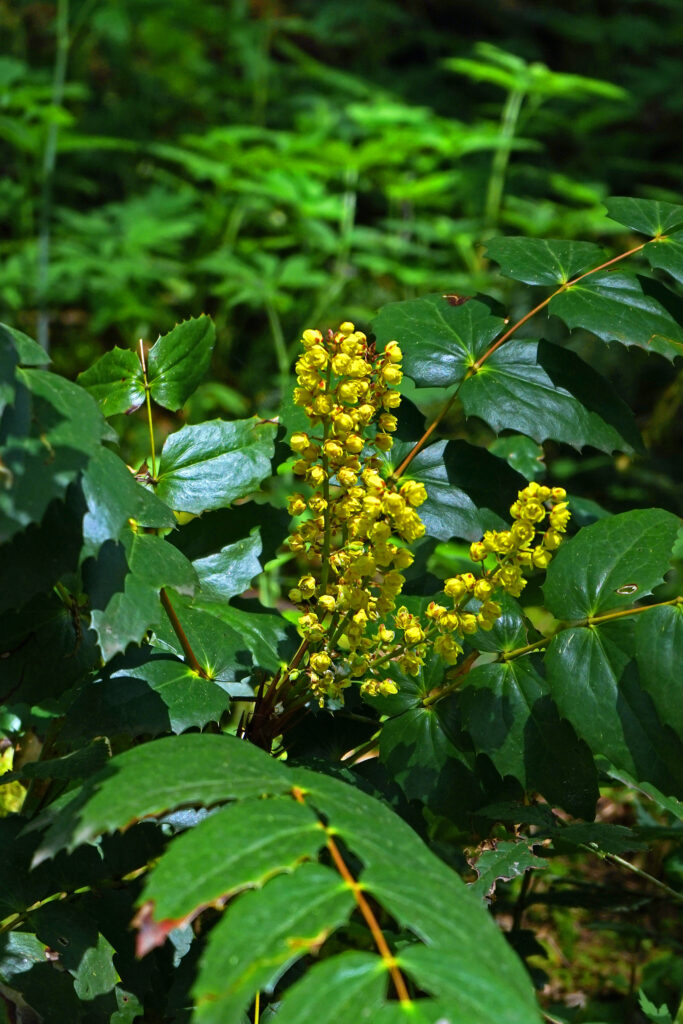


 Posted May 18, 2023 by Alan K. Lee.
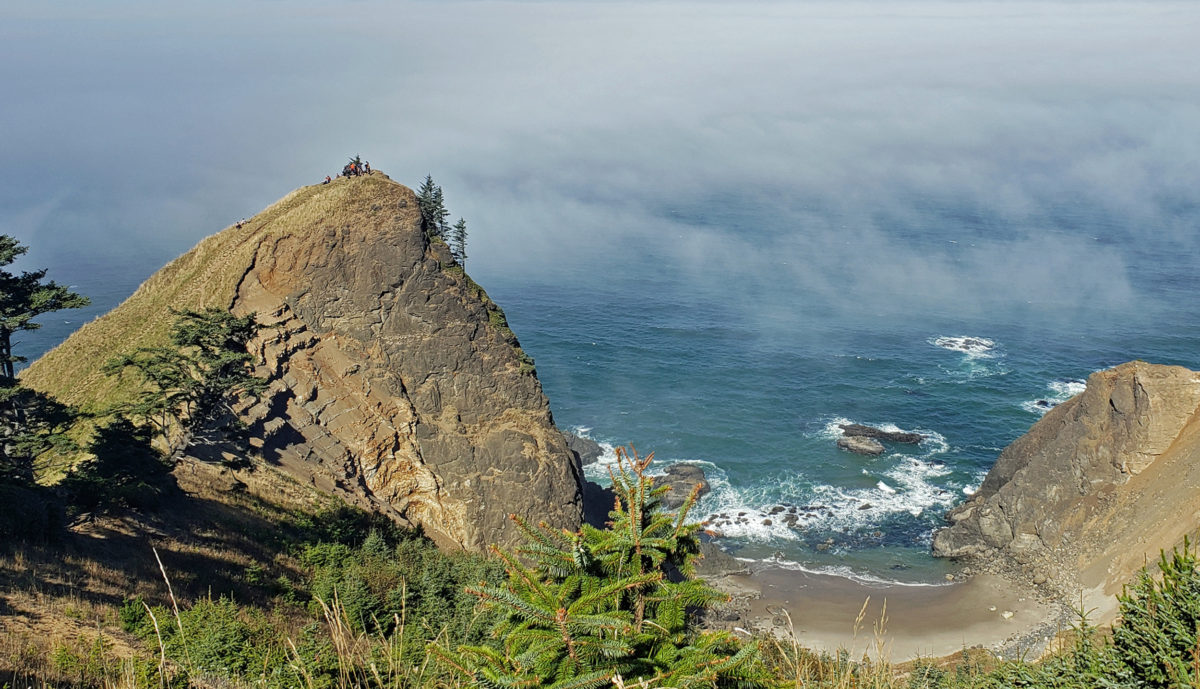
 Overview:
 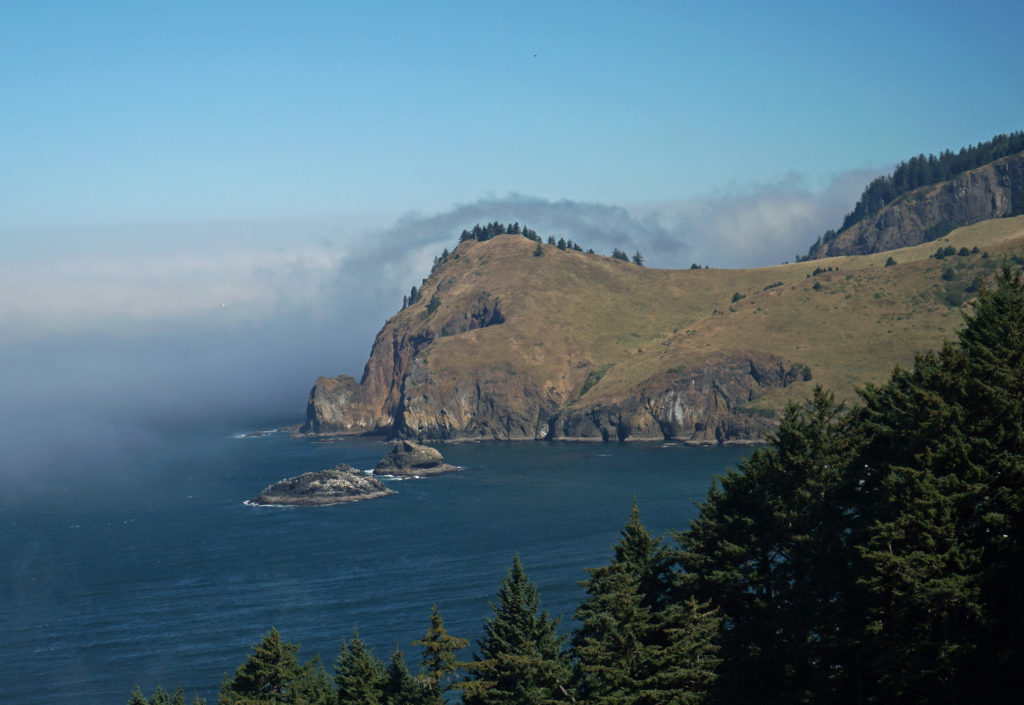 The God’s Thumb hike remained closed to the public until about a decade ago. Although people occasionally trespassed across private property to get to it, God’s Thumb remained largely unknown. But in 2013 Lincoln City purchased about 500 acres of property that was the site of a failed subdivision and negotiated an easement with the owner of the neighboring property, making God’s Thumb legally accessible to the public for the first time.
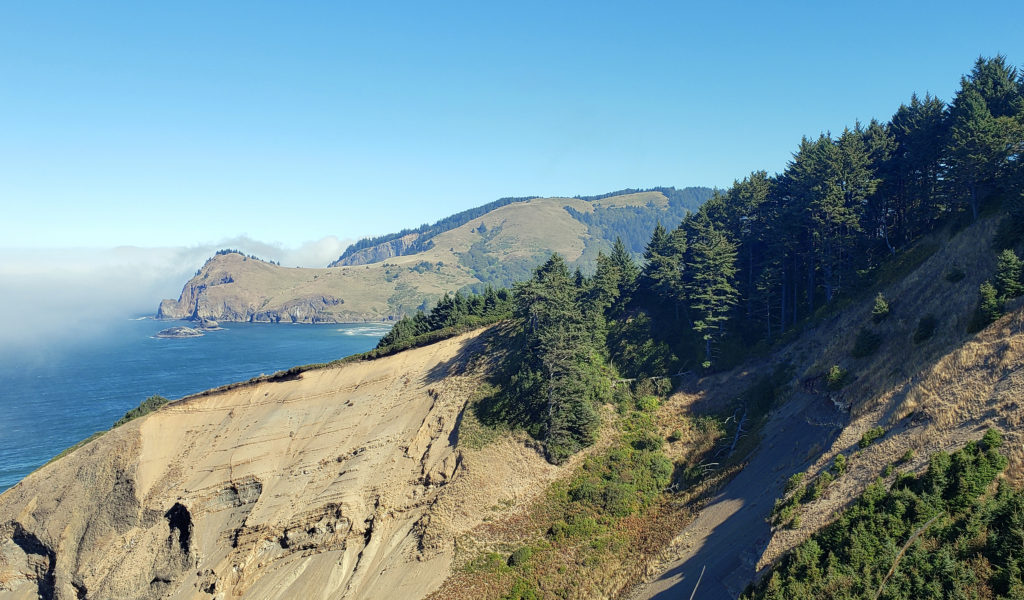 Trailhead:
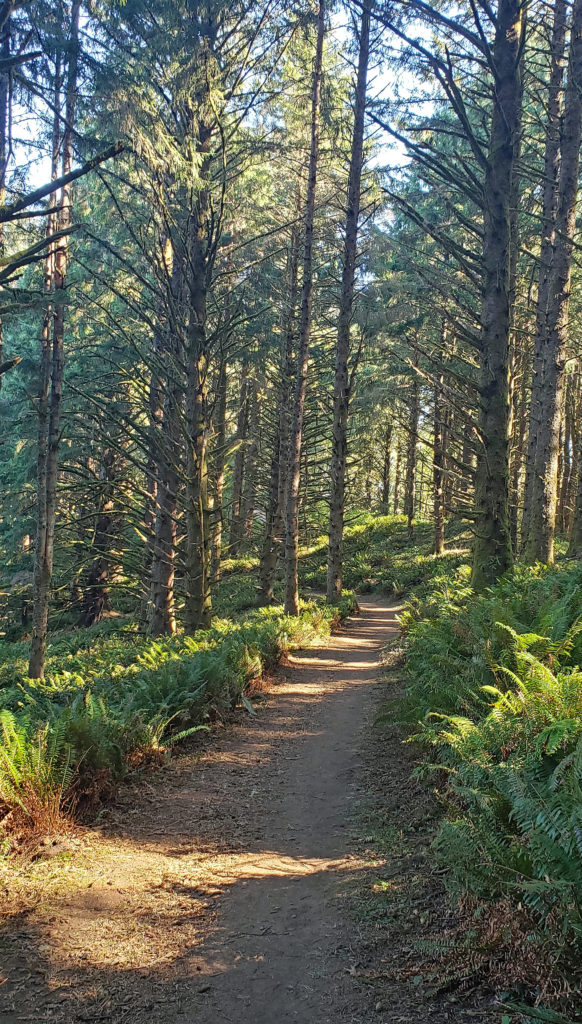 The hike:
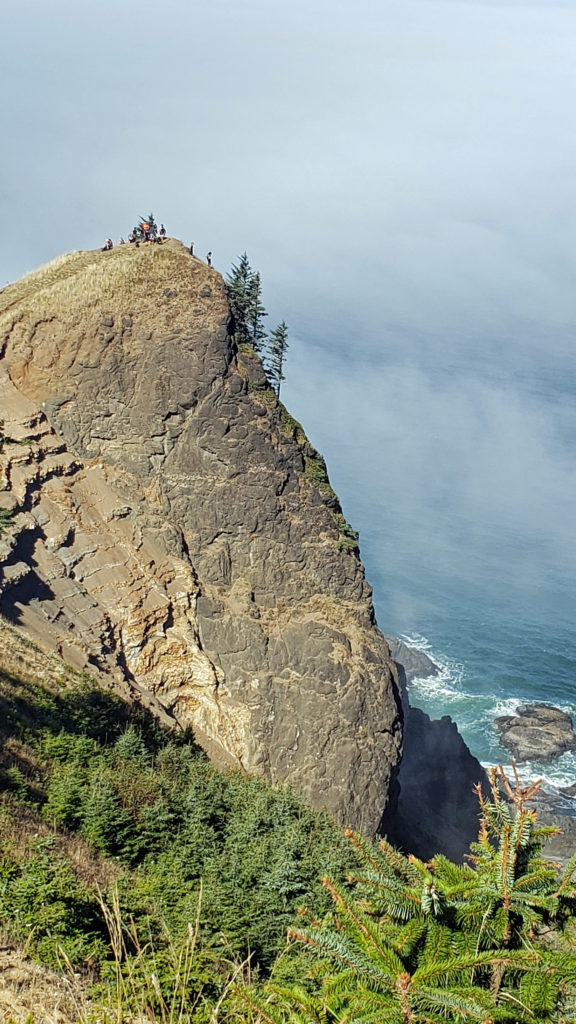
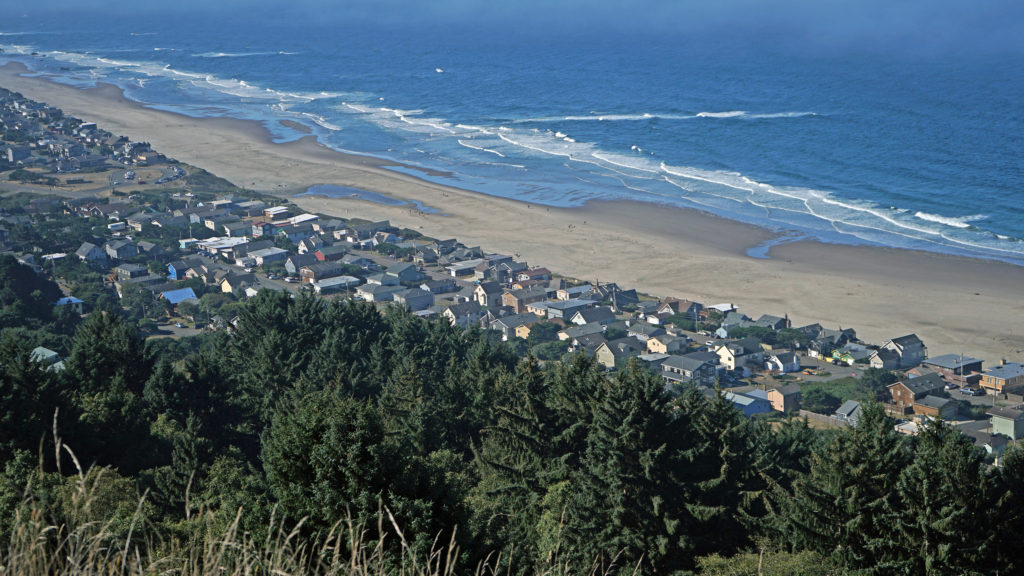 You don’t want to skip this because the view here is spectacular. The Pacific Ocean is spread out before you in all its glory. The Road’s End section of Lincoln City is directly below you. Lincoln City stretches out before you, with Devil’s Lake to the east and Siletz Bay to the south. The view extends south to Cape Foulweather. You might want to park yourself on the grassy summit and just sit for a while. Apparently, the local herd of elk also like the view because they often bed down here at night.
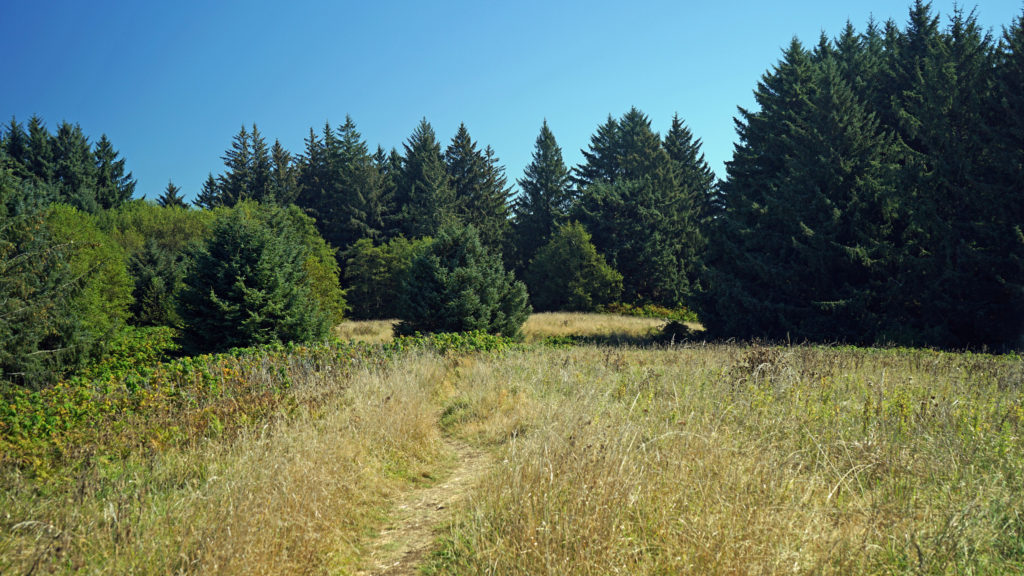 When you’re done taking in the view from The Knoll, return to the main trail and continue north. This portion of the trail is on the easement granted to the city by the property owner. The trail takes you through a spruce and hemlock forest and across a small meadow. Parts of the trail are steep, but the elevation gain is modest, and most people won’t have any difficulty. You’ll soon come to a trail junction. Stay left to continue on to God’s Thumb. You’ll pass through more spruce, hemlock and alder forest, and across several grassy meadows before the trail swings to the west and comes to another trail junction. The trail to the right comes up from the private Camp Westwind on the Salmon River Estuary. Stay left at the junction and you’ll soon see God’s Thumb in front of you. Stop here and admire the view of The Thumb and the surrounding cliffs, the two coves and beaches on either side of The Thumb, and Cascade Head to the north.
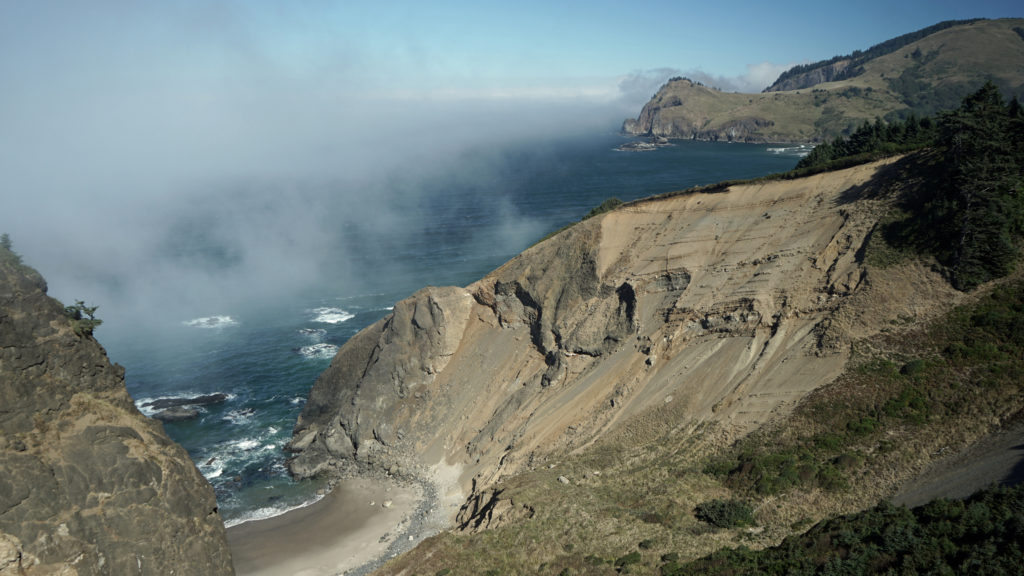 The trail then drops steeply down the slope and across along a narrow ridge before climbing very steeply up the slope to the summit of God’s Thumb. This section can be tricky to navigate and can also be slippery if the trail is wet. Some people choose not to venture down and then up to the summit. But if you do, you’ll be rewarded with magnificent views in all directions. Even if you don’t, the views you do get make the hike well worthwhile.
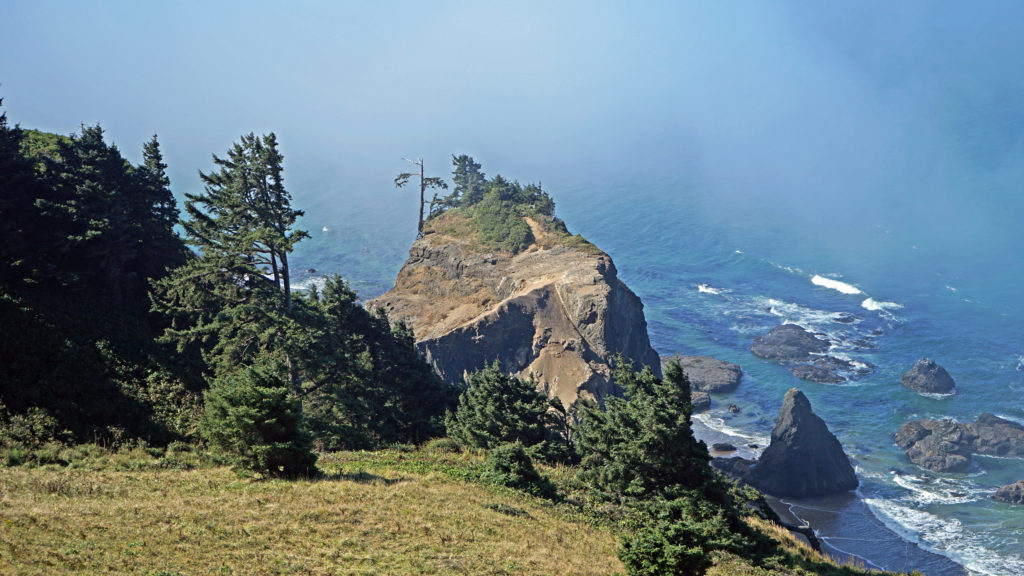 When you’re done taking in the views, return the way you came. When you reach the second trail junction, before you get to The Knoll, you have the option of taking the trail to the left for an alternate, slightly longer route back to the end of Devil’s Lake Boulevard where you left your car. Check the Oregon Hikers
  A few notes on parking:
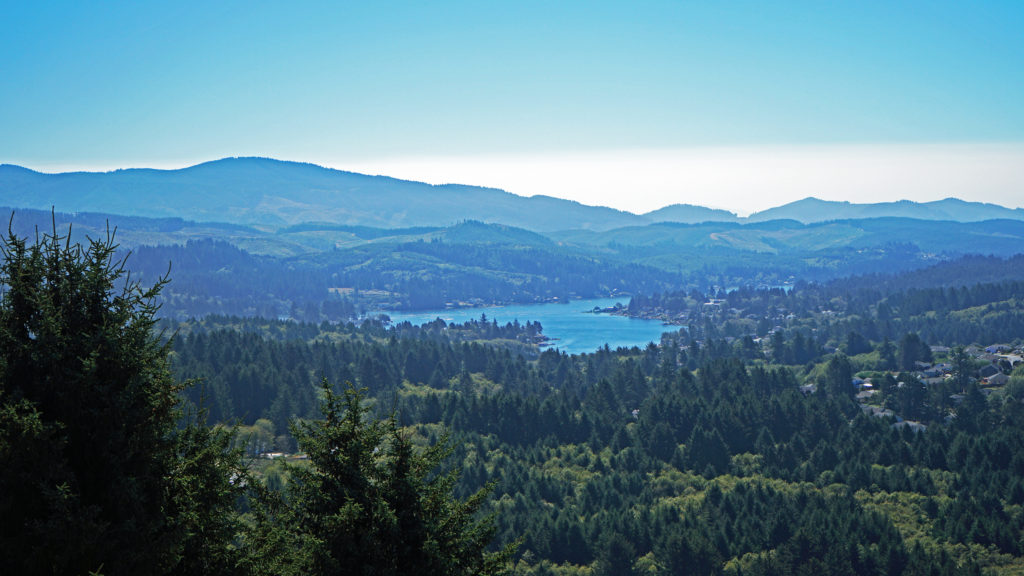 Other area hikes and other attractions:
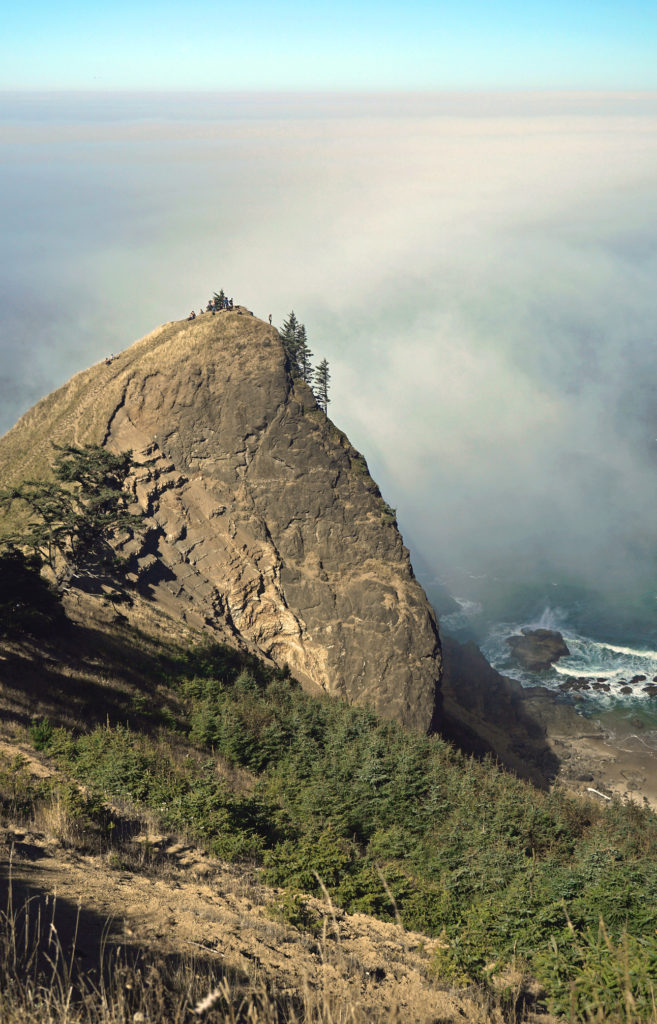


 The
The 

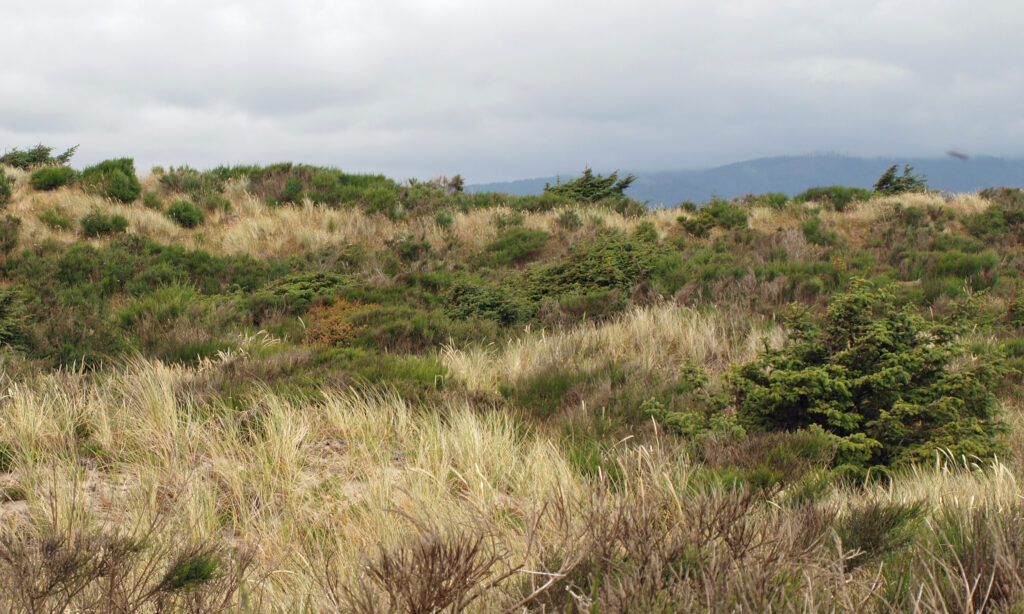
 The peninsula is now an undeveloped county park. There has never been a campground, but in the past backcountry camping was permitted. That has changed, however, and overnight camping is no longer allowed.
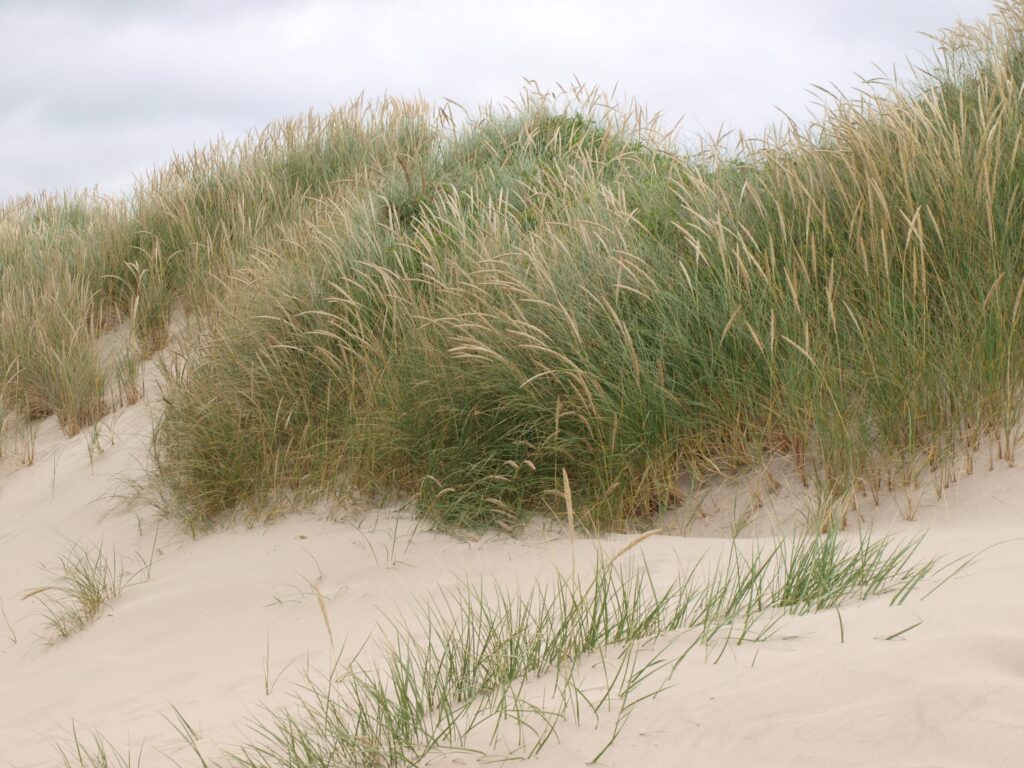 Getting there:
 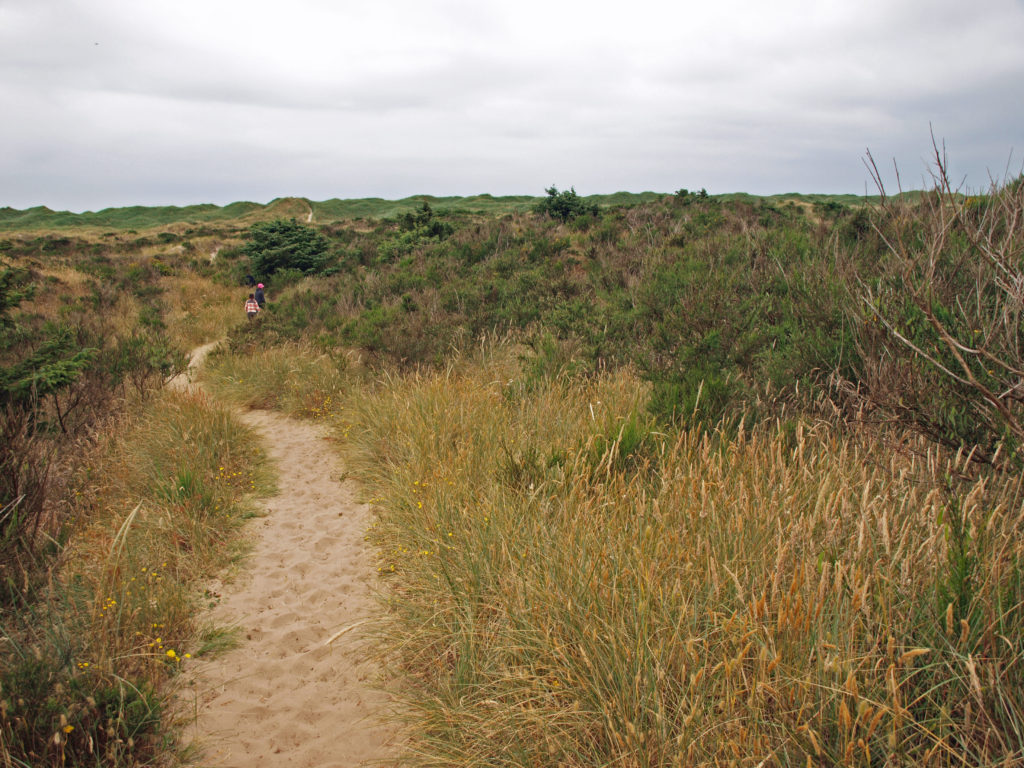 The hike:
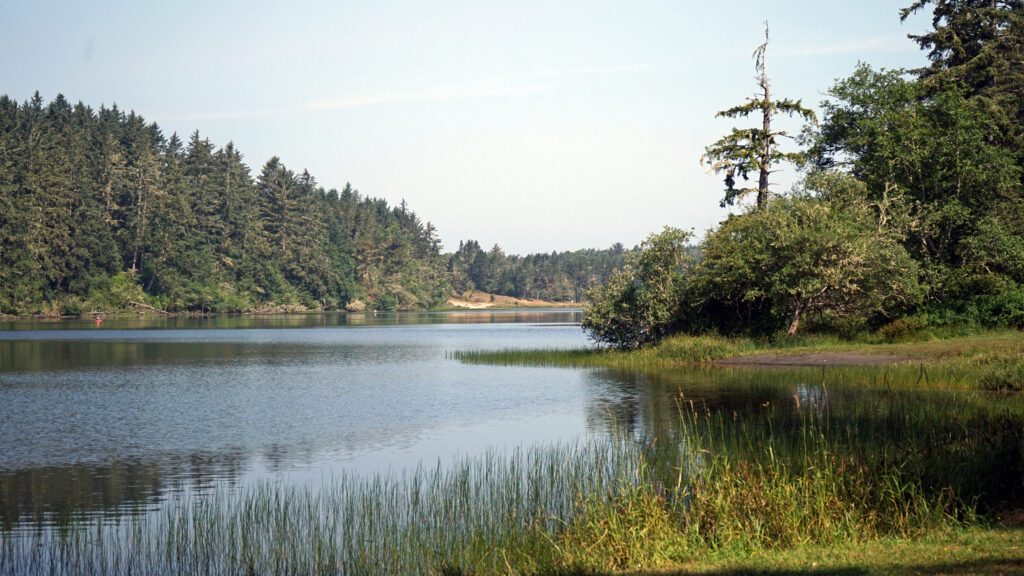
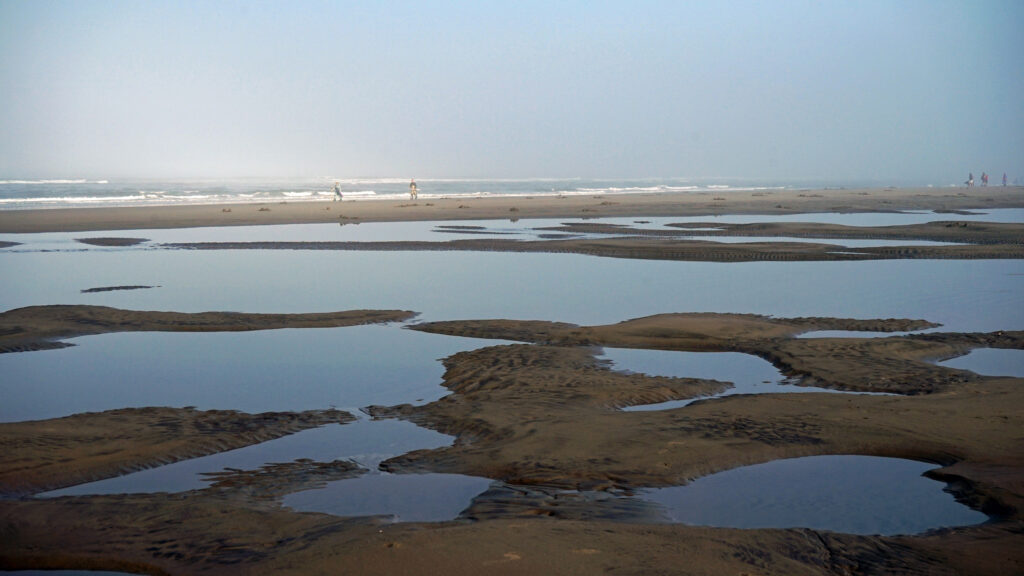
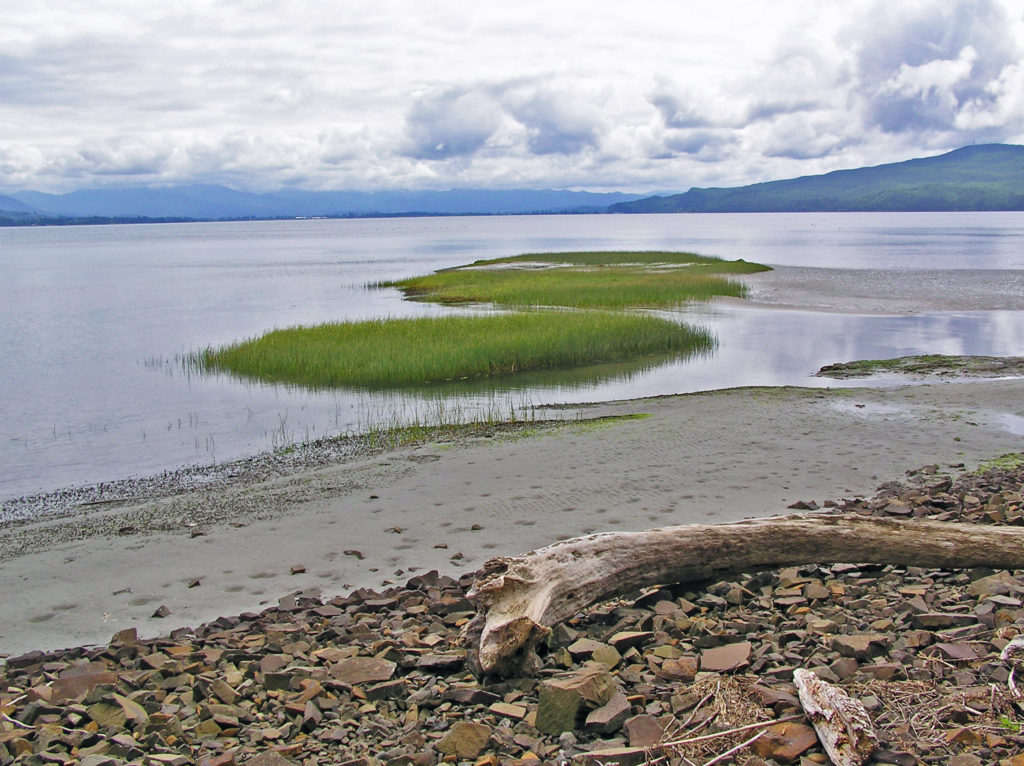
 Or, continue along the beach until you reach the south jetty at the mouth of Tillamook Bay. You’ll be rewarded with one of the least crowded beaches on the entire coast. You might have the beach to yourself even on summer weekends.
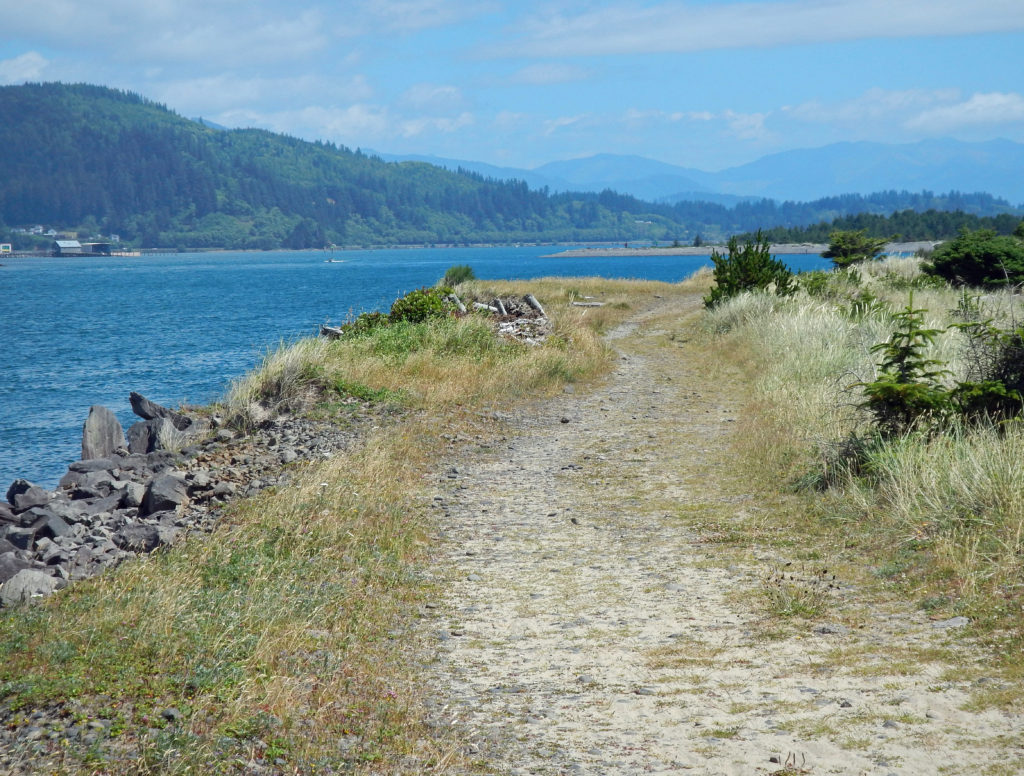 From the jetty you can return the way you came for 7.2 mile out and back beach walk or complete the 7.7-mile loop hike by following the jetty inland to the old jetty haul road and following it back to the trailhead. The road is rock and gravel with some sandy stretches. It runs along the bayshore, with good views of the shore and bay, with a couple of stretches in the pine and spruce forest of the peninsula interior.
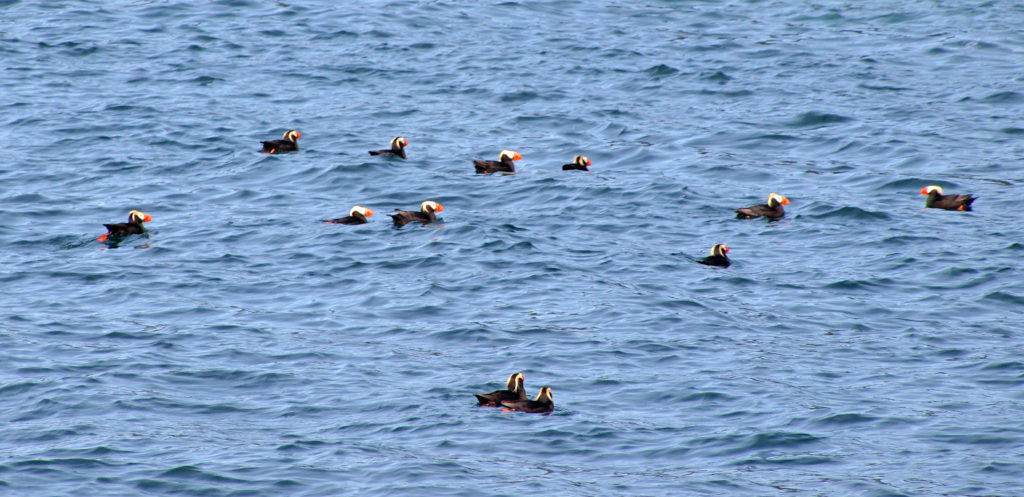
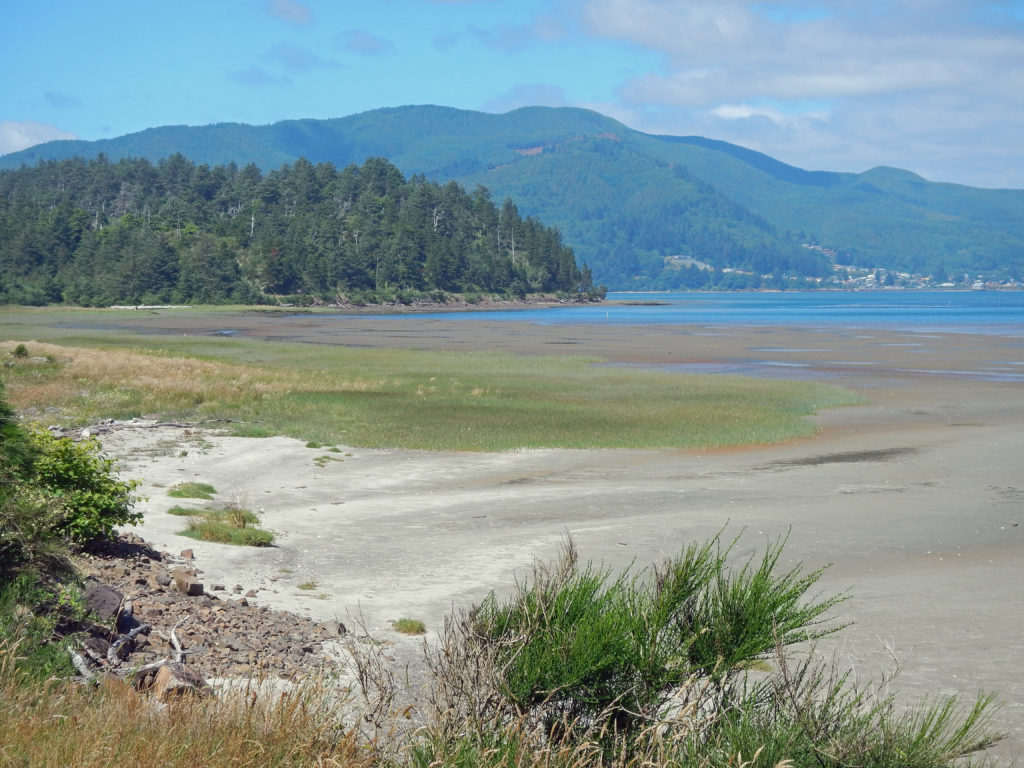
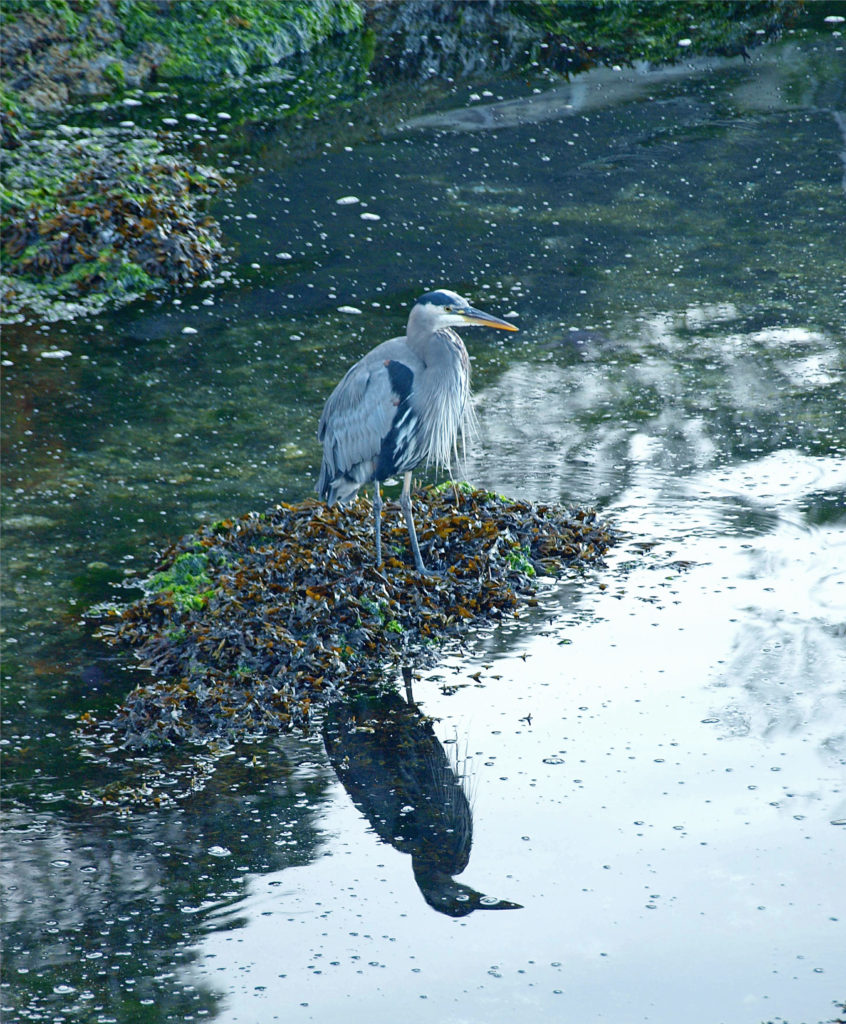
 Look for ducks and geese on the water and shorebirds along the water’s edge. This is one of the best birding areas for waterfowl on the coast.
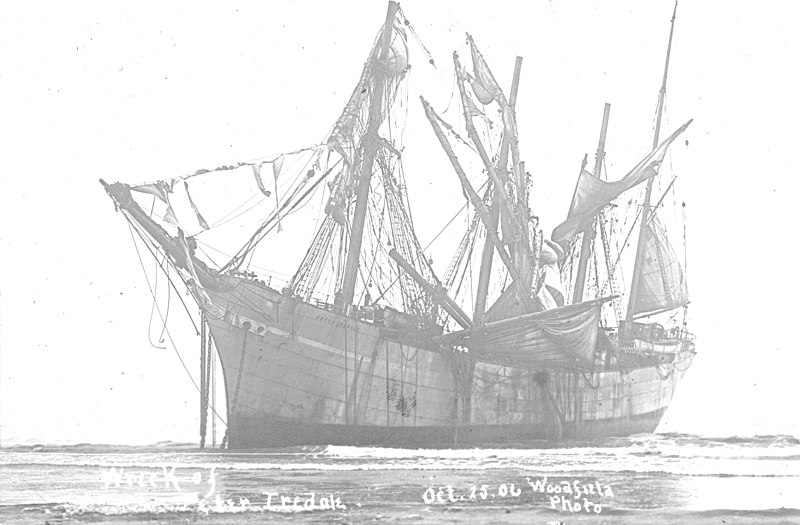
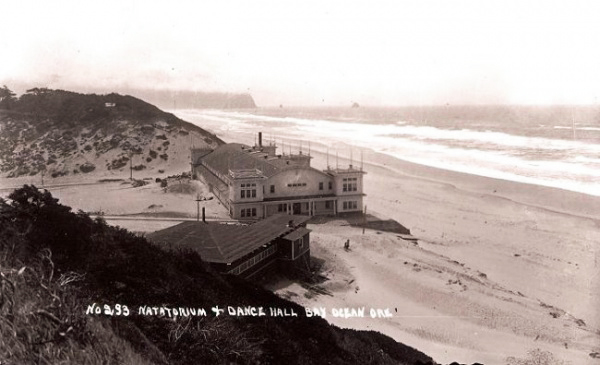
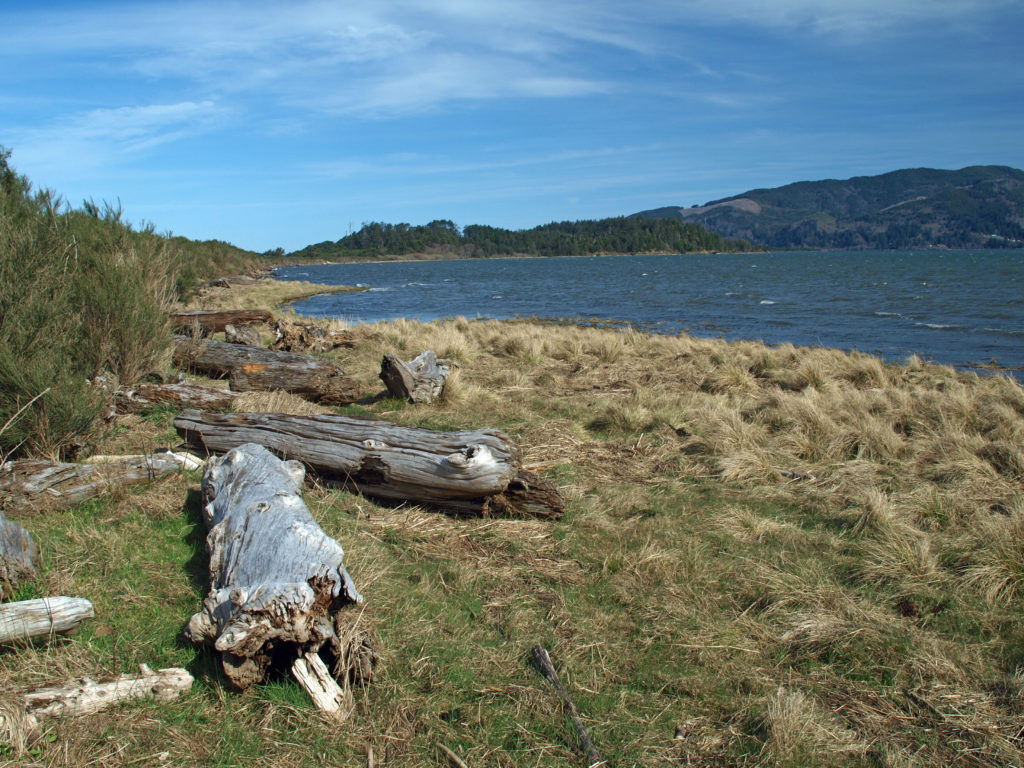 Near the end of the hike look for a sign labeled Bayocean Townsite. Here a trail leads toward the beach to the old townsite. The trail loops south through what was then the bayfront (the whole peninsula has shifted a couple of hundred yards to the east and much of the old townsite is now under the waves), then returns to the haul road, where there is an interpretive display that tells the tale of the town and its demise. From there, return to the parking area. (If you started at the town of Cape Meares, hike from the Dike Road parking area through the dunes and return to Cape Meares on the beach.)
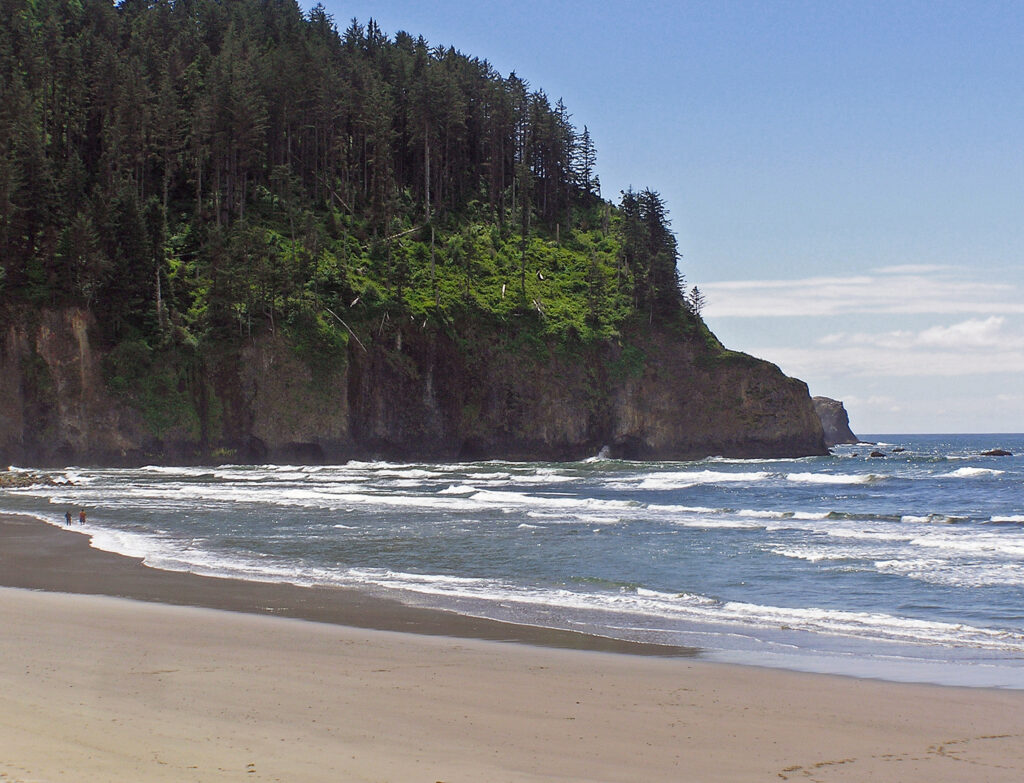
 Farther south,
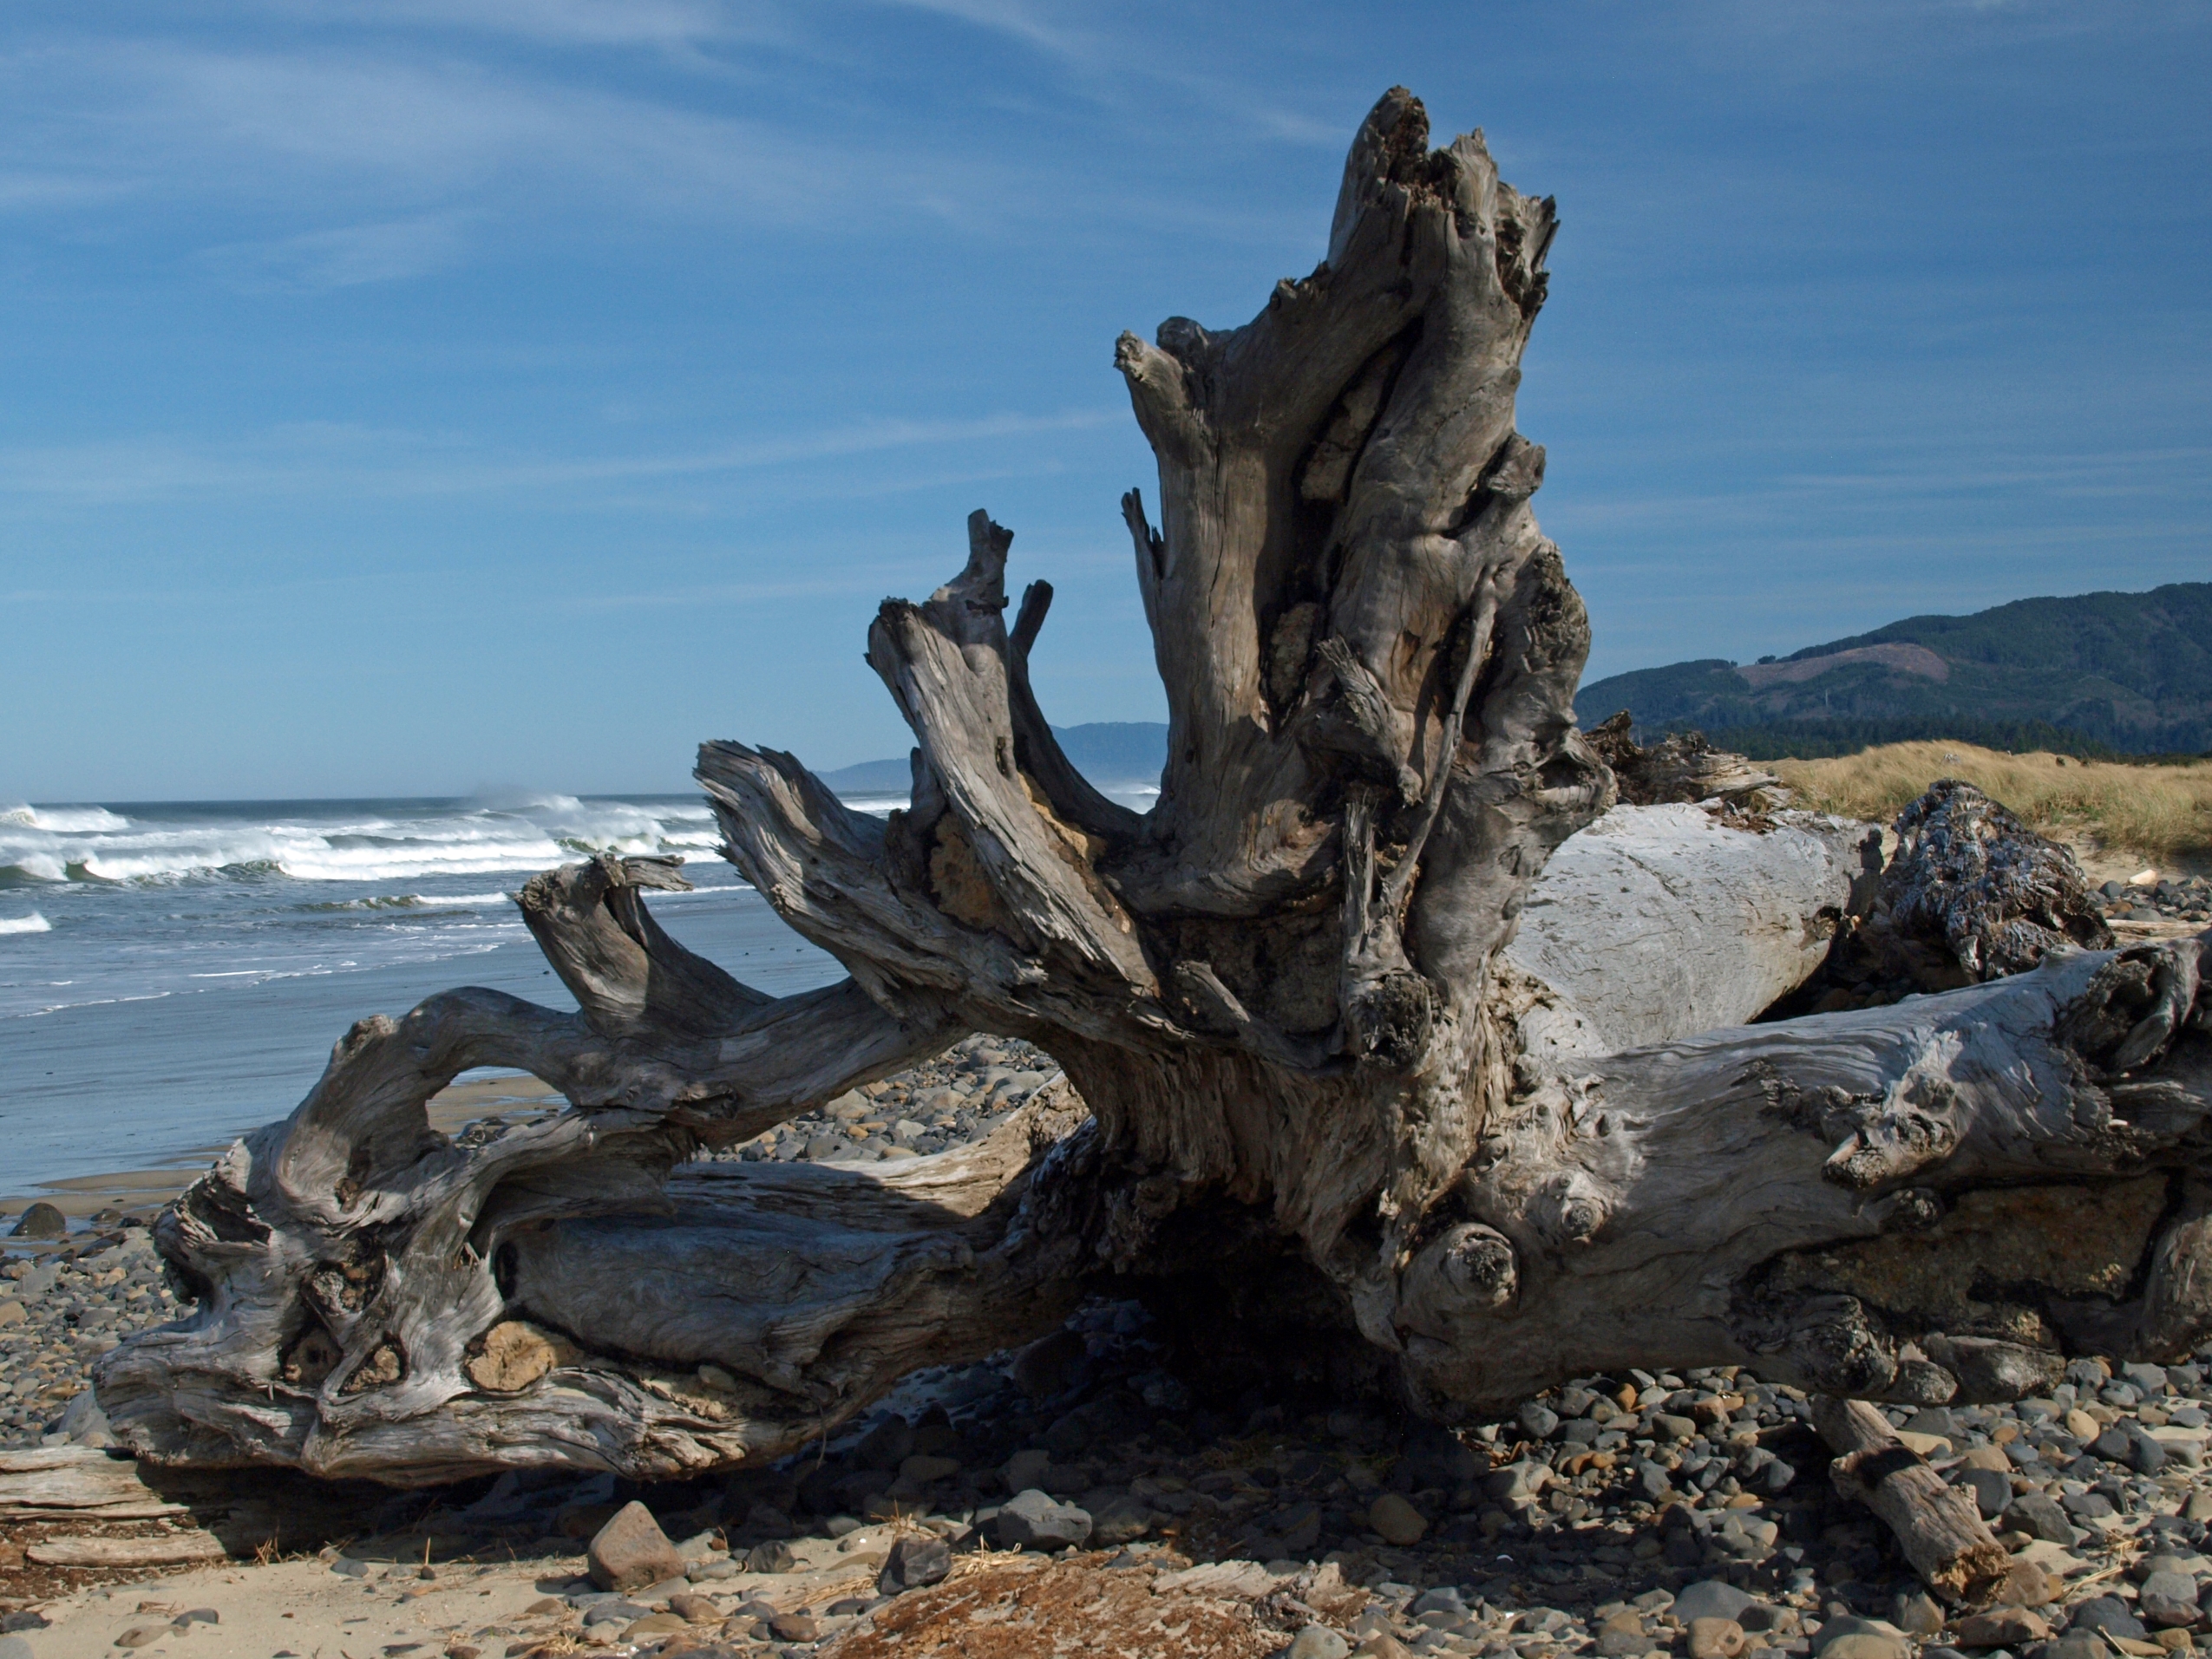
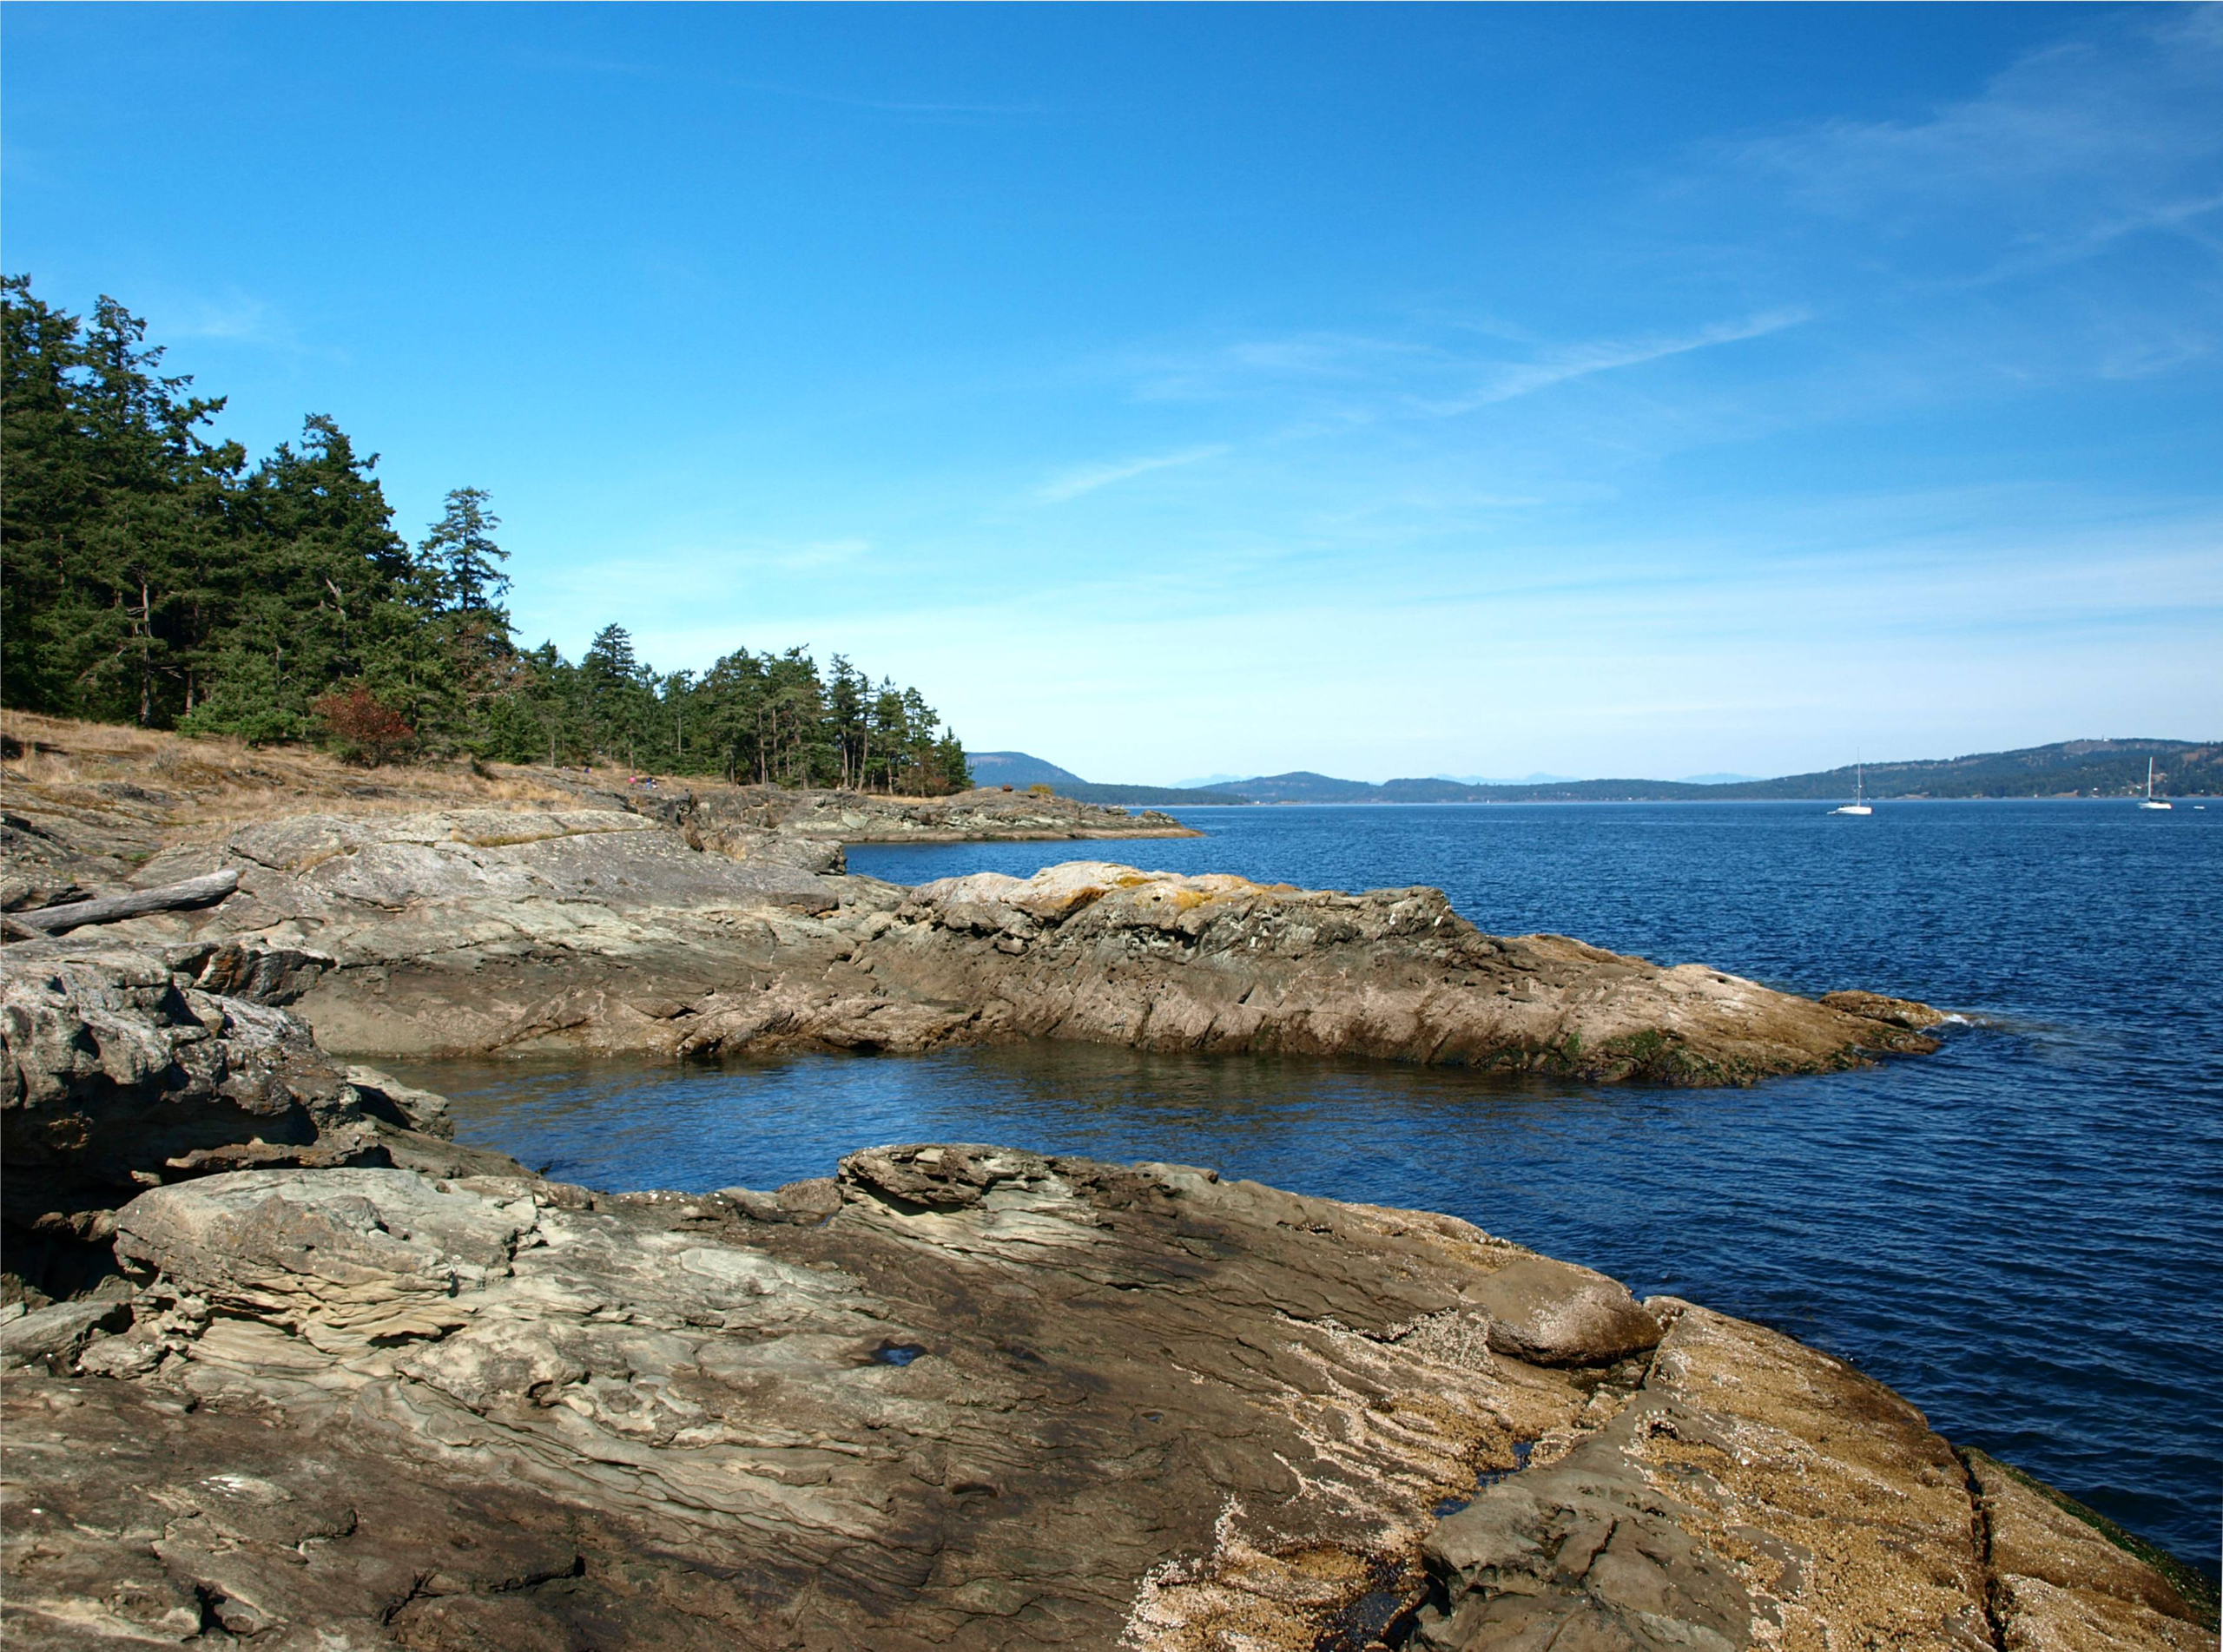
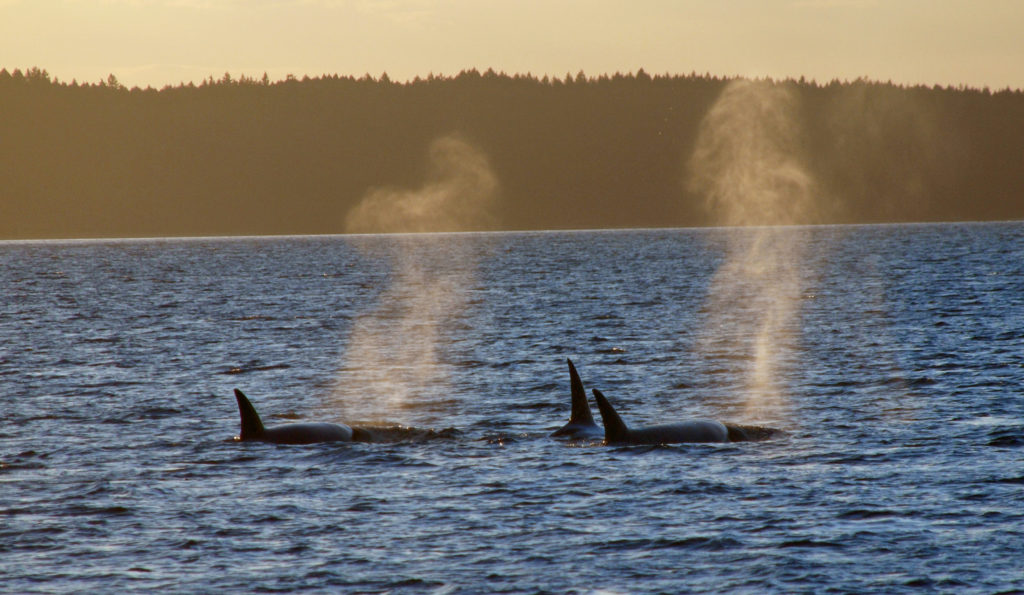
 The Gulf Islands are located off the southeast coast of Vancouver Island. There are six main islands in the Southern Gulf Islands: Salt Spring, Mayne, North Pender, South Pender, Saturna, and Galiano. The Northern Gulf Islands consist of Thetis, Penelakut, Valdes, and Gabriola Islands. Each island has its own particular charms, and all are well worth exploring.
 The
The 


 Thetis and Penelakut Islands are reached by ferries from Chemainus on Vancouver Island. Gabriola Island is a short ferry ride from Nanaimo. Be sure to check the ferry schedules on the BC Ferries website. Reservations may be required, especially on summer weekends, and the ferry system is designed to serve island residents, not tourists, so island hopping can be difficult. Getting from one island to another in the Southern Islands by ferry sometimes requires going back to Salt Spring Island and then taking a second ferry from there. And there are no ferries from Thetis or Penelakut to Gabriola.
 I’ve found that a good way to explore the Southern Gulf Islands by car is to base yourself on Salt Spring and pick an island to explore each day. North and South Pender Islands are connected by a bridge, so they can be explored in a day. Take another three days to explore Mayne, Saturna, and Galiano. That still leaves you several days to see all Salt Spring has to offer, or to explore the Northern Gulf Islands, even if you have only a week.
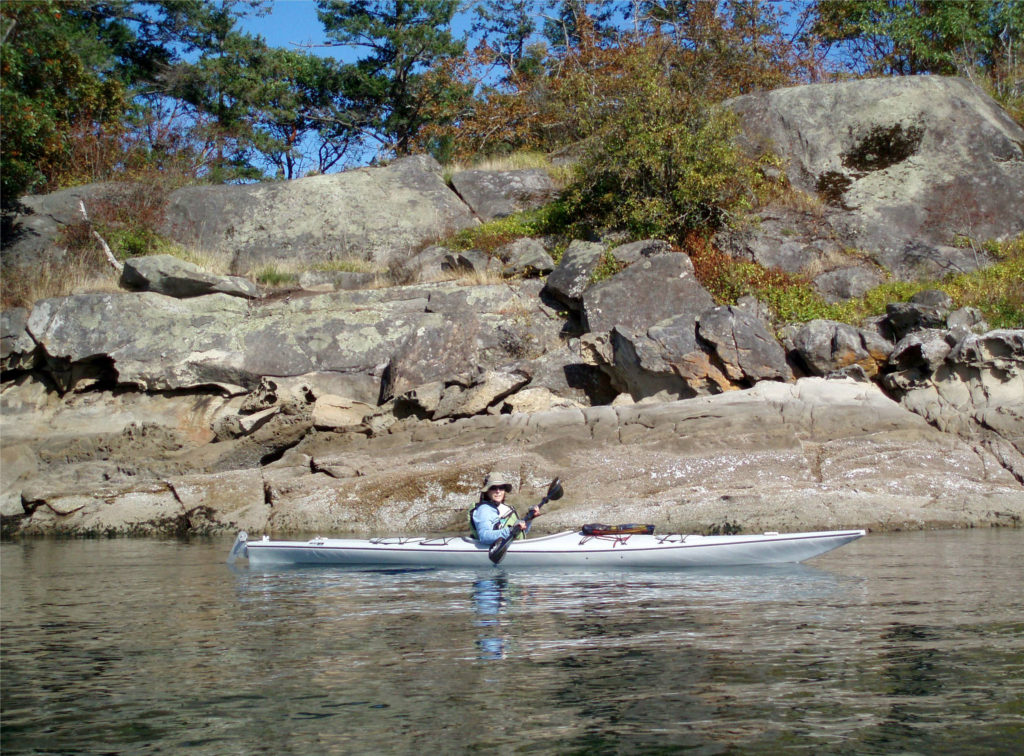 There is a bus system on Salt Spring Island, but public transportation is limited or nonexistent on the other islands. You can get around without a car, though. There is a unique
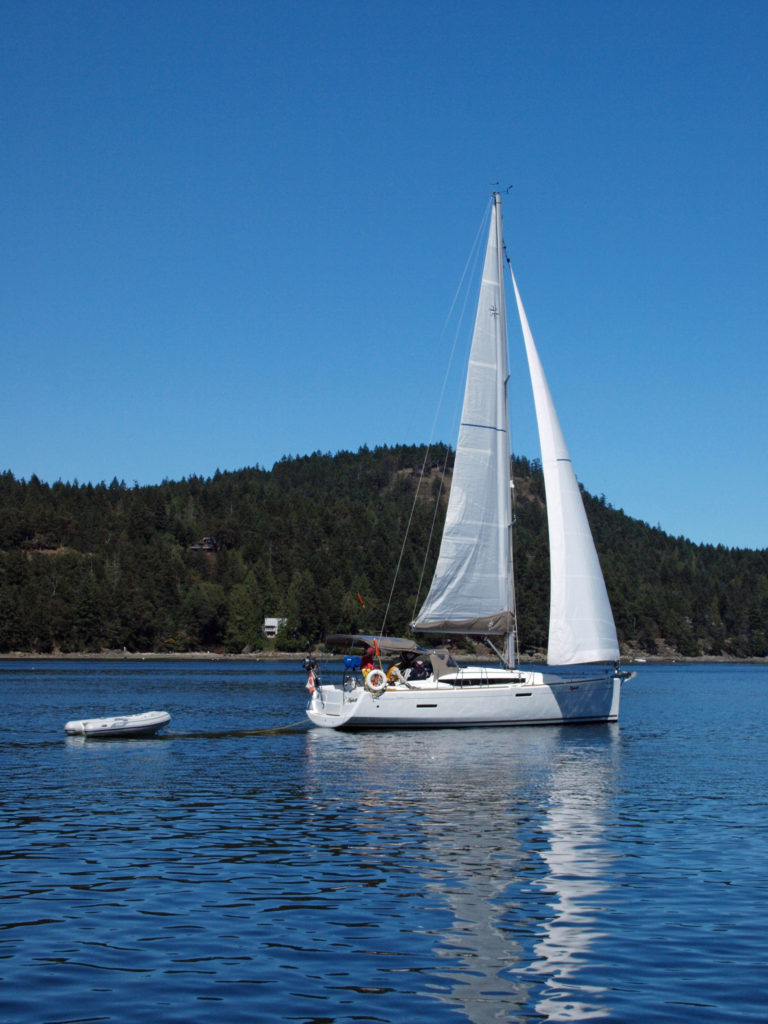
 There are a wide variety of accommodations available on the islands, from full-service resorts and hotels to traditional B&Bs to single rooms available through Airbnb. Most of the accommodations are on Salt Spring Island, but you can find small resorts and many individual houses for rent on the other islands. If you’re a kayaker, this is a perfect jumping off point. Ganges Harbor and its numerous islands are well worth exploring. Prevost Island, a short paddle to the southeast of Ganges Harbor is also worth a visit. A portion of Prevost is set aside as part of the
  There are a number of
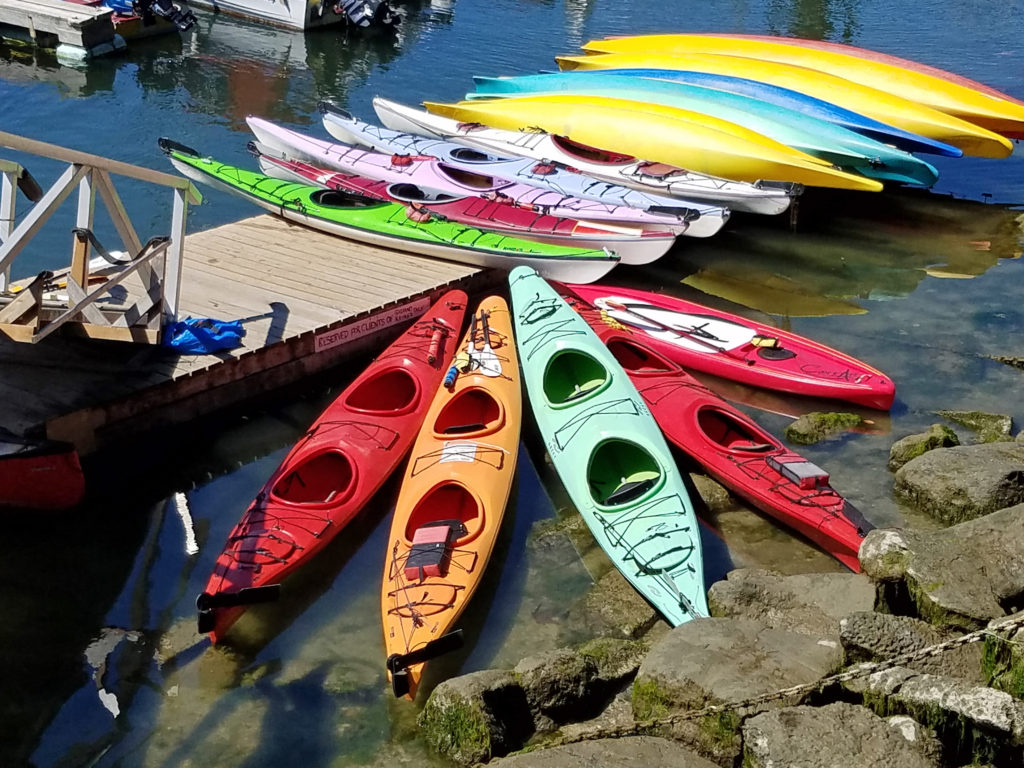
 Overview:
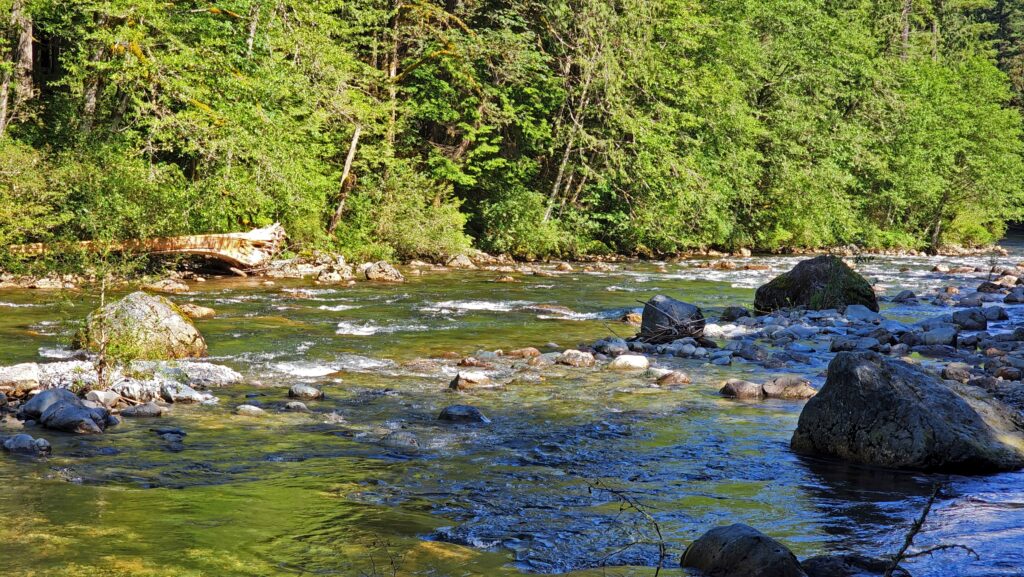
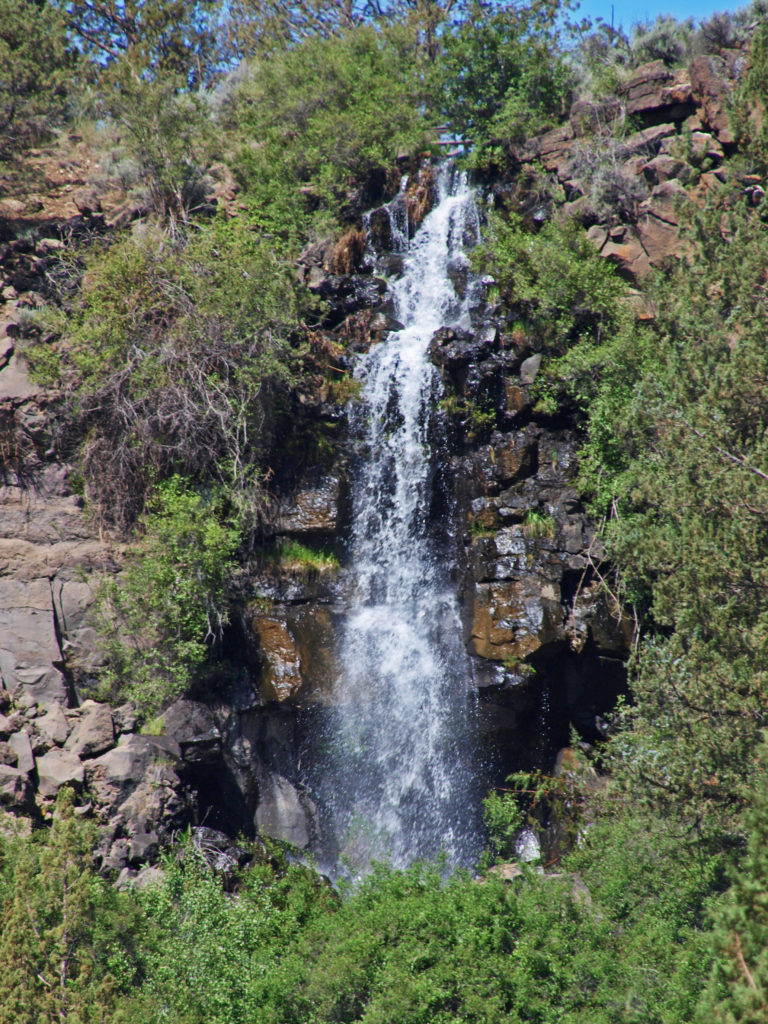
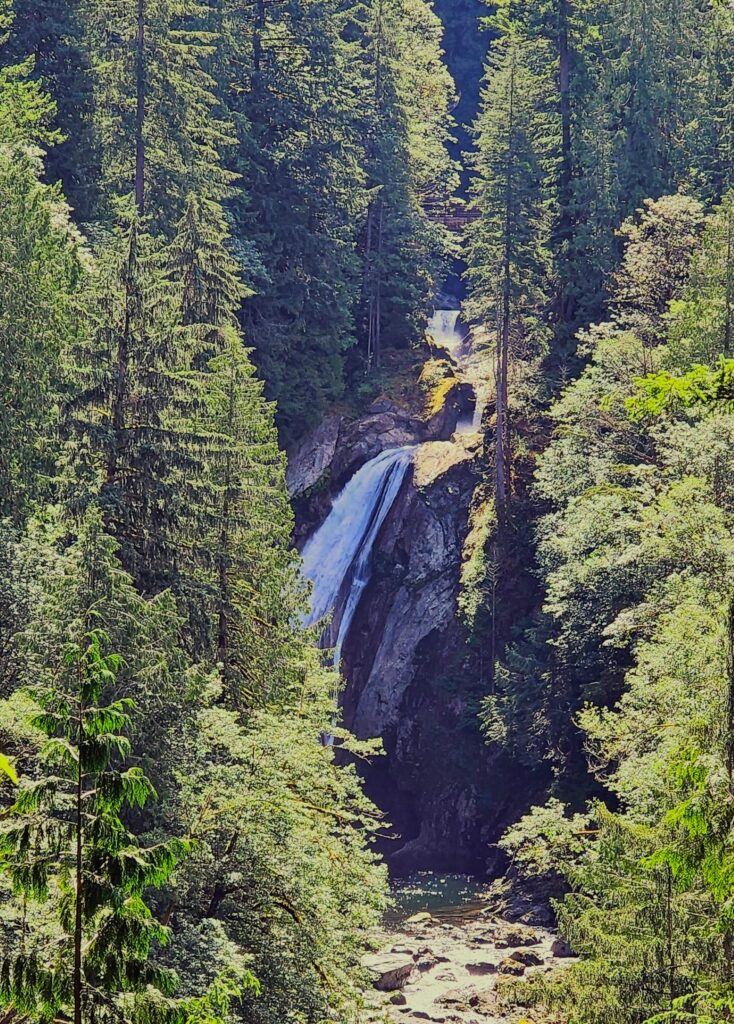
 The trail then drops back down before making a second climb to another summit. Beyond that the trail descends a series of stairs and a side trail leads down another set of steps to a viewpoint of the lower falls that is well worth the 104 steps back up to the main trail.
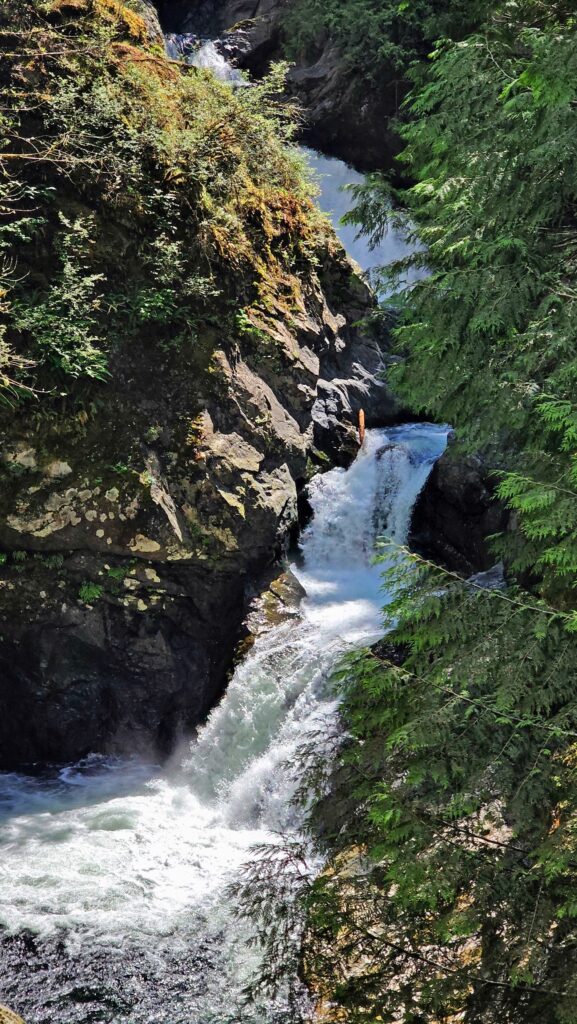